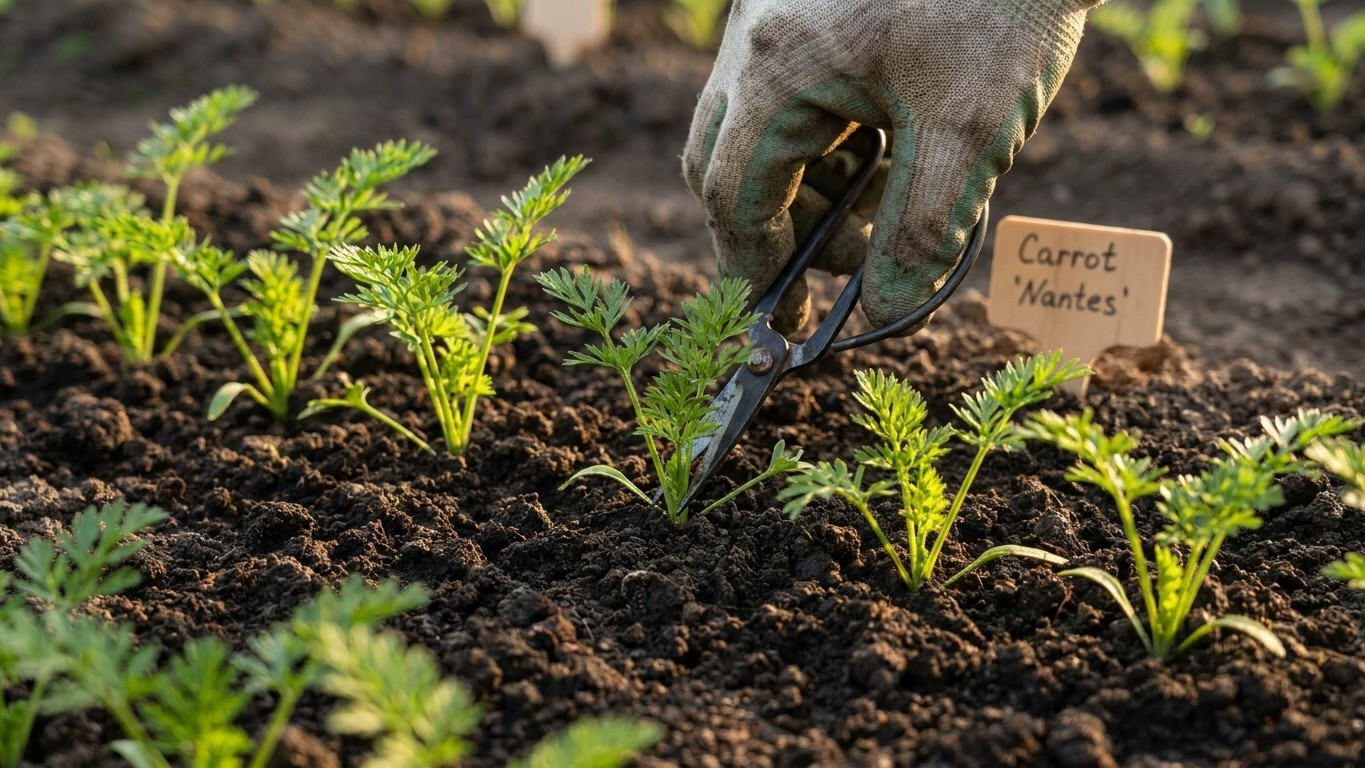

Thin carrots once seedlings show three to four true leaves, cutting them down to two to three inches apart in rows spaced twelve to eighteen inches. That guidance comes from Utah State University Extension, and it’s the number that keeps roots from crowding into forked, stunted shapes. Miss that window and the competition starts underground before you ever see a problem above it.
The short answer
Three to four true leaves is the marker to watch, not a date on the calendar. Carrot seedlings pop up with two small, grass-like cotyledon leaves first. Those don’t count. You’re waiting for the next set, the ones that actually look feathery and carrot-like, to reach three or four per plant. That’s the stage Utah State University Extension flags as ready for thinning, and it usually lines up with seedlings that are still small enough to snip without disturbing their neighbors’ roots.
The spacing itself has two parts, and gardeners often only remember one. Within the row, you’re aiming for two to three inches between plants, close enough to make good use of a bed but wide enough that each root has room to swell without shouldering into the one next door. Between rows, Utah State University Extension calls for twelve to eighteen inches, which gives you room to hoe, hand-weed, or just walk the bed without crushing foliage.
Because carrots are sown directly in the ground rather than started elsewhere and moved, there’s no transplant shock to factor into your timing. The whole crop runs seventy to one hundred days from the day you sow the seed to the day you pull a mature root, and thinning happens early in that window, usually within the first few weeks. Get it done while the plants are still small. Waiting until roots have started to size up means every seedling you remove tugs on the soil around the ones you’re keeping, and that disturbance can set back the roots you meant to protect.
One thing worth saying plainly: this figure is a target, not a guarantee. Two to three inches works well in loose, well-worked soil. Denser or rockier ground changes the math, which is exactly what the next section walks through.
What actually decides it
A carrot root doesn’t grow by pushing soil out of the way. It grows by finding the path of least resistance straight down, and anything that blocks that path, whether it’s a stone, a clump of unbroken clay, or another root, forces the tip to bend, split, or fork. That’s the mechanical reality behind every spacing recommendation you’ll ever read. The number on the seed packet or the extension bulletin assumes a reasonably loose, stone-free bed. Your bed might not match that assumption at all.
Soil texture is the biggest variable no chart can capture for you. A state extension office writes for an entire state, and a single state can span hundreds of distinct soil types, from sandy river-bottom ground to dense clay hillsides. That range means the general spacing advice is a starting point, not a diagnosis of what’s happening six inches under your own carrots. If your soil forms a ribbon that holds together when you squeeze a damp handful, you’re dealing with more clay content, and roots will have a harder time pushing through unbroken ground. If it crumbles apart and feels gritty, you’ve got a looser, sandier mix that lets roots run straighter with less resistance.
The test that settles it at home doesn’t require a lab. Dig a shovelful from where you plan to grow carrots, moisten it slightly, and try to roll it into a ball, then into a thin ribbon between your thumb and finger. Soil that holds a long ribbon before breaking is heavier and will benefit from wider spacing and more thorough loosening before you ever sow seed. Soil that won’t hold a ribbon at all, crumbling into loose grains, is friendlier ground and can often support spacing at the tighter end of the range.
Rock and debris content matter just as much as texture. A bed that looks fine on the surface can hide gravel a few inches down, and every pebble in a taproot’s path is a potential fork. Raking a bed to a depth of at least eight inches and pulling out visible stones before sowing does more for straight roots than any thinning adjustment can fix after the fact.
How to do it
- Watch the seedlings, not the calendar, and wait until the majority show three to four true leaves beyond the initial cotyledons.
- Water the bed the day before or the morning of thinning so the soil is moist and seedlings release easily instead of tearing.
- Walk the row and identify the strongest, most evenly spaced seedling in each cluster to keep.
- Snip the unwanted seedlings at soil level with small scissors rather than pulling them, since pulling can drag or damage the roots of the seedlings you’re keeping.
- Space the kept seedlings two to three inches apart along the row, removing extras as needed to reach that spacing.
- Confirm rows are spaced twelve to eighteen inches apart; if you sowed rows closer than that, thin the outer plants more aggressively to open a working path.
- Water again right after thinning to settle the soil back around the remaining roots.
- Keep watering frequent and uniform for the rest of the season, since inconsistent moisture is one of the two main causes of split roots later on.
- Check back a week or two later and thin again if any seedlings were missed or if new ones germinated late and are now crowding the row.
What goes wrong
- Waiting too long to thin. Once roots have started to size up, removing neighbors disturbs the ones you’re keeping and can snap or twist their growing tips. The fix is to thin right at the three to four true leaf stage rather than waiting until the row looks crowded.
- Pulling instead of snipping. Yanking a seedling out by hand often drags the root system of the plant next to it along with it. Switch to small scissors or nail clippers at soil level so the neighboring roots stay undisturbed.
- Forked or hairy roots. This is usually the direct result of crowding, rocks, or heavy unbroken soil forcing the taproot to split or send out side roots as it searches for the path of least resistance. Thinning to the recommended two to three inches and clearing stones from the bed before sowing next time addresses both causes at once.
- Split roots after they’ve sized up. This comes from uneven watering or from heavy soil that swells and contracts unevenly around the root, and the two causes often overlap. Watering frequently and uniformly rather than letting the bed dry out between soakings is the direct remedy.
- Rows too close to work. If the twelve to eighteen inch row spacing wasn’t honored at sowing, thinning alone won’t fix crowded pathways between rows. Removing extra plants from the row edges nearest the walking path helps, but the real fix is respecting that spacing at the next sowing.
Common questions
Can you eat the seedlings you thin out? Yes, the thinnings are edible and have a mild carrot flavor, though at that stage they’re just tiny greens and a thread of root rather than anything resembling a mature carrot.
Can you sow seeds farther apart to begin with and skip thinning entirely? Carrot seed is small and germination is uneven, so most gardeners sow more thickly than the final spacing to guarantee enough seedlings come up, then thin down to the two to three inch target once true leaves appear.
How many times do carrots typically need thinning? Usually once is enough if you do it promptly at the three to four true leaf stage, though a second light pass a week or two later catches any seedlings that germinated late or were missed the first time.
Does thinning stress the carrots you keep? Some minor root disturbance is possible, which is why watering before and after the process and snipping rather than pulling matters. Done carefully at the right stage, thinning has far less impact on the remaining roots than leaving the row overcrowded would.