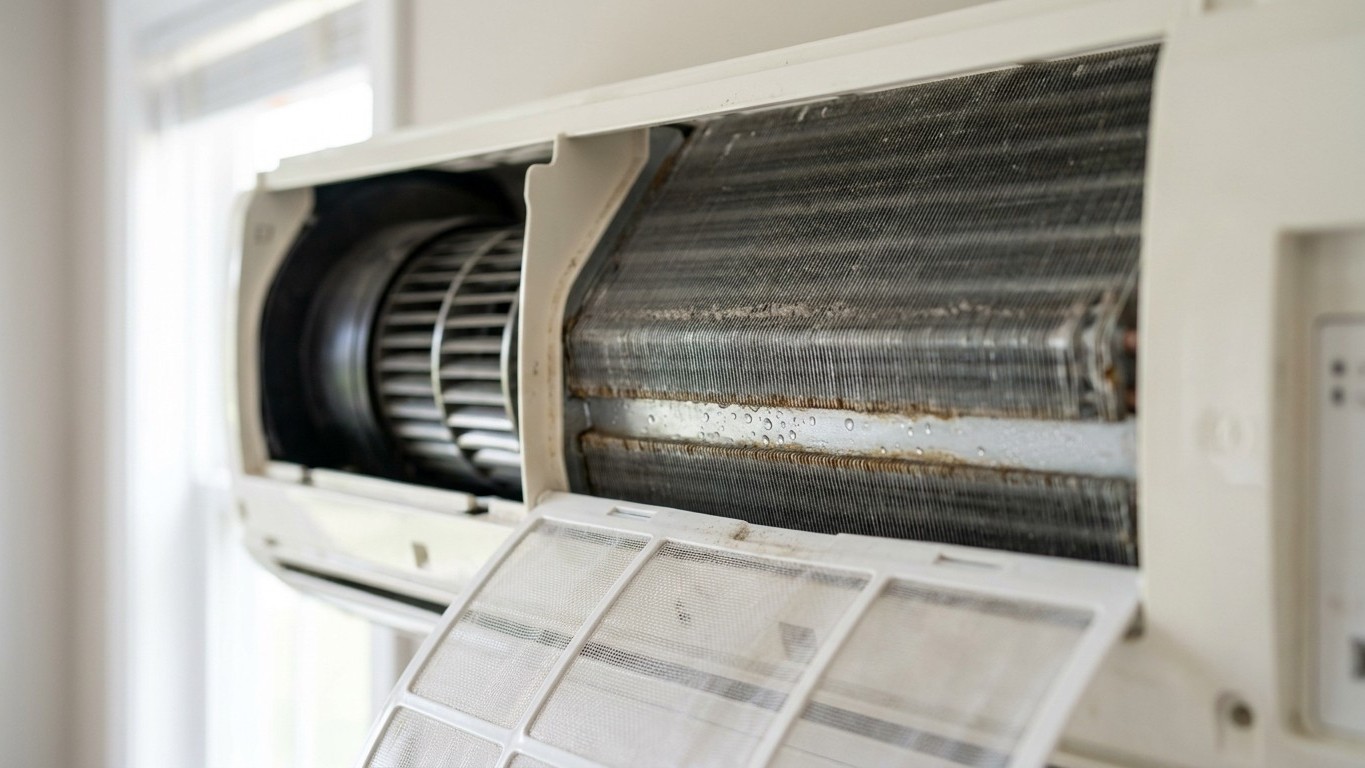

Cleaning the indoor head of a mini-split means clearing the filters, the evaporator coil, and the blower wheel of the dust and mold film that block airflow. The washable filters are yours to handle, monthly, with a garden hose and mild soap. The coil and the blower wheel behind them are a different story, those usually call for a technician, because getting to them means removing the housing without bending the fins or shorting the electronics.
Cleaning the Indoor Head
Pop the front cover off any mini-split indoor unit and you’ll find three layers stacked behind each other: a mesh filter, a finned evaporator coil, and a spinning blower wheel that pushes air across the room. Each layer traps something different. The filter catches lint, pet hair, and coarse dust before it ever reaches the coil. The coil, cold and often damp during cooling season, condenses moisture out of the air, which means anything that slips past the filter tends to stick to it rather than blow through. The blower wheel, a cylindrical fan with dozens of thin curved blades, moves the conditioned air out into the room, and its blades are shaped in a way that traps grime in the grooves rather than shedding it.
That dampness on the coil is the whole problem. A wet surface is a magnet for airborne particles, and it’s also exactly the environment mold spores need to take hold. Once a thin biofilm forms on the coil fins, it does two things at once: it insulates the metal from the air passing over it, so heat transfer drops, and it narrows the tiny gaps between fins, so the system has to work harder to push the same volume of air through. The blower wheel suffers a similar fate, grime builds up unevenly across the blades, which throws the wheel slightly out of balance and forces the motor to compensate.
None of this happens overnight. It’s a slow accumulation, week after week, invisible unless you actually remove the cover and look. That’s the mechanical reason a once-a-month habit matters more than it sounds like it should: catching dust at the filter stage is a five-minute rinse, but letting it reach the coil turns into a job that needs a coil brush, a vacuum with a soft attachment, and in stubborn cases a no-rinse foaming cleaner made for coils, none of which a filter alone can fix after the fact.
How to tell, in your own house
You don’t need a service call to figure out whether your indoor head needs attention tonight. Work through these checks in order, each one costs a little more effort than the last, and stopping after the first three still covers the checks that matter most for a homeowner.
- Look at the airflow. Stand in front of the unit while it’s running. Weak, uneven, or barely-there airflow compared to when the system was new is the first sign something behind the filter is restricting it.
- Pull the filter and hold it up to a light. If you can’t see light through the mesh, it’s clogged. This is also the moment to check the U.S. ENERGY STAR guidance directly: “Inspect, clean, or change air filters once a month in your central air conditioner, furnace, and/or heat pump.” That single instruction covers all three systems together, which matters because plenty of mini-split and heat-pump owners assume filter advice is written for furnaces only. It isn’t. Once a month, not “every few months.”
- Sniff the air right when the unit kicks on. A musty smell in the first few seconds usually means moisture and mold on the coil, not just dust on the filter.
- Check for water where there shouldn’t be any. Look under the indoor unit and along the wall beneath it for drip marks or a damp patch on the drywall. That points to a clogged condensate drain line, which sits downstream of the coil.
- Listen for a new rattle or hum. An unbalanced blower wheel, coated unevenly with grime, often announces itself as a faint vibration or noise that wasn’t there a year ago.
Steps one through three are entirely yours: filters slide out, rinse under a faucet, dry, and slide back in, no tools required. That’s where homeowner work ends, though. Removing the housing to reach the coil or the blower wheel means disconnecting panels that are also holding wiring harnesses and, on some models, a condensate pump. Bend a coil fin or nudge a wire loose and you’ve traded a cleaning job for a repair bill. If steps four or five turn up anything, that’s the point to call a technician rather than keep opening the unit yourself.
What it costs you to ignore it
A dirty coil doesn’t fail all at once, it just quietly makes the system work harder to do the same job. As grime insulates the coil fins and narrows the airflow path, the compressor has to run longer to pull the same amount of heat out of the room, because less air is actually making contact with the cold metal per cycle. Longer run times mean more electricity used for the same comfort level, and they mean more wear accumulating on a compressor that was sized to run in shorter bursts.
The blower wheel tells a similar story. Once it’s out of balance from uneven buildup, the motor bearing it turns absorbs extra vibration on every rotation, which shortens the life of a part that’s expensive to replace and inconvenient to access. Meanwhile, comfort erodes first, before any of that mechanical strain becomes obvious: rooms take longer to cool, humidity lingers because the coil isn’t dehumidifying efficiently, and the system starts short-cycling as it struggles to satisfy the thermostat.
The condensate line is the quiet risk in all this. Ignore a clogged drain long enough and water backs up past the pan, and it ends up in the wall or ceiling below the unit instead of outside where it belongs, turning a filter you skipped into a drywall and mold problem that has nothing to do with cooling performance anymore. None of these outcomes require a dramatic breakdown to matter. They show up as a system that runs more, cools less, and ages faster than it should have.