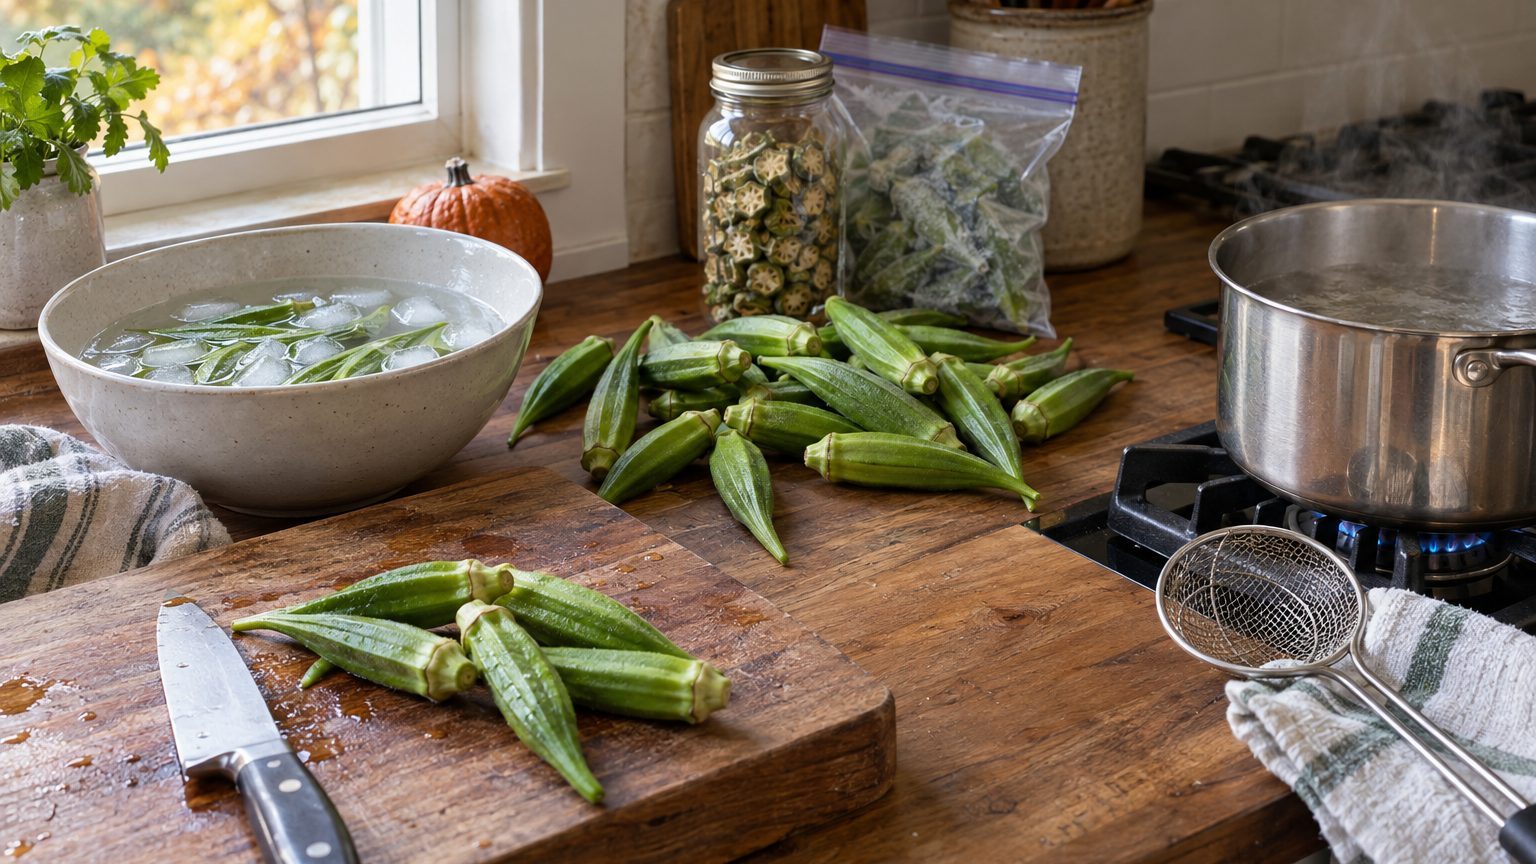

Freeze okra if you want it for gumbo, stews, and skillet dishes, and dry it if you want crunchy snacks, soup thickener, or a pantry shelf that doesn’t depend on freezer space. Both methods work well for preserving okra, but they produce very different foods, so the choice comes down to what you plan to cook in January.
Whichever you pick, the quality is set before the pod leaves the garden. Pods harvested at roughly 2 to 4 inches long are tender and mild. Past that, the walls turn woody and no amount of blanching or dehydrating fixes it. If you’re still sorting out how often to pick and what heat okra wants, Growing Okra: Heat, Daily Picking, and the Slime Question covers the growing side in detail.
Freezing okra: blanch first, cut later
Blanching is the step most people want to skip, and the one that matters most. Raw vegetables carry active enzymes that keep working at freezer temperatures, slowly turning color, flavor, and texture. A short scald stops them. The National Center for Home Food Preservation recommends about 3 minutes in boiling water for small pods and 4 minutes for large ones, followed by an immediate ice bath for the same length of time.
Start with clean, dry-handled pods. Rinse them, then trim only the stem cap, and do it without slicing into the pod itself. Cutting into the seed cavity exposes the mucilage, the gel that makes okra slippery, and it leaks into the blanching water and turns the pot cloudy and stringy. Whole pods blanched with their caps barely trimmed hold their shape and stay far less slimy.
Once the pods are chilled, drain them well. Wet okra freezes into a solid brick. Spread the pods in a single layer on a rimmed baking sheet lined with a clean towel, pat the tops dry, and slide the sheet into the freezer for an hour or two. When the pods are hard, pack them into freezer bags or a vacuum sealer. Pressing out the air matters, because trapped air is what causes freezer burn, the gray, leathery patches that make frozen vegetables taste like cardboard.
Properly blanched and packed, okra holds up for 8 to 12 months at 0°F. Label the bags with the date and the cut. You’ll be glad you did when you find three unmarked bags in March.
Whole pods or slices?
Freeze both, in separate bags. Whole pods are better for roasting, grilling, and braising, since the intact skin keeps the slime inside. Slices (about half an inch thick) go straight into gumbo, soups, and rice dishes where the mucilage is a feature, not a flaw.
Slice after blanching and cooling if you want rounds. Slicing before blanching sends more gel into the water and gives you gummier results. Then tray-freeze the rounds the same way you did the pods, so they stay loose and pourable. A bag of frozen slices that pours like peas is infinitely more useful than a frozen clump you have to chisel apart.
Cooking from frozen
Do not thaw frozen okra on the counter. Thawing in its own water produces exactly the slimy mess people associate with bad okra. Cook it straight from the freezer instead. Toss whole pods with oil and salt and roast on a sheet pan at 425°F until the edges brown. Drop frozen slices into a simmering pot of gumbo or tomato stew in the last 15 to 20 minutes. Dredge frozen slices in cornmeal and pan-fry, and they’ll crisp up fine, though not quite as shatteringly as fresh.
Drying okra: slices, chips, and powder
Drying turns okra into something else entirely. Slices become brittle, nutty chips, and a spice grinder turns them into a thickening powder for soups. The flavor concentrates, and a season’s worth of pods fits in a couple of quart jars.
Cut pods into rounds about a quarter inch thick. Thicker slices take forever and risk spoiling in the center, while thinner ones tear and stick to the trays. Some home preservers blanch the slices for a minute or two first to hold color and mellow the grassy flavor, and others skip it. Unblanched okra dries a bit darker but works fine, especially for powder. If you plan to eat the chips as snacks, a quick blanch gives a cleaner taste.
Spread the slices on dehydrator trays without overlapping. Set the temperature to roughly 125°F to 135°F, the standard range for vegetables, and dry until the pieces snap cleanly instead of bending. Expect anywhere from 6 to 12 hours depending on humidity, slice thickness, and how crowded the trays are. A humid August kitchen in Georgia or Louisiana takes noticeably longer than a dry day in Arizona.
No dehydrator? An oven set to its lowest temperature, with the door propped open a crack with a wooden spoon, will do the job. Ovens often run hotter than 135°F even on the lowest setting, so slices can cook on the edges before the centers dry. Check often and rotate the pans. A cheap oven thermometer tells you more than the dial ever will.
Conditioning and storing
Pieces that feel dry can still hold hidden moisture. After drying, let the slices cool completely, then pack them loosely into a jar about two-thirds full. Shake the jar daily for a week. If condensation shows up on the glass, or the pieces start to clump, they need more time in the dehydrator. Mold in a jar of dried vegetables is almost always a moisture problem that could have been caught at this step.
Fully dried and conditioned okra keeps well in airtight glass jars stored in a cool, dark cupboard, commonly cited at around a year, though flavor fades well before it becomes unsafe. Toss a food-grade oxygen absorber into larger jars if you want longer storage, and keep the jars away from the stove, where heat cycles speed up quality loss.
What to do with it
Dried okra is far more versatile than most people expect.
- Toss the slices with oil, salt, and cayenne for a savory snack (they’re chewy-crisp, closer to a cracker than a chip).
- Grind them into powder and stir a spoonful into soup or stew as a thickener, the same job filé powder does in gumbo.
- Drop whole dried slices into brothy soups, where they rehydrate in 10 to 15 minutes and soften without turning slimy.
The powder is the sleeper hit. A tablespoon thickens a pot of soup without flour, and it works for gluten-free cooks who miss a good roux.
Picking the method that fits your harvest
Okra rarely arrives in one tidy batch. A healthy plant produces a handful of pods every day or two through the summer, and the pods grow fast enough that a 3-inch pod on Tuesday can be a tough 6-inch one by Friday. That rhythm shapes how you preserve it.
Fresh okra does not like the refrigerator. It’s a warm-climate crop, and prolonged chilling below about 45°F causes pitting, dark spots, and a slick surface. If you can’t process the same day, keep pods in a paper bag in the crisper drawer for two or three days at most, then deal with them. Alternatively, blanch each day’s small pickings and add them to a running freezer bag. Five minutes of work each evening beats a Saturday-afternoon marathon with a bushel.
Some rough guidance on which method suits which situation:
- Freeze if you cook a lot of gumbo, stews, and roasted vegetables, or if you want the texture closest to fresh.
- Dry if freezer space is tight, if you want snacks, or if you want a thickener with no extra steps.
- Do both if you have a heavy harvest: freeze the tender young pods and dry the ones that are slightly oversized but not yet fibrous.
Cutting plants back mid-season changes the math, too. A trimmed plant sends up fresh branches and a second flush of tender pods in late summer, just when you have the energy for a second round of freezing. The tradeoffs are laid out in Cutting Okra Back in Mid-Season.
Mistakes that ruin a batch
Most failures come from four habits. Skipping the blanch gives bitter, off-flavored frozen pods within a few months. Freezing wet pods without tray-freezing creates a single frozen lump. Overloading dehydrator trays leaves chewy, damp centers that mold in the jar. And preserving oversized pods, which are tough no matter how you treat them.
Keep notes as you go. Write down how many pounds you froze or dried, and which cuts you actually used by spring. Those numbers tell you how many plants to grow next year, and they help when you plan where okra goes in the garden. Okra shares certain pests and soilborne diseases with other crops, which is why where you put it next season matters, a topic covered in Rotating Okra: What It Shares Problems With.
One more nuance: pods that slip past you and grow into 8-inch clubs are not a total loss. Let a few mature fully on the plant at the end of the season, and the dry pods yield seed for next year’s garden, as long as your variety isn’t a hybrid that won’t come true from saved seed.