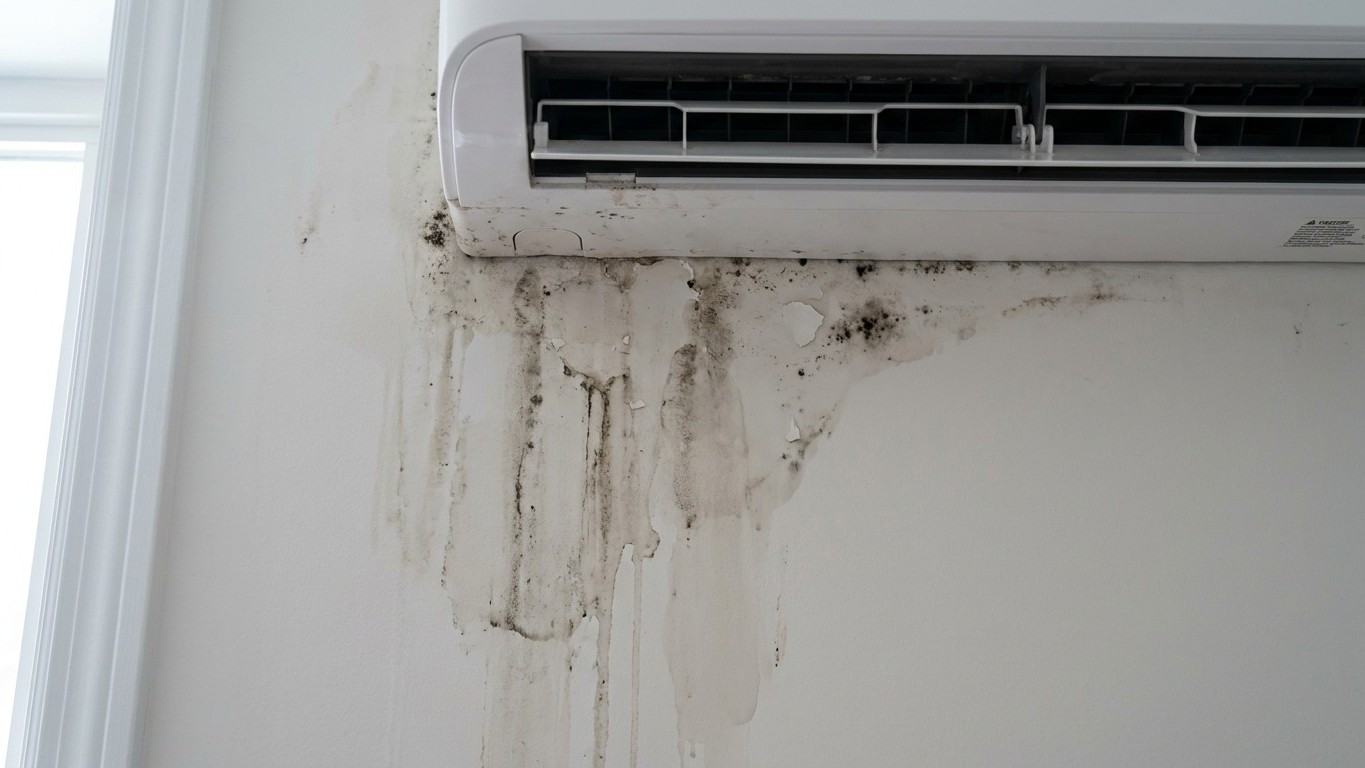

Water running down the wall beneath a mini-split head almost always means the condensate drain system has failed somewhere between the indoor coil and the outdoor exit point. Either the line is clogged, disconnected, or pitched wrong, so the water the unit is supposed to carry outside backs up and spills over the drain pan instead.
Water on the Wall Below the Head
A ductless mini-split doesn’t just move air. Every time it cools, the indoor coil pulls moisture out of the room, and that moisture has to go somewhere. It collects in a small drain pan under the coil, then flows through a plastic drain line that’s supposed to slope gently downhill, out through the wall, and drip somewhere harmless outside. The whole system depends on gravity and a clear path. Nothing pumps that water unless the installation includes a condensate pump, which some setups need when the line can’t run downhill the whole way.
The trouble starts when that path gets interrupted. Dust, lint, and algae build up inside the tubing over months of use, the same way a shower drain slows down from hair and soap scum. Eventually the line narrows enough that water can’t clear as fast as the coil produces it, so the pan overflows. A second common failure is more mechanical: the drain line slips loose from its fitting inside the unit, a foam sleeve shifts, or the line was never sloped correctly during installation, so water pools instead of draining.
There’s also a version of this problem that has nothing to do with clogs. A dirty air filter restricts airflow across the coil, and the coil gets cold enough to ice over. When the unit shuts off or airflow briefly returns, that ice melts all at once, faster than the drain pan and line were ever designed to handle, and the overflow runs down the wall exactly like a clog would. From the outside, both problems look identical: a wet streak below the unit. Inside, the cause is completely different, and that matters for what you check first.
Ductless individual units like this one have become a bigger share of home cooling nationally, and drainage issues are one of the most common calls tied to them, precisely because the mechanism (gravity-fed drainage through a wall) has no built-in backup unless a pump is installed.
How to tell, in your own house
Work through this in order. It’s built so the free checks come first, and by the time you’d need a tool or a ladder, you’ve already ruled out the easiest causes.
- Note when the water shows up. Water appearing only during heavy cooling days, or a few hours after the unit cycles off, points toward ice buildup and thaw rather than a slow clog, which tends to drip more steadily.
- Pull the filter and look at it. If it’s gray, matted, or you can’t see light through it, that’s likely restricting airflow enough to ice the coil. Clean or replace it, this costs nothing and takes five minutes.
- Find the drain line’s exit point outside and check whether water is actually coming out there while the unit runs. If nothing drips outside during active cooling, the blockage is somewhere in the line or at the pan.
- Look for visible kinks, sags, or pinches in the exterior portion of the line, especially anywhere it dips before flowing back up, which traps water and debris.
- Check the wall and floor below the head for how far the water has traveled and whether it’s staining, which tells you how long this has been going on, not just how bad it is today.
That’s where homeowner work ends. Opening the head unit’s casing to access the internal drain pan, disconnecting or resetting the drain hose fitting inside the unit, clearing a clog with a wet vacuum at the line’s low point, or inspecting the coil itself for ice and refrigerant issues, all of that requires removing panels that are meant to stay closed and handling components that can be damaged by the wrong tool or a heavy hand. A technician also carries a specialized vacuum built for clearing condensate lines without pushing debris further into the system, which is the opposite of what a shop-vac at the wrong end does. If the filter is clean and water is still backing up past the exit point, that’s the line to call a professional, not push further yourself.
What it costs you to ignore it
Water finds the path of least resistance, and inside a wall that path usually runs behind drywall, along framing, and down into Insulation you can’t see. Left alone, a slow drip doesn’t stay a cosmetic stain. Drywall absorbs moisture and softens, paint bubbles, and the wood framing behind it stays damp long after the surface looks dry, which is exactly the environment mold needs to take hold. Once that happens, the fix stops being a drain cleaning and becomes a demolition and remediation job.
The unit itself takes a hit too. A coil that keeps icing over because of a dirty filter has to work harder to move the same amount of air, running longer to reach the same temperature, and running longer means the coil sees more freeze-thaw cycles, which is hard on the fins and the fan motor over time. Many systems include a float switch designed to shut the unit down when the drain pan overflows, as a safeguard against exactly this kind of wall damage. That’s good news for the wall, less good news for the room, because it means the unit cuts out during the exact hours you need cooling most, on the hottest afternoon of the year, with no obvious sign why beyond a lit error light or a suddenly silent unit.
None of this resolves on its own. A clogged line doesn’t clear itself, and ice that keeps forming keeps melting into the same overworked drain pan. The wall stain is the visible symptom of a mechanical problem sitting quietly behind it, and the checklist above is the fastest way to find out which one you’re dealing with before it spreads any further.