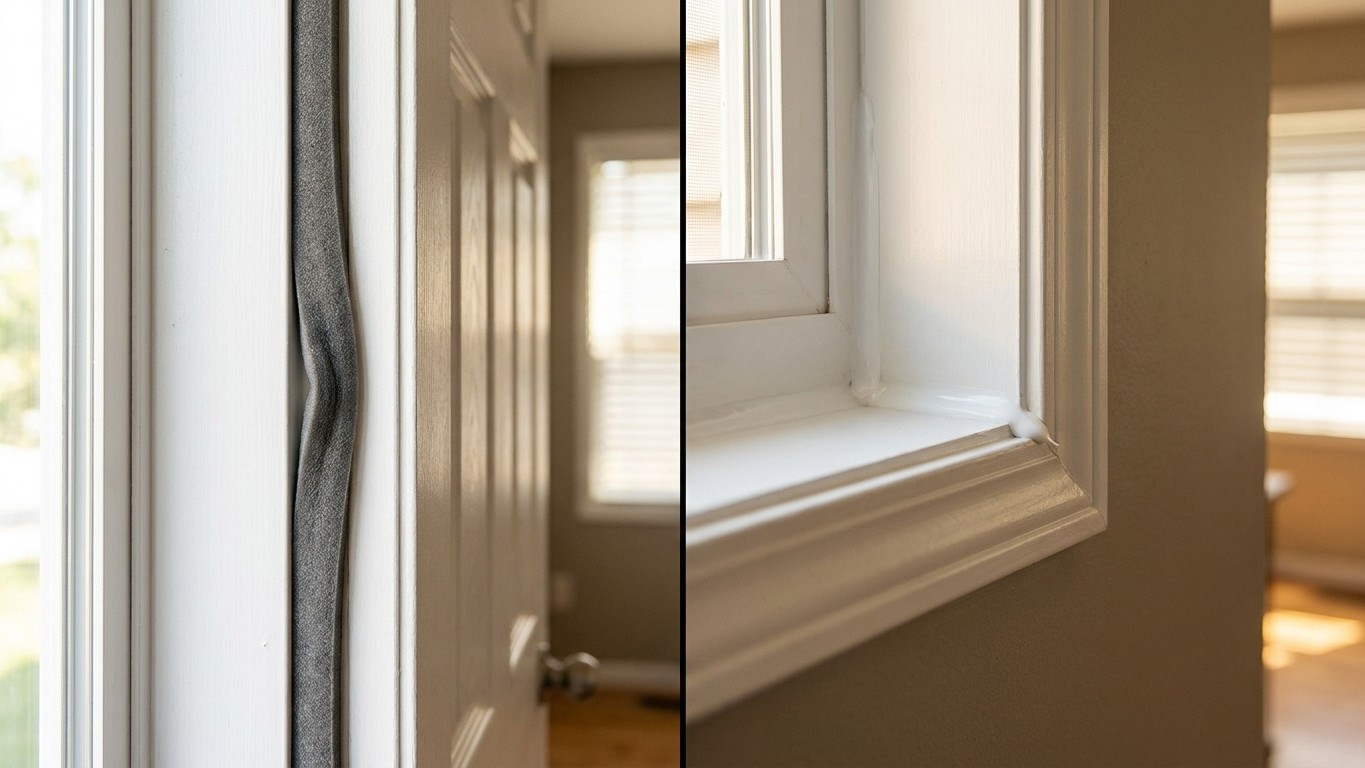

Caulk belongs where two things never move against each other: a window frame set into a wall, a door frame nailed to the studs around it. Weatherstripping belongs where two things do move against each other: a door swinging on hinges, a sash sliding up a track. Confuse the two and the seal fails within a season. Get the fit right, with the strike plate doing its share of the work, and both should hold for years.
Two materials, two jobs
The line between caulk and weatherstripping is not about which product feels sturdier. It is about motion. A window frame and the rough opening around it are fixed to each other for the life of the house. The wall may shrink a fraction as lumber dries, the house may settle a hair over a decade, but nothing there is designed to move on a daily basis. That joint wants a material that cures hard and bonds to both surfaces: caulk, in one of its several flexible formulations, applied once and left alone.
A door in its frame is a different problem entirely. It opens fifteen times a day, swings on hinges that wear, and needs to close against something soft enough to compress and spring back, over and over, for years. Caulk cannot do that job. Apply a bead of caulk between a door and its stop and the first time the door swings, the bead tears. What that gap needs is a compressible strip, foam, rubber, or a metal-backed flap, fastened to the stationary jamb so the moving door presses against it and seals without gluing itself shut.
The failure that shows up most often in this kind of work is exactly this swap. Someone runs a bead of caulk along a door stop because it is what they had on hand, or nails rigid weatherstripping into a static frame-to-wall gap where it never gets compressed and just sits there doing nothing. Both mistakes look like progress for about a month. Then the caulk cracks along the door’s swing line, or the static gap keeps leaking air because nothing ever pressed the material into it.
Windows complicate the picture slightly, because a double-hung or casement window has both kinds of joint in one unit. The sash that slides or cranks open needs weatherstripping, usually already built into the frame from the factory or added along the tracks. The frame itself, where it meets the wall’s rough opening, needs caulk, or in older construction, backer rod and sealant for a wider gap. Treating a whole window as one uniform sealing job, caulking the moving sash shut or expecting weatherstripping to bridge a two-inch frame gap, wastes material and skips the actual leak.
The test that separates the two, before buying anything, is simple: does this joint open and close, or has it been in the same position since the house was built? That answer decides the aisle.
The door, edge by edge
An exterior door has four sides and a threshold, and each one gets checked differently. Working through them in order avoids the common trap of fixing the obvious gap at the bottom while leaving air moving freely along the top.
- Check the fit with paper. Close the door on a standard sheet of paper at the top corner, then partway down each side. Pull the paper out. If it slides free with almost no resistance, that spot has a gap worth sealing. If it tears or won’t move, the door is already sealing tight there.
- Fit compressible stripping to the stop, not the door. The stop is the fixed strip of wood the door closes against, and it does not move. Weatherstripping goes there, running along the top and both sides, so that when the door swings shut, it presses into the material rather than past it.
- Adjust the strike so the door is actually pulled tight. The strike plate on the jamb is what the latch pulls against, and on many doors it can be moved slightly, or the latch itself adjusted, to pull the door in an extra sixteenth of an inch. Without that adjustment, new weatherstripping just gets brushed by a door that never fully closes onto it, and the seal does almost nothing.
- Handle the bottom on its own terms. The gap under a door is usually the widest in the whole opening and needs its own hardware, either a sweep attached to the bottom of the door itself or an adjustable threshold set into the floor, sometimes both together for an exterior door that takes weather directly.
The strike adjustment is the step almost everyone skips, and it is the one that decides whether the rest of the work matters. New weatherstripping that the door never actually compresses is decoration. Before buying replacement stripping, it is worth confirming the door closes firmly against the existing latch; if it does not, that is a hardware problem, not a sealing problem.
A door that has visibly dropped, dragging on the threshold or leaving a widening gap at the top corner opposite the hinges, is telling a different story. That is a hinge problem, usually a screw that has stripped its hole in the jamb, letting the whole door sag on its own weight. No amount of weatherstripping fixes a door that hangs crooked. The hinge gets addressed first, screws replaced or reset into solid wood, and only then does it make sense to fit new stripping to a door that is actually closing where it should.
The window, inside and out
A window has three places air can move through it, and treating only one leaves the job half done.
The first is the sash itself, wherever the window actually opens. On a double-hung window that means the meeting rail where the two sashes overlap, and the channels each sash slides in. On a casement, it is the perimeter where the sash swings against the frame when cranked shut. This is weatherstripping territory: thin foam or vinyl strips designed for narrow channels, sold specifically for double-hung tracks, applied along the moving edges so the sash compresses against something soft when closed.
The second is the static joint, where the entire window unit meets the wall’s rough opening. This is the frame-to-wall gap, and it is caulk’s job, run along the exterior trim where it meets the siding and, depending on the gap’s width, backed with foam rod before sealing if the space is wide enough to need it.
The gap nobody thinks to check
The largest air leak around a window is often neither of these visible joints. It is the cavity behind the interior trim, the narrow space between the window frame and the framing lumber that got stuffed loosely with fiberglass, or not sealed at all, when the house was built. Caulking the face of the trim where it meets the wall does nothing for this hidden gap; the air simply moves behind the trim and around the bead. Reaching it means pulling the interior trim off, sealing the actual cavity with foam or caulk against the framing, and reinstalling the trim. ENERGY STAR’s air sealing guidance covers this window and door trim cavity specifically, because it is consistently one of the more overlooked gaps in a house that otherwise looks well sealed.
One spot to leave alone: the small weep holes along the bottom of a modern window’s exterior frame. They look like flaws or leftover gaps, and the instinct is to caulk them shut along with everything else. They are not a leak. They exist to let any water that gets behind the exterior cladding drain back out, and sealing them traps that moisture against the frame instead, which leads to rot inside the wall long before anyone notices a draft.
What this work is worth, honestly
Doors and windows are the sealing work most homeowners actually do, for a reasonable reason: they are within reach, visible, and don’t require a trip into the attic or a crawl under the house. That accessibility is real value. It is also worth being honest about where this work sits in the bigger picture of a house’s air leaks.
ENERGY STAR’s own guidance for sealing a home puts air sealing first and insulation second, project by project, starting with the attic. That order exists because insulation laid over a gap that is still leaking air just hides the gap; it does not stop the air moving through it. The order is the useful part of that guidance, not a number, and it applies to attics, floors over crawl spaces, and rim joists specifically, the places ENERGY STAR pairs an air sealing step with an insulation step as one project.
That same guidance does not attach its published savings estimate to weatherstripping a door or caulking a window trim. The number covers combined air sealing and insulation work in attics, crawl space floors, and rim joists, the large, mostly hidden surfaces of a house where air moves in volume. A door frame and a window sash are real leaks, and worth sealing well, but they are narrow linear gaps compared to an unsealed attic floor or an open rim joist running the full perimeter of a foundation. Applying an attic-and-crawlspace savings figure to a weekend of door and window work would overstate what that work does, and this page won’t do that.
None of that makes weatherstripping a door or caulking a window a waste of an afternoon. It reduces drafts people can feel while sitting near a door, stops the whistle a bad window makes in a winter wind, and it is genuinely the most reachable air sealing most households will ever do without a contractor. It just is not the leak carrying the largest share of a heating and cooling bill, and knowing that keeps expectations in the right place before the caulk gun comes out.
Common questions
How do I know if a door or window actually needs new weatherstripping?
Run the paper test described above, along the top and both sides of a door, or feel for moving air along a closed window sash on a windy day with the back of a hand. Visible daylight around a closed door, stripping that has gone flat or brittle, or a window sash that rattles in the wind are all signs the existing material has stopped compressing the way it should.
Can I use caulk on a door if I don’t have weatherstripping on hand?
Only on the parts of the frame that don’t move, such as the outside edge of the door casing against the wall. Any joint the door itself closes against needs a compressible material, because caulk will crack the first time the door swings after it cures.
What should I ask for in a written quote if I hire this out?
A useful quote states exactly which openings will be sealed, which material goes where (weatherstripping type for moving parts, sealant type for static joints), whether strike plates or hinges will be adjusted as part of the work, and whether the window trim cavity will be opened and sealed or left as is. Vague language like “seal all doors and windows” without naming the specific joints is worth pushing back on.
Is it worth sealing doors and windows before tackling attic or crawl space air sealing?
Both are worth doing, but if choosing where to start, ENERGY STAR’s project order points toward the attic first, since unsealed attic penetrations and rim joists typically move far more air than a door or window gap. Doors and windows remain the easiest weekend project and the most immediately noticeable to occupants, which is a legitimate reason to do them regardless of sequence.