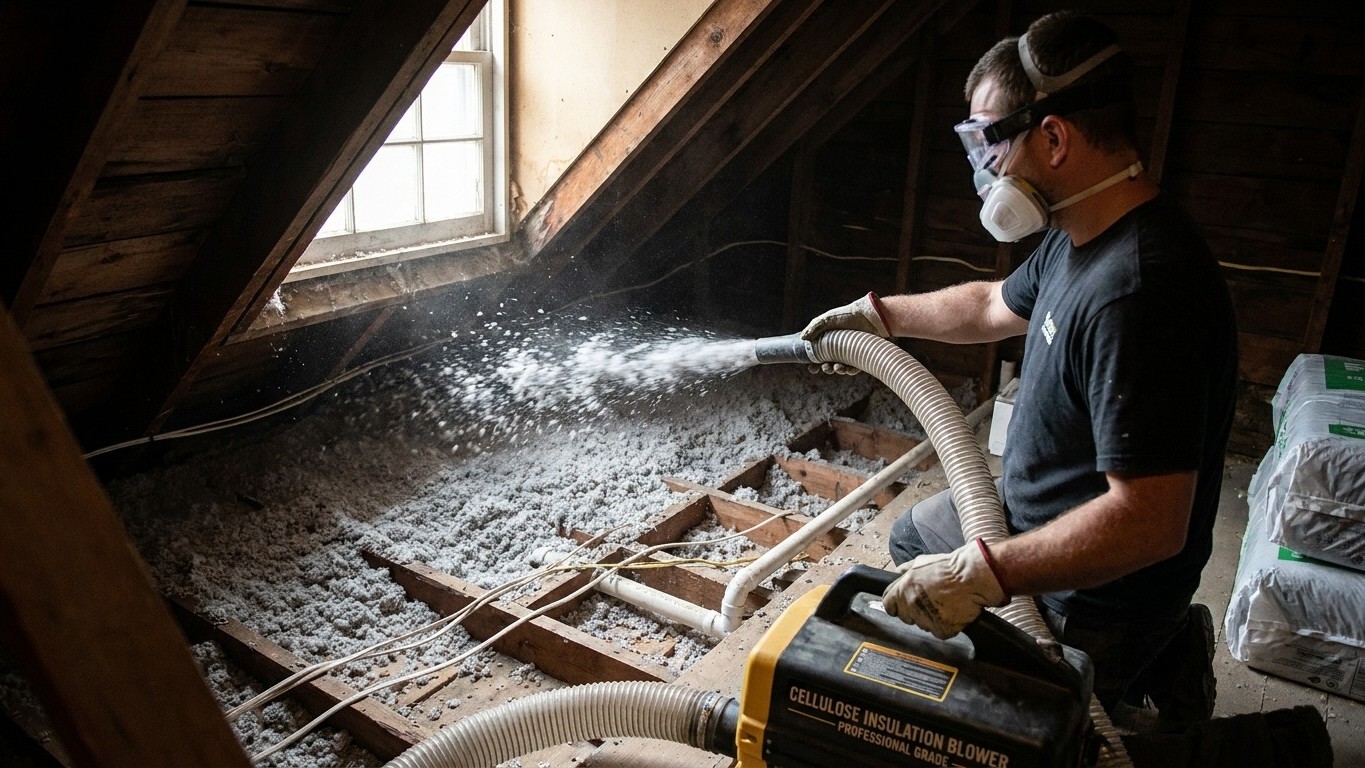

Blown-in cellulose is loose insulation made mostly from recycled paper, treated with a fire retardant, and installed by machine instead of laid by hand in pre-cut pieces. It earns its reputation in attics with odd framing, add-on rooms, and retrofits where tearing out drywall isn’t on the table. It also settles a few inches over the first year, which is why installers overfill on purpose. The material isn’t the right call everywhere. A few situations call for something else entirely, and knowing which one you’re in matters more than any brand name on the bag.
What is actually going on

The thing to understand about loose fill is that it flows. A fiberglass batt is a rectangle, cut to a standard width, and it either fits a joist bay or it doesn’t. Cellulose has no shape until it’s blown into place, so it moves around wiring runs, odd framing angles, plumbing stacks, and the little gaps a batt always leaves at the edges. That’s the whole mechanical advantage in one sentence: a batt fills a cavity shaped like the batt, and cellulose fills the cavity shaped like the cavity.
The fibers themselves come from ground-up newsprint, treated with borate compounds that do two jobs at once, slowing combustion and discouraging insects and rodents from nesting in it. When a machine blows it through a hose, the fibers separate and tumble into the space, trapping air between them. That trapped air is what does the Insulating work, not the paper itself. Exactly how much resistance a given thickness provides is printed on the bag as an R-value, and it varies by manufacturer and by how densely the material is installed, so there’s no universal number to memorize here. Check the bag for the job at hand rather than relying on a figure from a different product.
Two ways it gets installed
In an open attic, cellulose is blown loose over the existing floor, filling gaps between old batts and topping everything off to a target depth. In a finished wall, it’s dense-packed instead, meaning it’s blown at higher pressure through small holes drilled in the wall or from behind removed siding, so the cavity is packed tight from top to bottom with no room left to settle later. Those are different installation methods for different situations, and mixing them up (loose-filling a closed wall cavity, for instance) leads to the settling problems described in the next section.
None of this requires a specific brand to work well. What it requires is a cavity that’s actually accessible, dry, and free of anything the installer shouldn’t disturb, which is where the practical decisions start.
Where it belongs, and where it does not
Settling is the detail that trips up a lot of DIY attempts. Loose-fill cellulose compresses under its own weight over the first year or so, losing some of its installed depth. Professional installers account for this by blowing in more material than the target depth requires, based on published settled-density figures for that product. That’s also why some attics have small depth markers, cardboard placards stapled to the trusses showing the fill level right after installation. If you see one, it isn’t a mistake. It’s a reference point so a future inspector, or you, can tell whether the insulation has settled below where it started.
Dense-packed wall cavities are different. Packed at high enough density, the material locks in place and doesn’t settle the way loose fill does, which is exactly why walls get a different installation method rather than the attic approach.
| Situation | Fit | What happens if it’s used anyway |
|---|---|---|
| Open, unobstructed attic floor | Strong fit | N/A, this is the classic use case |
| Finished wall, drywall staying in place | Good fit, dense-pack method | Loose-fill blown into a closed cavity instead of dense-packed will settle, leaving an uninsulated gap at the top of the wall |
| Attic knee walls and sloped ceilings | Marginal | Without netting or blocking to hold it, loose fill slumps downhill, thinning out near the top |
| Active roof leak or damp attic | Not a fit | Cellulose absorbs the moisture, mats down, loses R-value, and can support mold growth |
| Attic with open, unbaffled soffit vents | Not a fit without baffles installed first | Incoming air currents blow loose fibers away from the eaves, thinning coverage exactly where it matters for ice-dam prevention |
| Crawlspace floor insulated from below | Poor fit | Gravity pulls unsupported loose fill down and out of the joist bay within months |
A page that only lists advantages is really an advertisement, so it’s worth saying plainly where cellulose loses to another material. Open masonry cavities, consistently wet locations, and floor assemblies insulated from underneath without support all favor a different product, usually a batt, rigid board, or spray foam held in place by something other than friction. Cellulose is a strong, flexible answer to a lot of retrofit problems. It isn’t the answer to all of them.
The moisture side of the decision
Every insulation choice is also a moisture choice, whether anyone frames it that way at purchase time or not. Cellulose is hygroscopic, meaning it absorbs and releases water vapor as humidity in the air rises and falls. That’s actually a useful buffering property, but only if the wall or attic assembly has a clear path to dry out afterward. The expensive mistakes happen when a wall can’t dry in either direction, because whatever moisture gets in stays trapped against wood framing and sheathing.
Which direction an assembly should be built to dry toward depends on the climate it’s in, and that’s not something a single national article can responsibly answer. The placement of a vapor retarder, on the interior or exterior side of the insulation, is dictated by regional building code and climate zone, and getting it backward can trap moisture inside a wall cavity instead of letting it escape. The current model energy code doesn’t even require an interior vapor retarder in the three warmest climate zones, which tells you the “right” answer genuinely changes depending on where the house sits. For the specifics, check the vapor barrier guide and your state’s insulation page rather than applying a rule that might only be correct three time zones away.
It’s also worth separating two things that sound alike but do different jobs. A vapor retarder slows the diffusion of water vapor through a material over time. An air barrier stops bulk air movement, the kind that carries far more moisture in a single afternoon than vapor diffusion moves in a season. Dense-packed cellulose, installed at sufficient density, does contribute some air-sealing benefit just from how tightly it’s packed. But it isn’t a substitute for a continuous, deliberate air barrier, and a contractor who calls it one is skipping a step.
What to settle before you buy anything
ENERGY STAR treats air sealing and insulating as two steps of one project, not two separate purchases, and it puts sealing first for a reason: pumping insulation into a leaky assembly is a bit like adding a thicker coat without buttoning it. As EPA models it, “homeowners can save an average of 15% on heating and cooling costs (or an average of 11% on total energy costs) by air sealing their homes and adding insulation in attics, floors over crawl spaces, and accessible basement rim joists.” That’s an average from energy modeling of a typical existing home, covering those three specific locations, not a guarantee for any particular house and not a figure that extends to walls, windows, or doors.
Before buying material, find out how much insulation is already up there and compare it against ENERGY STAR’s retrofit recommendations, organized by climate zone.
| Climate Zone | Attic, if currently uninsulated | Attic, if you already have 3-4 inches | Floor |
|---|---|---|---|
| Zone 1 | R30 | R25 | R13 |
| Zone 2 | R49 | R38 | R13 |
| Zone 3 | R49 | R38 | R19 |
| Zones 4A and 4B | R60 | R49 | R19 |
| Zones 6, 5, and 4C | R60 | R49 | R30 |
| Zones 7 and 8 | R60 | R49 | R38 |
ENERGY STAR publishes climate zone boundaries as a map, and no state, county, or address is named here on purpose. Look up the map before buying material, since the target depth depends entirely on which zone the house sits in.
A few checks come before any of that. Confirm the attic or wall cavity is actually accessible, and if you’ll be up there yourself, step only on joists, never on the drywall between them. If the existing insulation looks like small gray pebbles or shiny flakes, it may be vermiculite, which can contain asbestos, so don’t disturb it, get it tested first. Recessed light fixtures and flue pipes have clearance requirements set by the fixture or appliance itself, not by preference, and those clearances have to be maintained when new insulation goes in around them. A garage ceiling under living space is a fire separation, so its rating has to be preserved. And any combustion appliance, a furnace or water heater, sitting in a space that’s about to be sealed up tighter needs a combustion safety evaluation first, since tightening the building envelope can change how that appliance draws air. Your state energy office can also point to current rebate programs for insulation upgrades, worth a look before the work starts.
Common questions
Does blown-in cellulose need a vapor barrier?
It depends on the climate zone and which side of the assembly needs to dry, which is exactly why this page won’t give a single national answer. Check the vapor barrier guide and your state’s page for the specific requirement in your area.
Can I add blown-in cellulose over old fiberglass batts?
Generally yes, as long as the existing insulation is dry and free of contamination. Check first for vermiculite or signs of past moisture damage before adding anything on top.
How do I know if my attic already has enough insulation?
Compare the existing depth against the ENERGY STAR retrofit table above, using your climate zone from the ENERGY STAR map. The 3-4 inch column exists specifically because that’s a common starting point in older homes.
Is blown-in cellulose safe near recessed lights or a chimney?
Only if the fixture or appliance manufacturer’s clearance is maintained, and if any combustion appliance nearby is evaluated after the space is sealed. These clearances aren’t optional guidelines, they’re set by the equipment itself.