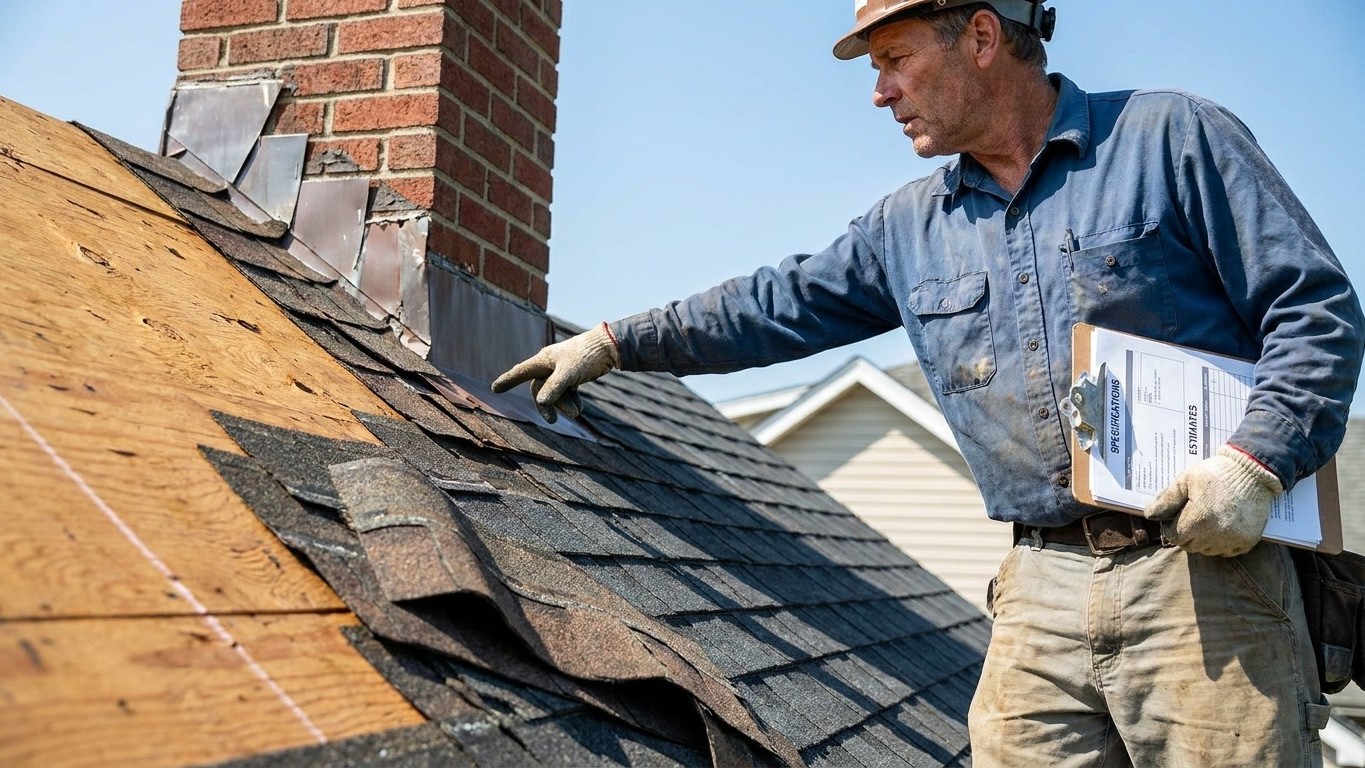

The questions that matter aren’t about brand names or shingle color. They’re about what’s included in the tear-off, who’s responsible for damaged decking and at what added cost, what goes down as underlayment before the roofing material, how flashing around chimneys and vents gets handled, and whether the crew carries its own liability and workers’ compensation insurance. A roofer who answers all five without hesitation has probably done this a thousand times. One who gets vague on any of them is telling you something.
What is actually happening
Two roofing contractors can walk the exact same roof and come back with wildly different quotes. The gap rarely comes down to profit margin. It comes down to what’s actually written into the scope of work, and that’s the detail most homeowners skim past on their way to the bottom-line total.
Tear-off is the first fork in the road. Some quotes assume a full removal of the old roofing material down to bare decking. Others assume a layover, where new material goes on top of what’s already there if local code and the existing layer count allow it. A layover quote will almost always look cheaper, and it will almost always hide problems the crew never gets to see, because nobody pulls up the old layer to check the wood underneath.
That wood underneath is the second fork. Decking, the plywood or board sheathing the roofing material actually attaches to, rots when moisture sits on it long enough. A responsible contractor builds a decking repair allowance into the quote, a set amount of square footage priced in advance for boards that turn out to be soft or delaminated once the old layer comes off. A quote with zero allowance for deck repair is either assuming a perfect roof underneath, which is rare on anything but a newer home, or it’s setting up a change order that arrives after the crew has already torn into your house.
Underlayment is the layer between decking and the visible roofing material, and it’s doing more of the waterproofing work than most homeowners realize. Manufacturers publish their own specifications for which underlayment pairs with which roofing product, and a contractor following those specs isn’t padding the invoice, they’re protecting the warranty that comes with the material itself.
Flashing, the metal strips sealing the joints where the roof meets a chimney, vent pipe, or wall, fails more often than the roofing field itself. It’s also the piece most likely to get quoted as “reuse existing” by a crew trying to shave a number. Ask directly whether flashing is being replaced or reused, and ask why.
Insurance is the line most homeowners never ask about at all. A roofer working without active liability coverage and workers’ comp can leave you exposed if someone gets hurt on your property or if the work damages something inside your home. Ask for a current certificate of insurance, not a verbal assurance, and confirm it directly with the carrier if the job is any size at all.
What you can see without climbing
You don’t need a ladder to know your roof needs attention. Most of the useful information is visible from the ground or from inside the attic, and that’s genuinely enough to start a conversation with a roofer or decide whether one is needed at all.
- Scan from the ground first. Walk the perimeter of the house and look up, using binoculars or a phone camera zoomed in tight. Look for missing or curling roofing material, dark streaking, sagging lines along the ridge or eaves, and granules collecting in gutters or downspouts.
- Check valleys and penetrations from a distance. Valleys, where two roof slopes meet, and the areas around chimneys, vents, and skylights are where most leaks start. Zoom in on these spots specifically rather than scanning the whole field of the roof at once.
- Move to the attic with a flashlight. On a dry day, climb into the attic (a stable, non-roof space) and turn off any attic light. Daylight visible through the roof deck means a gap or hole somewhere in the roofing system.
- Look at the rafters and sheathing directly. Dark staining, streaking, or a chalky white residue on wood framing points to past or ongoing moisture intrusion, even if the roof looks fine from outside.
- Check the Insulation for dampness. Compressed, discolored, or visibly wet insulation between the rafters is one of the clearest signs water has been getting in, sometimes for longer than any exterior sign would suggest.
This routine takes maybe twenty minutes and answers most of the question of whether you have a problem. It doesn’t tell you the cause with certainty, and it doesn’t replace a roofer’s inspection, but it gives you something concrete to describe when you call one, and it lets you push back if a quote doesn’t match what you’re actually seeing.
What it costs to leave it
A small roofing problem doesn’t stay small on its own timeline, it stays small on the house’s timeline, and the house doesn’t wait for a convenient moment. Water that gets past roofing material and underlayment lands on the decking first. Plywood or board sheathing that stays damp starts to soften, then delaminate, then lose the structural stiffness that lets it hold fasteners and support foot traffic during future repairs.
From there it moves to the rafters, the framing members holding the whole roof shape. Wood framing exposed to repeated moisture develops rot at the point of contact, and rot doesn’t stay contained to where the water first landed, it follows the grain of the wood along the rafter. By the time staining is visible from inside the attic, moisture has typically been present for a while already, working through layers you can’t see from either side.
Insulation is next, and it’s the most invisible casualty. Wet insulation loses its ability to slow heat transfer, which means the room below starts costing more to heat or cool without any obvious explanation. Compressed or waterlogged fiberglass or cellulose insulation doesn’t dry out and recover on its own, it typically needs replacement, and it can stay wet long enough to become a mold environment before anyone notices the attic at all.
Mold and mildew growth on framing and insulation is the point where a roofing problem becomes an indoor air quality problem, and it’s also the point where remediation costs start running parallel to the roofing repair itself rather than being folded into it. None of this happens on a fixed schedule. A roof with a small flashing failure in a dry climate can sit for a long stretch with minimal damage, while the same failure over a bathroom vent in a humid region can saturate framing much faster. What’s consistent is the direction of travel: small entry point, then decking, then framing, then insulation, then air quality, each stage harder and more disruptive to fix than the one before it.
If a hailstorm or windstorm is the suspected cause, document what you can see and check with your insurance company early. Homeowner policies vary by carrier and by state on what’s covered, how damage needs to be documented, and how long you have to file, so the policy itself, not general assumption, governs what happens next.
What is not a householder job
Everything in this article so far can be done with your feet on the ground or on solid attic flooring. What comes next generally can’t, and drawing that line clearly matters more in roofing than in almost any other home repair category.
Anything on a roof above a single story is not a homeowner task. The fall risk scales sharply with height, and the tools and anchoring that make higher work survivable for a professional crew aren’t something most households own or are trained to use.
Anything on a wet, mossy, steep, or frosted surface is off the table regardless of height. Moisture and moss turn roofing material into something closer to a skating rink than a walkable surface, and frost does the same thing invisibly, often melting into a slick film well after sunrise. Steep pitches remove the margin for error entirely, since a slip has almost no flat run-out before the edge.
Anything that requires both hands free while standing on a slope is also a professional job. That includes most flashing repair, underlayment work, and any task where you’d need to set down whatever you were holding onto in order to work. Roofers use harnesses, roof jacks, and toe boards specifically because the job assumes both hands will be occupied at some point.
The practical version of this boundary is simple. Use ground-level and attic observation to decide something needs attention, then call a roofer to confirm what you saw and quote the repair. A licensed roofer’s own inspection, using their equipment and training, is the appropriate next step once you’ve spotted a stain, a gap, or a soft spot from a safe vantage point.
Common questions
How many roofing quotes should I get before hiring one?
Enough to compare scope, not just price. Three quotes is a common practice because it’s usually enough to spot whether one contractor is quoting a layover while another is quoting a full tear-off, or whether one is including a decking repair allowance and another isn’t. Fewer than that and you’re often just comparing numbers without knowing what’s actually behind them.
Should I choose the lowest quote?
Not automatically. A lower number with no tear-off, no decking allowance, and reused flashing is a different job than a higher number that includes all three. Line up the scope of work side by side before comparing totals, since the cheapest quote on paper is sometimes the most expensive one once change orders start arriving mid-project.
What should I ask about insurance before hiring a roofer?
Ask for a current certificate of liability insurance and proof of workers’ compensation coverage, then confirm both directly with the insurance carrier rather than taking a printed certificate at face value. This protects you if a worker is injured on your property or if the job causes unexpected damage to your home during the work.
Do I need to climb up and check the roof myself before calling a roofer?
No. Ground-level observation with binoculars or a zoomed phone camera, paired with an attic check using a flashlight, gives you enough information to know something needs attention and to describe it accurately on the phone. The actual climb, and any repair, belongs to a professional roofer using the right equipment for the height, pitch, and surface condition involved.