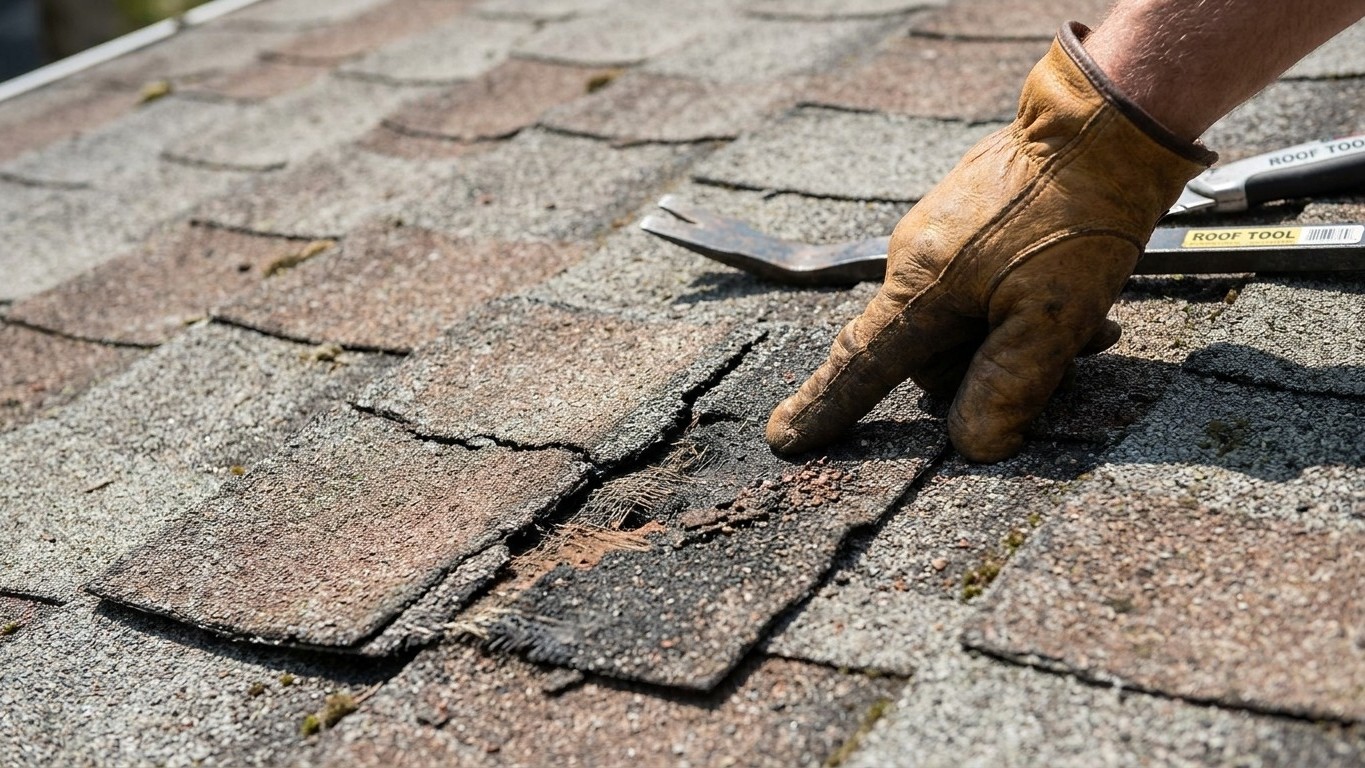

The honest answer is that a single damaged shingle or a small leak rarely tells you whether to repair or replace. What decides it is how much usable life the rest of the roof has left and whether the damage is contained or already spreading underneath the surface you can see. A roof that’s otherwise sound handles a patch well. A roof that’s tired everywhere else turns that same patch into a stopgap.
What is actually happening
The question is rarely the damage itself. It’s what condition the rest of the roof is in once you look past the spot that’s bothering you. A cracked shingle, a lifted flashing edge, a soft patch near a vent, these are symptoms. The thing to understand here is that patching a roof near the end of its useful life buys months, sometimes a season, and it often complicates the eventual replacement rather than delaying it cleanly.
Here’s the mechanism. Roofing materials age from the top down and from the edges in. Sun exposure breaks down the surface layer first, whether that’s the granule coating on asphalt shingles or the protective coating on metal panels. Once that layer thins, the material underneath starts absorbing more heat and moisture with every cycle of weather. A single repair addresses the spot that failed first, but it doesn’t reverse the aging happening everywhere else on the same roof, at roughly the same rate, because it was installed at the same time and has faced the same sun and storms.
That’s why a repair on an aging roof tends to shift the problem rather than solve it. Fix the leak over the kitchen, and six months later a different section starts failing because the whole roof was degrading in parallel. Each new repair also adds a seam, a patch edge, a fresh sealant joint, and every one of those is a future point of failure. A roofer who’s inspected hundreds of roofs will tell you the same thing: repairs multiply on a roof that’s past its prime, and at some point the labor and material going into patch after patch would have covered a meaningful share of a full replacement.
On the other hand, a roof that’s still within its working life handles isolated damage the way it’s supposed to. Storm knocked a few shingles loose? Replace them. A vent boot cracked from sun exposure? Reseal or swap it. These are contained problems on a system that’s otherwise doing its job, and a repair resolves them without setting up the next failure.
What actually separates a repair situation from a replace situation isn’t the size of the current problem. It’s whether the damage is isolated on a roof that’s structurally sound, or whether it’s the first visible sign on a roof that’s uniformly aging out. A roofer’s inspection is what tells the difference, because it looks at granule loss across the whole surface, not just the leak point, at flashing condition throughout, and at the decking underneath in more than one spot.
What you can see without climbing
You don’t need a ladder to gather most of the information that matters. A surprising amount of roof condition is visible from solid ground or from inside the attic, and both of those checks are safer starting points than getting up on the surface itself.
- Walk the perimeter with binoculars or a zoomed-in phone camera. Stand back far enough to see the whole slope and look for patches of discoloration, shingles that look curled or lifted at the edges, and any spot where the surface texture looks different from the rest, lighter, rougher, or shinier. Granule loss shows up as a change in color, often around valleys and near the edges where water runs fastest.
- Check the flashing lines from the ground. Around chimneys, vent pipes, and skylights, look for metal that’s separated from the surface, gaps, or rust streaks running down the roof below those points. These are common leak origins and often visible without magnification.
- Look at the gutters and the ground beneath the eaves. A buildup of granules in the gutter or on the driveway after rain is a sign the shingle surface is shedding material faster than normal wear would explain.
- Go into the attic with a flashlight, during daylight if possible. Turn off the attic light and look up at the underside of the roof deck. Any pinpoint of daylight coming through means there’s a gap somewhere in the roofing system above, even if you can’t see the corresponding spot from outside.
- Scan the rafters and decking for staining. Water stains often appear well below the actual entry point, since water follows the slope of the rafters before dripping. Dark streaks, warped wood, or a sagging section of decking are all signs worth Documenting with a photo and date.
- Feel the insulation, don’t just look at it. Damp insulation compresses and loses its loft. If it feels heavier or cooler than the surrounding material, moisture has been getting in for a while, even if there’s no active drip that day.
None of this requires getting on the roof, and all of it gives a roofer a head start when they do come out for a full inspection. Photographing what you find, with a note of the date and the weather at the time, also matters if you end up filing an insurance claim later.
What it costs to leave it
Leaving a known problem alone doesn’t freeze it in place. Water that gets past the roofing surface follows gravity and the path of least resistance, which usually means it travels along the decking or down a rafter before it ever shows up as a stain on the ceiling below. By the time you see a spot on the drywall, the moisture has often been moving through the structure for a while already, which is part of why the visible damage rarely matches the size of the real problem.
Wood decking that stays damp starts to lose its structural integrity gradually. It softens, then it can start to delaminate if it’s the layered type, and fasteners that used to hold tight begin to work loose as the wood around them weakens. Insulation that gets wet stops performing the way it’s supposed to, and it generally doesn’t dry out fully on its own, since the same conditions that let moisture in keep letting more in behind it. Once insulation is compressed and damp, it also creates a better environment for mold, particularly in humid climates or homes without strong attic ventilation.
None of this happens on a fixed schedule. A small leak in a well-ventilated attic in a dry climate can sit for a long stretch without turning into a visible problem. The same leak in a humid region, or in an attic with poor airflow, can show consequences much sooner. That’s why nobody can hand you a reliable timeline in months or years for how long you have before a leak becomes a bigger repair. What’s consistent is the direction: it doesn’t improve by itself, and each additional exposure to rain adds to the area affected rather than staying contained to the original spot.
If the damage was caused by a storm, hail, or wind event, your homeowner’s insurance policy is what governs whether repair or replacement costs are covered, and the details vary by policy and by state. Documentation matters here more than most people expect. Photos of the damage taken as soon as you notice it, dated notes about when you first saw a stain or a missing shingle, and a written estimate from a roofer all strengthen a claim. What isn’t useful is guessing at deadlines or coverage terms, since those are set by the specific policy and the state’s insurance regulations, not by any general rule.
What is not a householder job
Some parts of this process are safe to do yourself. Looking, photographing, checking the attic, all of that is reasonable. Getting on the roof itself is where the line sits, and it sits there for a good reason.
Anything above a single story is not a do-it-yourself inspection or repair. The fall risk changes substantially once you’re above the height of a one-story roofline, and professional roofers use harnesses, anchor points, and ladder stabilizers specifically because the risk doesn’t scale gently with height, it jumps. A surface that’s wet, mossy, steep, or frosted adds another layer of risk on top of that, since traction disappears in exactly the conditions where you’d be most tempted to go check on a leak right after it starts. And any repair that needs both hands free while you’re standing on a slope, holding a shingle in one hand and a nail gun in the other, for example, is a job that assumes training and equipment most homeowners don’t have.
This isn’t about being overly cautious. Falls from roofs are a leading cause of injury in home maintenance work, and the risk is highest precisely when people are rushing to check on damage after a storm, when the surface is still wet and visibility is poor. The safer sequence is the one described above: observe from the ground and the attic, document what you find, and bring in a professional for anything that requires being on the roof itself.
If you want a fuller picture of what a professional inspection actually checks, and how it differs from what you can see on your own, that’s covered in more depth on the roof inspection page. And when the answer comes back as repair or replace and you need to bring in a professional to do the work, the practical side of finding and vetting one is covered on the hiring a roofer page.
Common questions
Can I repair just one section of the roof and leave the rest alone?
Yes, if the rest of the roof is structurally sound and the damage is genuinely contained to that section. A roofer’s inspection is what confirms that, since it looks at granule loss, flashing condition, and decking soundness across the whole roof, not just the visibly damaged area.
Does a small leak always mean I need a full replacement?
No. A small, isolated leak on a roof that’s otherwise in good condition is typically a repair. It becomes a replacement conversation when the same underlying aging shows up in multiple places, which an inspection can identify even before more leaks appear.
How do I know if my insurance will cover the repair or replacement?
That depends entirely on your specific policy and your state’s insurance rules, particularly for storm, hail, or wind damage. Document the damage with dated photos as soon as you find it and get a written estimate, since both strengthen any claim you file.
Is it safe to check for roof damage myself after a storm?
It’s safe to check from the ground with binoculars or a zoomed phone camera, and from inside the attic with a flashlight. Getting on the roof itself, especially right after a storm when surfaces are wet, is not a householder task and should be left to a professional.