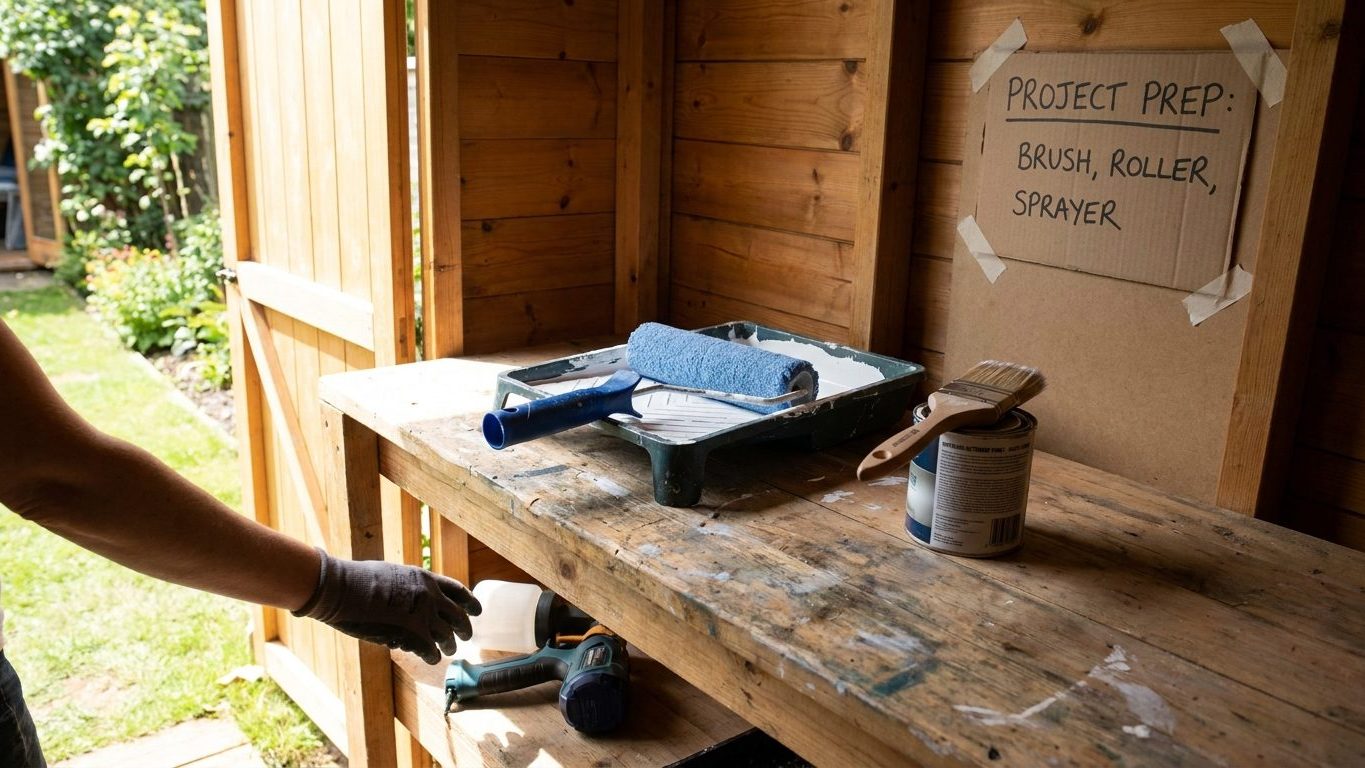

A roller lays a thick, textured film and covers flat walls and ceilings fast. A brush lays a thinner, controlled film and is the only tool that can cut a clean line at a corner, a ceiling edge, or a piece of trim. A sprayer lays no texture at all and is the right call for paneled doors, spindles, and anything with a profile a roller can’t reach into. Pick the tool by the shape of the surface in front of you, not by habit, and expect most rooms to need at least two of the three before the job is done.
What is actually going on

Every one of these tools does the same job: it moves paint from a container onto a surface. What differs is film thickness and texture, and that difference is the entire reason to choose one tool over another for a given spot. A roller loads up with paint and deposits a thick, even film, but the nap on the cover presses a slight orange-peel texture into that film as it rolls. A brush lays down a thinner film, and if you work it with any deliberate direction, it leaves faint strokes running the way you moved it. A sprayer breaks paint into a fine mist and deposits an extremely thin, texture-free coat, because nothing drags across the surface to leave a pattern behind.
That’s why a roller is the default for flat walls and ceilings. Those surfaces are large, rarely examined up close, and a bit of texture disappears at normal viewing distance, while the thicker film hides small imperfections in one or two coats. A brush is the only tool with enough control to cut a straight line where a wall meets a ceiling, a window frame, or a piece of trim, because you can watch exactly where the bristle tip lands as you work. A roller dragged into that same corner either misses it entirely or smears paint onto the surface next to it.
A sprayer earns its place on anything with a complicated profile: paneled doors, stair spindles, louvered shutters, cabinet fronts with molded detail. A roller can’t get into a groove, and a brush leaves visible strokes across every flat panel face, but atomized paint reaches into recesses and lays down evenly no matter the shape underneath. The tradeoff is that a sprayer puts as much paint into the air as it does onto the surface. Overspray drifts, and anything nearby that isn’t masked off, including flooring, furniture, and fixtures, picks up a fine coat of paint dust. That’s the real reason sprayers show up less often in occupied homes than the marketing suggests: the containment work usually takes longer than the spraying itself.
Whichever tool ends up in your hand, none of it does anything useful over a wall that hasn’t been cleaned, sanded, and patched first. See Interior Painting: Preparation Is Most of the Work for that stage, because skipping it undoes whatever advantage the right tool gives you. And whatever tool is in use, an open can of paint in a closed room means fumes build up whether you notice the smell or not. Crack a window, run a fan that exhausts outside, and keep air moving for the whole job, not just while you’re actively rolling or spraying.
The nap on a roller cover is not a minor detail either. A thick nap holds more paint and pushes more texture into the wall, while a shorter nap lays a smoother, thinner coat suited to surfaces where a flatter finish matters. See Choosing a Roller: The Nap Decides the Finish for how to match nap length to the surface you’re covering.
Doing it
Most rooms need more than one tool, because most rooms have both flat expanses and edges. The order you use them in, and exactly where you switch, is what decides whether the finished wall reads as one continuous coat or two mismatched ones.
| Surface | Best tool | Why |
|---|---|---|
| Flat wall or ceiling field | Roller | Even, thick film, fast, texture invisible at normal viewing distance |
| Corners, edges, trim lines | Brush | Only tool with fine enough control to hold a straight line |
| Paneled doors, spindles, louvers | Sprayer | Atomized paint reaches recesses a roller or brush can’t follow |
| Small touch-ups, patched spots | Brush | Feathering a small area in by hand blends better than reloading a whole roller |
Cutting in and rolling a wall
On a typical wall, the two tools that matter are brush and roller, and the order is fixed:
- Cut in the edges with a brush first, running a band two to three inches wide along the ceiling line, into corners, and around trim. Skip this step and the roller either can’t reach the corner cleanly or gets dragged too close, rolling texture onto the trim it was meant to avoid.
- Work in small sections rather than cutting in the whole room before you ever pick up the roller. If the brushed strip dries before the roller reaches it, that strip and the rolled field dry to slightly different sheens, and the seam between them stays visible under raking light.
- Load the roller evenly and run it in overlapping W or M shaped passes rather than straight up-and-down strokes. A roller loaded unevenly, or worked in one direction only, leaves visible banding where one pass is thicker than the next.
- Maintain a wet edge, working into the previous section before it starts to flash, meaning the dulling that happens as a coat begins to set. Stopping mid-wall and returning later leaves a lap mark that shows once the whole wall has dried.
- If a section calls for a sprayer, mask off everything not being painted, including the floor, adjoining walls, and any fixtures, before the first pass, not partway through. Spraying without full containment first means cleaning overspray off surfaces you never meant to touch, and that cleanup usually takes longer than the masking would have.
- Move the sprayer in overlapping passes held at a constant distance from the surface. Slowing down or lingering in one spot deposits more paint than the surrounding area, and it shows up as a wet-looking patch once everything dries.
Once the job is done, how you treat the tools matters for the next one as much as this one. A brush or roller left to dry with paint still in it is usually ruined. See Cleaning Brushes, and Disposing of What Is Left for getting a tool back to usable condition and disposing of leftover paint properly.
What it looks like when it goes wrong
Each tool fails in its own recognizable way, and knowing which failure you’re looking at tells you whether to fix it now or start that section over from scratch.
Roller defects

Lap marks show up as faint stripes or a slight sheen change where one roller pass overlapped a section that had already begun to dry. They read most clearly in raking light from a window or lamp positioned low and to one side. A light lap mark can sometimes be blended out by re-rolling the entire wall in one wet pass if you catch it during the job. Once the paint has fully cured, the only fix is another full coat over the whole wall, not a spot patch. Roller marks that look like a series of parallel ridges usually mean the nap was too coarse for the paint being used, or the roller was overloaded, and that texture is baked into the film. It can only be removed by sanding it back and recoating.
Holidays, meaning thin or missed spots where the old wall color still shows through, are the easiest defect on this list to fix. Catch them while the coat is still workable and go back over them with the roller before moving on.
Brush defects

Visible brush strokes that stand up as a ridge, sometimes called ropiness, happen when the paint was worked too long after it started to set, or applied too thick in one pass. Once dry, this is a texture problem rather than a color problem, and it will telegraph through the next coat unless it’s sanded smooth first. A brush mark caught while still wet can often be relaxed out by dragging the brush lightly over it one more time in a single direction. A brush mark that’s already dry is permanent until sanded.
Sprayer defects

Runs and sags, where paint pools and slides down the surface in a visible tear-shaped drip, happen when too much paint is laid down in a single pass or the gun lingers too long in one spot. A run caught while still wet can be brushed out on the spot. A dried run has to be sanded flat and recoated, because a sprayed film that thick doesn’t level on its own once it’s set. Dry spray, a rough, gritty texture instead of a smooth film, means the gun was held too far from the surface or the paint began drying in the air before it landed, and this is also a sand-and-recoat problem, not a quick touch-up. Overspray on surfaces that weren’t meant to be painted is usually the costliest mistake on this list, because it lands on flooring, fixtures, and furniture as a fine dust that’s much harder to remove once dry than any of the wet defects above.
What to settle before you open the tin
Before you pick up any of these three tools, work out what you’re actually painting and how it will be lit once you’re finished. Overhead and raking light, the kind that comes low and sideways from a window or a lamp, shows up every lap mark, ridge, and roller stipple you leave behind. Stand where the strongest light source in the room will hit the wall and look at the surface from that angle before you start, so you know which finish quality you’re actually being held to once the job is called done.
Surface, substrate, and age
Check the surface itself before choosing a tool. A wall with existing texture, patches, or an uneven sheen from an old coat needs to be sanded and cleaned before any tool goes near it, and glossy existing paint won’t hold a new coat without being dulled first. Plaster, drywall, and old painted wood trim all take paint differently, and none of that is fixed by picking a different tool. No tool choice compensates for a surface that wasn’t prepped.
If the building is old and you don’t know its paint history, do not sand, scrape, or dry-spray any existing paint until you’ve ruled out lead. Disturbing old paint by power-sanding or dry scraping is one of the main ways lead dust becomes airborne, and this is not something to guess about. Have the paint tested or check the EPA’s guidance on lead-safe work practices before doing any surface prep that generates dust or debris.
Confirm ventilation before you start, not partway through. A sprayer especially needs airflow moving through and out of the room for the entire job, because atomized paint stays suspended in the air far longer than anything applied by brush or roller. Open a window on more than one side of the room if you can manage cross ventilation, and run an exhaust fan if the room has one.
Finally, settle how much of the room you can realistically finish in one continuous session. A wall started and left half-done for hours will show a lap mark where the fresh section meets the section that had time to set. Plan the room in sections you can actually complete wet-edge to wet-edge, sized by how much wall you can physically cover before the leading edge starts to dry, not by the clock.
Common questions
Can I just cut in with a small roller instead of a brush?
Mini rollers and foam edging tools exist, but they still can’t match a brush at a true corner. Most of them leave a slightly rounded or uneven line where a brush would hold straight, so they work better for touch-ups than for the first cut-in on a fresh wall.
Is a sprayer actually faster for painting one room?
Usually not. The masking and containment work for a single room often takes longer than brushing and rolling it would have. Sprayers pay off on repetitive, detailed surfaces like a full set of cabinet doors or a staircase full of spindles, or on jobs spanning several rooms where the setup cost is spread out.
Why does my roller leave tiny bubbles in the finish?
That’s usually from rolling too fast or going back over an area that’s already tacky, which whips air into the wet film. Slowing down, loading the roller fully before each pass, and avoiding repeated passes over the same spot once it starts to set will usually stop it.
Can I use the same brush for a water-based paint job right after an oil-based one?
Not without cleaning it thoroughly in between. Residue from an oil-based paint left in the bristles will contaminate a water-based coat and can cause spotting or poor adhesion. Clean the brush completely, and let it dry fully, before switching paint types.