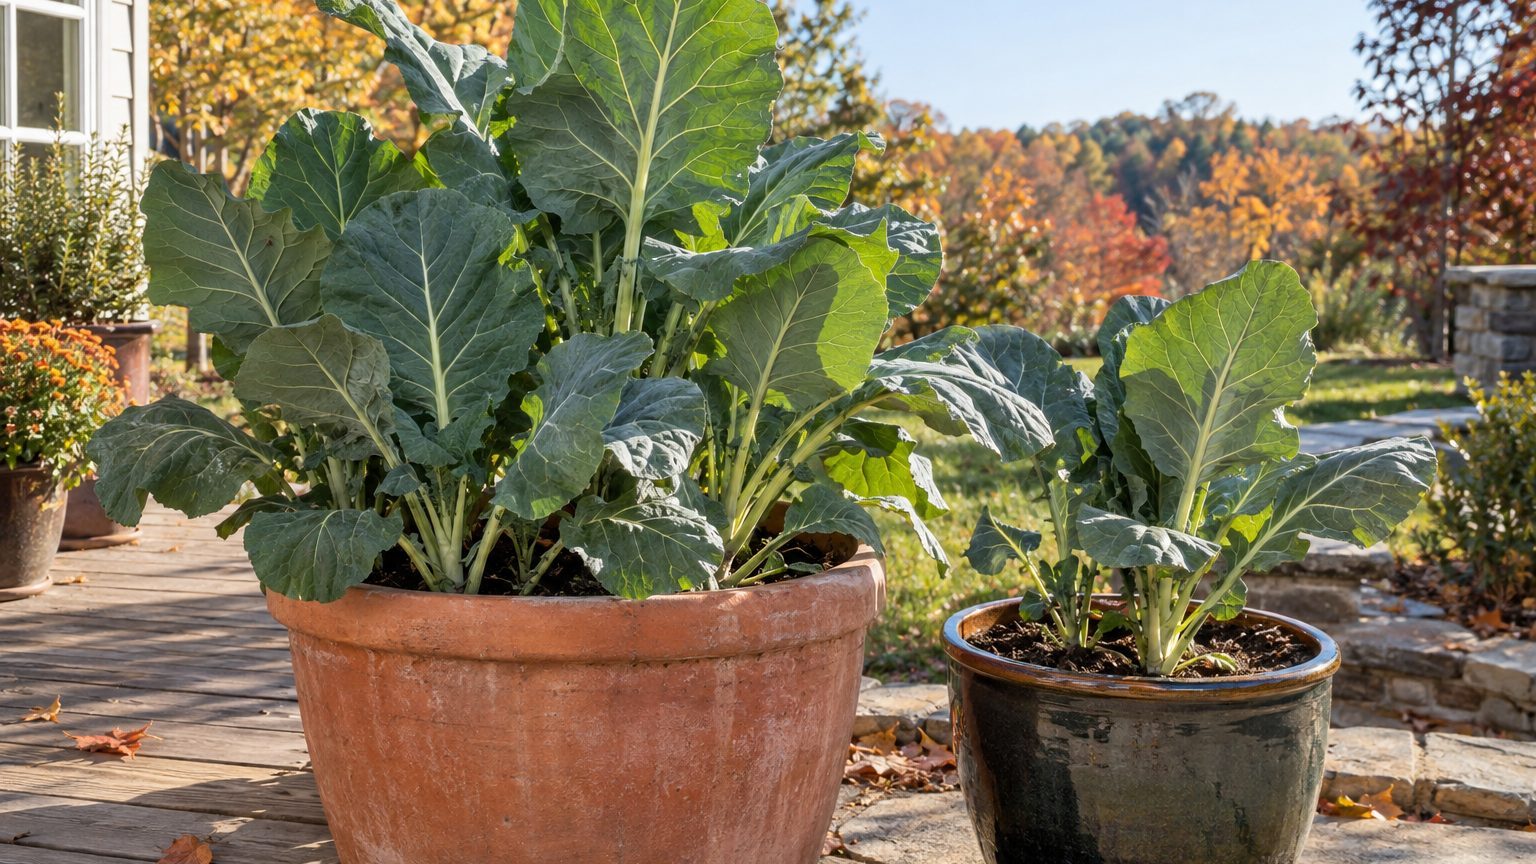

A single collard plant grows happily in a 5-gallon container, and two or three share a pot of 15 gallons or more without trouble. Give them a quality potting mix, six hours of sun, steady moisture, and regular feeding, and a container will deliver leaves for months. The real limits are root room and water, not space.
That makes collards one of the more forgiving greens for a patio, deck, or driveway edge. They are a cabbage relative (Brassica oleracea) bred to make leaves instead of a head, and they tolerate both summer heat and hard frost better than kale, spinach, or most lettuces. The sections below cover pot size, soil, feeding, pests, and the harvest technique that keeps a pot producing. For the bigger picture on garden-bed culture, see Growing Collards: One Planting, Months of Harvest.
Pot size, soil, and where to put it
Collards form a deep taproot and a wide mat of feeder roots, so a shallow window box will stunt them. Plan on a minimum of 12 inches of soil depth and a 12 to 14 inch width for one plant, which works out to roughly 5 gallons. A 10-gallon pot is more comfortable. If you want a mini planting of two or three plants, a half whiskey barrel or a 20 inch pot gives them room without constant competition. In the ground, collards are usually spaced 18 to 24 inches apart, and containers can run a little tighter only because you control the feeding and watering.
Material matters less than drainage. Every pot needs holes in the bottom, and a pot without them will drown the roots after a few heavy rains. Fabric grow bags drain fast and keep roots cooler, which helps in the Deep South, though they dry out sooner. Plastic holds moisture longer. Glazed ceramic looks nice but is heavy and unforgiving to move. Dark-colored pots in full afternoon sun can heat the root zone well past what the plant likes, so in Georgia, Texas, or Alabama summers, a lighter color or a spot with afternoon shade pays off.
Fill the container with a bagged potting mix, not soil dug from the yard. Garden soil compacts in a pot, drains poorly, and can carry weeds and disease. A good mix with some compost blended in (about one part compost to three parts mix) gives the plant nutrients and structure. Collards prefer a pH of about 6.0 to 7.0, and most commercial mixes land in that range already. Skip the layer of gravel at the bottom of the pot, a stubborn myth; it actually raises the soggy zone closer to the roots.
Move the pot into position before filling it. A 15-gallon container of damp mix can weigh well over 50 pounds, and nobody wants to drag that across a deck. Put it where it gets at least six hours of direct sun. Collards will make leaves in four hours, but growth is slower and the stems get leggy. In the hottest regions (USDA zones 8 through 10 in summer), a spot with morning sun and light afternoon shade keeps the leaves from toughening.
Planting, feeding, and variety choice
Transplants are the easy route. Set them at the same depth they grew in the nursery cell, or slightly deeper, up to the first true leaves, since collards can root along a buried stem. Seeds also work: sow them about a half inch deep, thin to the strongest seedling, and expect germination in 5 to 10 days when the soil sits between 60 and 85°F. From transplant, plants typically reach full harvest size in about 60 to 75 days, though you can start picking small leaves much earlier.
Timing depends on your climate. In most of the country, plant in early spring, about four to six weeks before the last frost, or in late summer for a fall crop, about six to eight weeks before the first frost. A fall planting often beats a spring one because the plants mature as temperatures drop. Cold sweetens collards: after a few frosts, the plant converts starches to sugars as a form of antifreeze, and the leaves taste milder. In zones 8 through 10, you can plant through fall and into winter. Gardeners in the North can treat spring planting as an early start and lean on fall for the best flavor.
Variety changes how well a plant fits a pot. Heirloom types such as Georgia Southern can reach 3 feet or more and may flop over in a lightweight container, so they want the bigger pots and a stake or a spot out of the wind. Compact, slower-bolting varieties such as Vates stay shorter and are a sensible first pick for a 5 to 10 gallon container. Seed catalogs describe mature height, and that single number is worth checking before you buy.
Feeding is where containers differ most from garden beds. Collards are heavy feeders, especially of nitrogen, and each watering flushes some nutrients out through the drainage holes. Mix a slow-release, balanced granular fertilizer into the top few inches of mix at planting, following the label rate for container vegetables. Then supplement with a diluted liquid fertilizer, such as fish emulsion or a water-soluble vegetable feed, every two to three weeks once the plant is established. Pale, yellowing lower leaves in a pot that is otherwise well watered usually mean the plant is hungry for nitrogen. Overfeeding is a risk as well, since too much fertilizer in a small volume of soil can scorch roots, so stick with label rates.
Water, heat, and the usual pests
Containers dry out faster than ground soil, and collards punish uneven watering with tough, bitter leaves and early bolting. The target is soil that feels evenly damp an inch or two down, never soggy and never bone dry. In summer, that can mean watering daily, sometimes twice on a windy 95°F afternoon with a small pot. A finger test beats a calendar: push a finger into the mix, and water when the top inch feels dry. Water until it runs out the bottom, then stop.
A 2 inch layer of mulch (shredded leaves, straw, or bark fines) on top of the mix slows evaporation and keeps the root zone cooler. Self-watering containers and drip lines on a timer are worth considering if you travel in July. A rough rule of thumb for in-ground collards is about an inch of water per week, but a pot in full sun in the South will often need more than that, applied in smaller, more frequent doses.
Heat is the other stress. Collards are among the most heat tolerant of the brassicas, but sustained temperatures above about 85°F slow growth, and long hot spells can trigger flowering. Shade cloth rated at 30 to 40 percent can take the edge off. If a plant does send up a flower stalk, the lower leaves are usually still edible, though they get stronger in flavor, and you can pull the plant and replant for fall.
Pests find collards in containers as readily as in the ground, which surprises people who expect a pot to be a safe zone. The usual suspects are imported cabbageworm, cabbage looper, and diamondback moth caterpillars, plus aphids on the undersides of leaves. Small white or yellow moths fluttering around the pot are the early warning sign. A lightweight floating row cover draped over a hoop or stakes keeps the moths from laying eggs, and it is the single most effective step. Check leaf undersides weekly for egg clusters and tiny green caterpillars. If caterpillars appear anyway, hand-pick them or spray with Bacillus thuringiensis (Bt), a bacterial product that targets caterpillars and is labeled for edible crops. Aphids often wash off with a firm spray of water.
Rotating the pot mix matters too. Brassicas in the same soil year after year invite disease, such as clubroot and black rot. Each season, either replace the mix or, at minimum, avoid planting cabbage, broccoli, kale, or other brassicas in it again. Spent potting mix works fine in a flower bed or as compost.
Harvesting so the pot keeps producing
The cut-and-come-again method is what makes a container of collards worth the space. Start picking when the lower leaves are about 8 to 10 inches long, roughly the size of your hand or larger. Snap or cut the outer, lowest leaves at the stem and leave the central growing point and the upper crown of leaves intact. Take no more than about a third of the foliage at once so the plant can keep photosynthesizing. A healthy plant puts out new leaves from the center, and you can return every week or so for another picking.
Younger leaves, picked at 4 to 6 inches, are tender enough to eat in salads or quick sautés, while larger leaves suit the traditional long braise with smoked meat or a vegetarian equivalent. Midribs on big leaves are tough, and many cooks strip them out before slicing. Harvest in the cool of the morning and refrigerate unwashed leaves in a bag lined with a paper towel, where they keep for about a week.
Because one plant gives a steady trickle instead of a single large harvest, a household that eats collards regularly will want several pots. Staggering them solves the problem: plant a new container every three or four weeks, and as one plant slows, the next hits its stride. The approach is covered in detail in Succession Sowing Greens for a Continuous Supply. Small plantings also work well as a front-of-house display, since the blue-green, waxy leaves look good next to herbs and flowers.
Cold weather doesn’t have to end the season. Established collards handle temperatures down into the teens, and a pot is actually easier to protect than a bed, since you can slide it against a south-facing wall or cover it with a frost blanket. Roots in a pot are more exposed than roots in the ground, though, so insulation around the container itself (wrapped burlap, bubble wrap, or a cluster of pots huddled together) makes a real difference. The full cold-season routine, including when to cover and when to leave plants alone, is laid out in Collards Standing Through the Winter.
One last practical detail: a collard plant that survives winter in a pot will often flower the following spring, since it is a biennial. Let a few bloom, and the yellow flowers draw early pollinators at a time when little else is open. That’s a bonus, not a reason to skip the replanting.