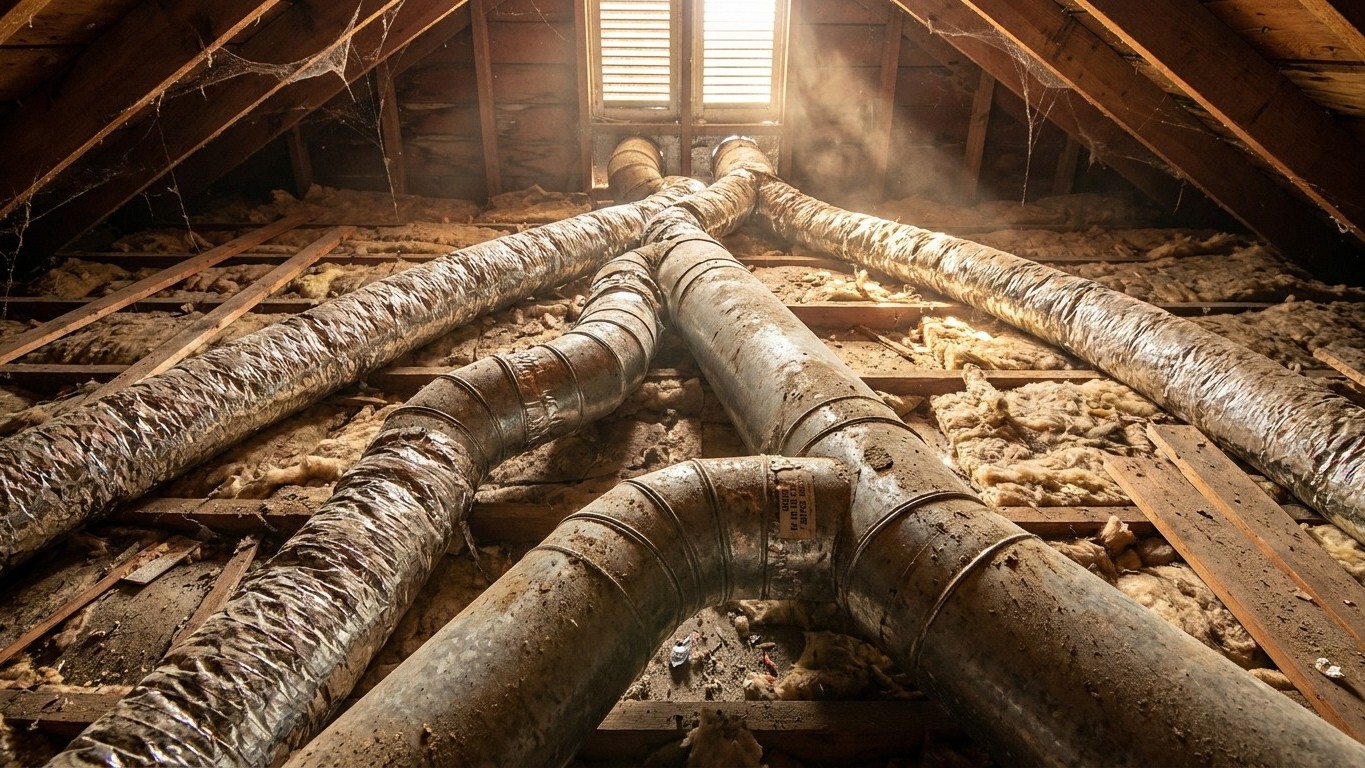

Ductwork running through an unconditioned attic or crawlspace sits outside your home’s thermal envelope, even though it’s carrying air meant for living rooms and bedrooms. That location is precisely why insulation matters: without it, the air inside the duct trades temperature with the space around it before it ever reaches a register. The fix isn’t complicated, but skipping it costs real comfort and real money every single season.
A duct in an attic is outside the house
Here’s the mental shift that makes everything else on this page make sense: insulation and the air barrier are what define “inside” a house. A duct running through an attic, above the insulation layer, is not inside your home in any way that matters thermally. It’s outside, sitting in a space that behaves more like the outdoors than like your living room.
That distinction has consequences you can feel. On a July afternoon, an attic can sit well above the outdoor air temperature, sometimes by a wide margin, because trapped heat under the roof deck has nowhere to go. A duct carrying 55-degree cooled air through that environment is fighting a losing battle the entire trip from the air handler to the supply register. In winter, the same duct sits in an attic that can be nearly as cold as the outside air, so heated air loses ground before it ever reaches the room.
This matters for a specific reason: the loss happens through the metal or flex-duct wall itself, by conduction, even when every joint is perfectly sealed and not a single cubic foot of air is escaping. A duct can be completely airtight and still deliver air that’s noticeably warmer or cooler than what left the equipment, simply because it spent minutes traveling through a hostile attic.
That’s worth separating from the leak problem, because the two failures get fixed in different ways. A leaking duct loses actual air, cubic feet per minute, out through a gap or a disconnected joint. A conductive loss doesn’t lose air volume at all, it loses temperature, through the duct material itself. Sealing stops the first problem. Insulation stops the second. A duct system in an attic usually needs both, and treating them as the same fix is where a lot of DIY attempts go wrong.
One more thing worth knowing before you climb into an attic with a roll of insulation: not every house has this problem to solve. According to the U.S. Energy Information Administration’s 2020 Residential Energy Consumption Survey, 67% of U.S. homes run central air conditioning, and 26% run individual units instead, a ductless mini-split, a window or wall unit, or a portable unit. A house heated by radiators, hydronic baseboard, or a ductless mini-split has no ducts at all. If that’s your setup, this entire page doesn’t apply to your equipment, and no amount of attic insulation will change how that system performs.
Seal before you insulate
Order matters here, and getting it backwards wastes the work. Wrapping insulation around a duct joint that’s already leaking doesn’t fix the leak, it just hides it. The gap keeps losing air, you just can’t see it anymore, and the insulation traps the escaping heated or cooled air against the duct instead of letting it dissipate visibly enough to notice something’s wrong.
The scale of that leak problem is bigger than most homeowners assume. According to ENERGY STAR, “In a typical house, however, about 20 to 30 percent of the air that moves through the duct system is lost due to leaks, holes, and poorly connected ducts.” That’s air your equipment paid to heat or cool, vanishing into an attic or crawlspace before it ever reaches a room. Insulating over that kind of loss doesn’t recover a single cubic foot of it.
The right sequence looks like this:
- Inspect every accessible joint, boot, and connection for gaps, disconnected sections, or crushed flex duct.
- Fasten mechanically first: screws or sheet-metal straps at every connection, because sealant alone can’t hold a joint together under airflow pressure.
- Seal the mechanically fastened joints with mastic or foil tape rated for duct use, covering seams completely.
- Insulate only after the sealing step is done and the mastic or tape has had time to set.
- Check the vapor side in a humid climate, since the outer vapor barrier on duct insulation is doing separate work from the insulation itself, and that’s the subject of the next section.
Skipping straight to insulation because it’s the more satisfying, visible step is a common mistake. It feels like progress, and it does add some conductive resistance. But if the underlying joints are leaking 20 to 30 percent of the system’s air, the insulation is dressing up a problem that’s still actively costing money underneath the wrap.
The trap: condensation
This is the failure that turns a reasonable insulation project into a water stain on the ceiling below. A duct carrying cooled air runs colder than the humid attic air surrounding it. Where that cold metal surface meets warm, moisture-laden air, condensation forms, the same way a cold glass of iced tea sweats on a summer porch.
Insulating that duct without an intact vapor barrier on the outside of the insulation doesn’t solve this, it can make it worse. Moisture from the attic air can work its way through the insulation to the cold duct surface, condense there, and then have nowhere to go. It sits inside the insulation layer instead of evaporating off an exposed metal surface, which means the insulation stays wet, loses much of its effectiveness, and creates a steady drip that a homeowner often doesn’t notice until it’s already stained a ceiling or grown something unwelcome.
This matters most in hot, humid climates, the Gulf Coast, the Southeast, and anywhere summer dew points run high for months at a stretch. In drier climate zones, attic air simply doesn’t carry enough moisture for this to become a serious issue, even on a poorly wrapped duct. Climate is the deciding factor here, more than anything about the duct itself.
Early signs are worth knowing before they become a repair project. A damp patch or discoloration on a ceiling directly below a duct run, especially one that appears only in summer, is a strong clue. A musty smell near a supply register, insulation that feels damp or compressed when you can reach it, or foil-faced insulation with a torn or gapped seam are all early flags. None of them require a specialist to spot, just a flashlight and a willingness to look.
The practical takeaway: if you’re insulating ducts yourself in a humid region, the vapor barrier facing needs to stay continuous and sealed at every seam, not just draped over the duct. A gap in that facing is where the moisture gets in, and once it’s inside the insulation, it doesn’t dry out on its own.
How far to go
An accessible attic with standing room and a walkable path is the easiest case. Supply and return trunks, the boots, and any exposed flex duct can usually be wrapped and sealed by a reasonably confident homeowner, provided the sealing step happens first and the vapor-barrier facing stays intact and taped at every seam. This is realistic weekend-scale work for someone comfortable in an attic.
A crawlspace is trickier. Headroom is often limited, ducts may run close to damp soil, and a vapor barrier on the ground itself becomes part of the equation alongside the duct wrap. Reachable sections near an access hatch are fair game for a DIY pass. Runs buried under insulation, blocked by framing, or requiring a full crawl on your stomach with a flashlight in your teeth are where a lot of people call it done and bring in someone who does this for a living.
There’s no single insulation thickness or R-value that applies everywhere. Requirements vary by climate zone, and giving one national number here would be more misleading than helpful without a sourced table to back it up. What’s consistent across zones is the sequence: seal first, insulate second, and keep the vapor barrier facing continuous in humid regions.
At a certain point, the honest answer isn’t “insulate harder.” If ductwork runs through a large chunk of unconditioned attic, or through a vented crawlspace that never gets warmer than the outside air, the better long-term fix is moving those ducts into conditioned space, dropping a soffit, running them through a conditioned basement, or burying them properly under attic insulation so they sit below the thermal boundary instead of above it. None of that is a weekend project. It usually means opening up ceilings or reworking insulation depth across a large area, and it’s the kind of job where a home-performance contractor or an HVAC pro earns their fee. Knowing when to stop wrapping duct tape around a problem and start planning a real relocation is, honestly, the more valuable skill here than any insulation technique.
Common questions
Does duct insulation stop air leaks?
No. Insulation slows heat transfer through the duct wall, but it does nothing for a gap, disconnected joint, or hole that’s actually losing air. Leaks need mechanical fastening and mastic or foil tape sealing first, insulation is a separate, later step.
Can I insulate ducts in a crawlspace myself?
Sections you can comfortably reach near an access hatch, yes. Runs buried deep under a house with minimal headroom or damp soil conditions are where DIY work gets both harder and riskier, and that’s usually the point to bring in a professional.
Why does my duct insulation feel damp?
That’s usually condensation forming where humid air meets a cold duct surface, often because the vapor barrier facing has a gap or torn seam somewhere along the run. It’s most common in hot, humid climates and needs an intact, sealed vapor barrier to fix, not more insulation piled on top.
My house has a ductless mini-split. Does any of this apply to me?
No. Mini-splits, along with radiators and hydronic baseboard systems, don’t use ductwork at all, so there’s no duct to insulate or seal. This page, and the sealing and insulating steps in it, only apply to central, air-pulse systems that move conditioned air through ducts.