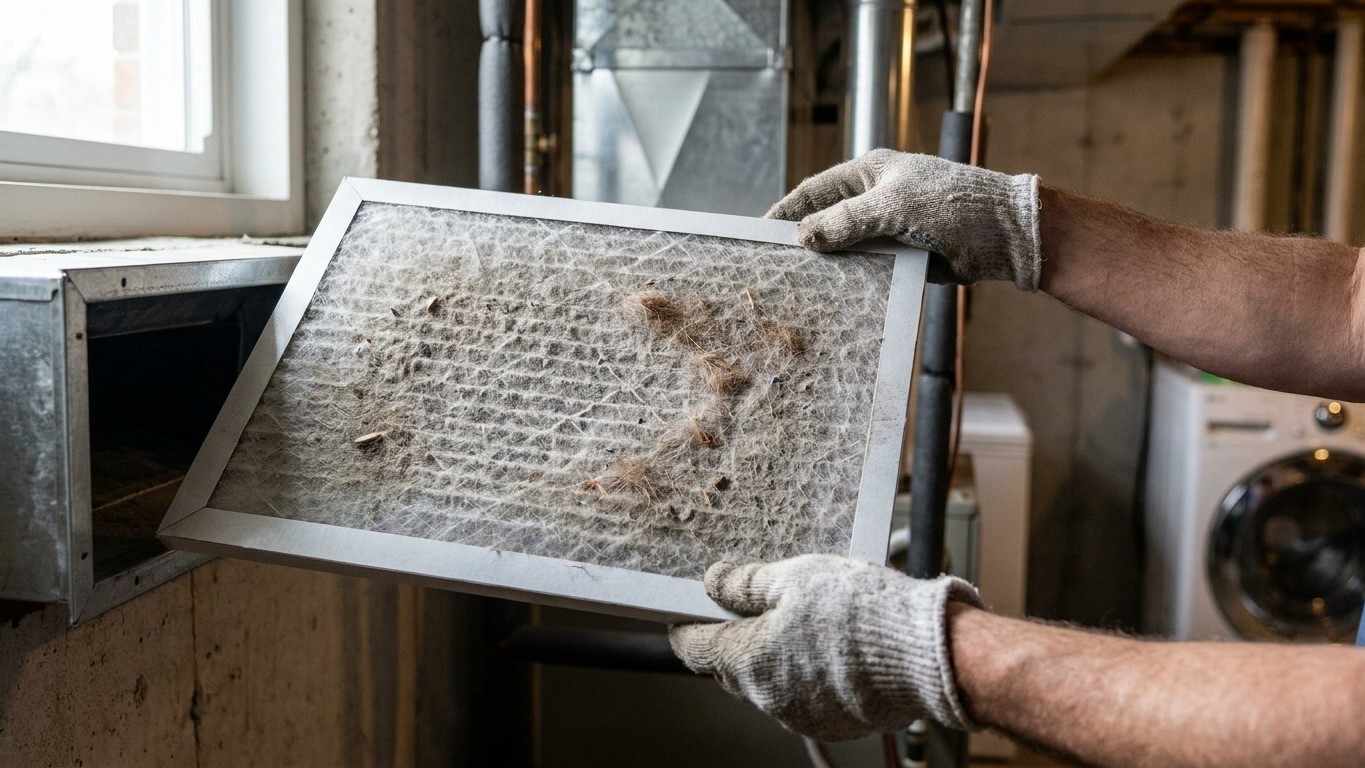

ENERGY STAR’s maintenance guidance is unambiguous on this point: filters get checked every 30 days, not every season, not “when they look dirty.” That single cadence applies whether your home runs on a furnace, a central air conditioner, or a heat pump, and treating it as a furnace-only habit is where most households get the schedule wrong.
The Filter, Once a Month
Why one schedule covers three machines
Here’s the part that trips people up: a filter isn’t a furnace part or an AC part. It sits in the return air path, and every piece of equipment that pulls air through that path, whether it’s heating, cooling, or a heat pump doing both jobs in one box, pushes air across the same mesh. ENERGY STAR states it plainly: “Inspect, clean, or change air filters once a month in your central air conditioner, furnace, and/or heat pump.” Notice the three nouns in that sentence. A heat pump owner who assumes filter talk is a furnace topic is skipping a check that applies to them just as much, more, since heat pumps run in both summer and winter cycles and rack up more total operating hours across a year than a furnace alone.
What actually clogs the mesh
The mechanism is mundane, which is exactly why it gets ignored. Every cubic foot of air pulled through your return duct carries dust, pet dander, fabric fibers, and whatever’s airborne in your particular house. The filter’s job is to catch that debris before it reaches the blower and coil. Each month of run time adds another layer to what’s already trapped, and the buildup isn’t gradual in the way people expect. A filter can look barely used at three weeks and noticeably grayed by day thirty, because the last layers of dust accumulate on top of a mat that’s already partially blocked, not on open mesh. That’s the reason a fixed monthly check beats a “looks fine” judgment call: by the time clogging is visible to the eye, airflow resistance has usually been climbing for a while.
How to tell, in your own house
The checks, in order
The sequence below starts with what costs nothing and ends with what needs a professional. Skipping ahead defeats the purpose, since each step either confirms or rules out what the previous one found.
- Pull the filter and hold it up to a light. If light passes through evenly, it’s still doing its job. If you see a gray or brown mat with no visible light coming through, that’s your answer, no tools required.
- Check the date, not just the look. Mark a calendar or set a phone reminder the day you install a new filter. A filter that “looks okay” at the 30-day mark still gets swapped, because the visual check and the calendar check are catching different things: one catches heavy debris, the other catches the slow buildup that isn’t obvious yet.
- Listen to the blower. A system straining against a clogged filter often runs longer per cycle and sounds like it’s working harder to push the same amount of air. If cycles feel longer than they used to, without any weather explanation, the filter is a five-minute thing to rule out before assuming anything else.
- Watch supply vents for weak airflow. Hold your hand near a vent in a room farthest from the unit. Noticeably weaker flow than you remember, combined with a filter that’s overdue, points to restricted airflow rather than a duct or equipment problem.
- Call a technician if the filter is clean and the symptoms persist. This is the line. Once you’ve replaced the filter and the system still runs long cycles, makes new noises, or the airflow stays weak, you’re past what a filter swap can fix. That points toward the blower motor, the coil, or duct static pressure, and diagnosing those requires equipment and training a homeowner doesn’t have on hand.
Where the boundary actually sits
Homeowner work stops at the filter itself and at what you can observe from outside the cabinet. Opening the furnace or air handler to inspect the blower wheel, the evaporator coil, or the electrical components isn’t a DIY step, not because it’s complicated to look at, but because those components carry electrical risk and because misdiagnosing what you’re seeing can lead to unnecessary part replacement. A clean filter and continued poor performance is the exact signal that tells you it’s time to hand the problem to someone who can measure static pressure and airflow with instruments, rather than guess from the outside.
What it costs you to ignore it
Comfort goes first
A restricted filter forces the blower to pull air through a smaller effective opening, and the system compensates by running longer to move the same volume of conditioned air into your rooms. That shows up first as uneven comfort: rooms farthest from the unit cool or heat more slowly, cycles run longer than they should, and the thermostat takes longer to satisfy. None of that reads as an emergency, which is exactly why it gets tolerated for months before anyone traces it back to the filter.
The equipment absorbs the strain next
Longer, harder cycles don’t just cost comfort, they load the blower motor and, over time, the coil. A coil starved of proper airflow runs colder than it’s designed to and can start collecting condensation or frost in conditions where a properly ventilated coil wouldn’t. That’s a mechanical strain question, not a hypothetical one: the components in a heating and cooling system are engineered around a certain airflow range, and a clogged filter pushes the system outside that range every time it runs.
Then the bill catches up
A blower working harder to push the same air pulls more electricity to do it, and a system running longer cycles simply operates more hours per day than it would with clear airflow. Neither of those facts requires a specific number to matter: any homeowner who’s ever compared a sluggish system to a freshly serviced one has felt the difference in how long the equipment runs before the house feels right. The filter is the cheapest, fastest point of control in that whole chain, and it’s also the one step nobody needs a technician to check.