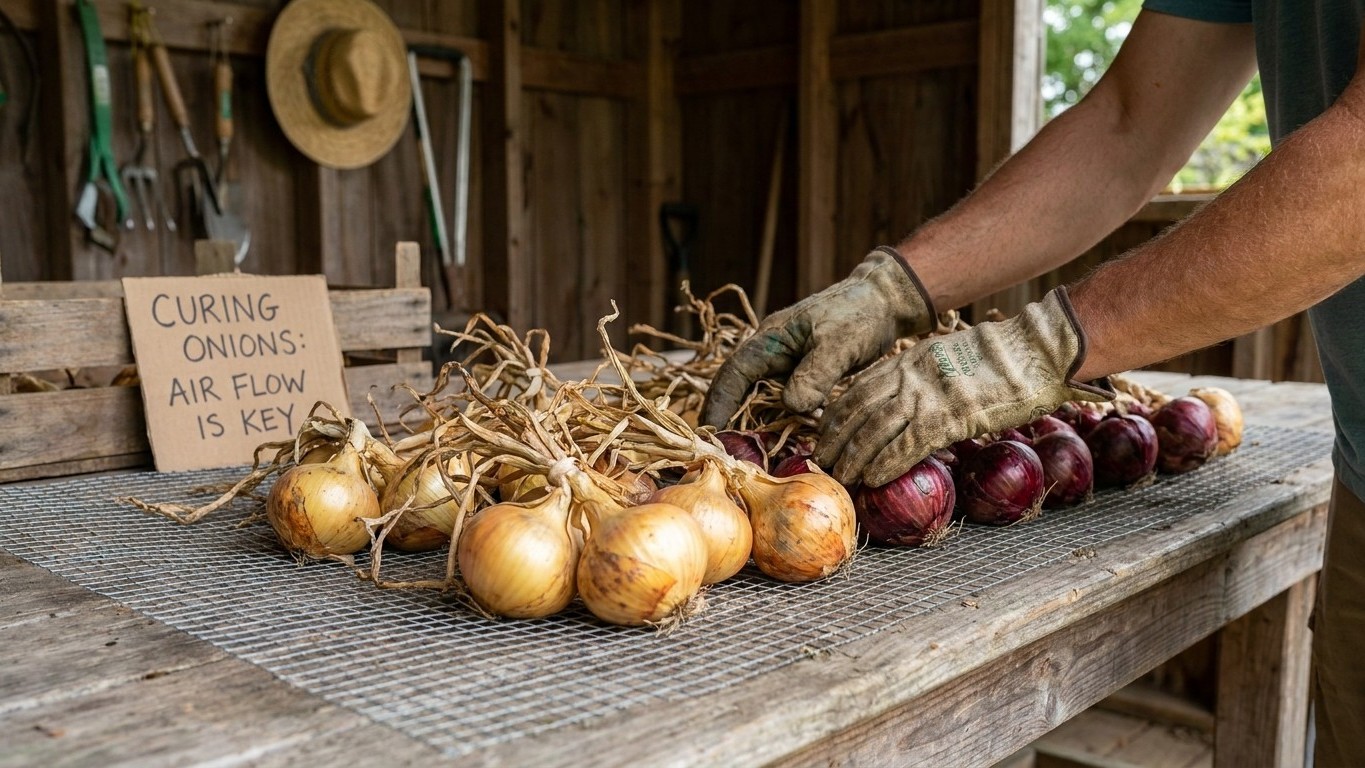

An onion pulled straight from the bed, tops still green and neck still soft, and dropped into a storage bin is rotting before you’ve even shelved it. That thick, soft, green neck is the single best predictor of rot in storage, the passage rot takes straight down into the bulb. Curing fixes that: it dries and tightens the neck so nothing can travel through it. Spread the bulbs out of direct sun and rain, with air moving around them, until the necks are dry and tight and the outer skins rustle.
Curing Onions
Curing is what separates an onion you eat this month from one you still have in March. It is not the same as leaving the tops to wilt in the field for a day or two after pulling. Curing is a slow, deliberate drying of the neck and outer skins, done after harvest and before storage, and it is the step most gardeners skip because the onion already looks finished the moment it comes out of the ground.
Why the neck matters more than anything else on the bulb
A freshly pulled onion is still full of moisture, right up through the neck and into the leaves. An uncured onion put straight into storage rots from the neck down, because that neck is still a soft, open channel between the outside air and the inside of the bulb. Bacteria and fungal spores that would otherwise sit harmlessly on the skin travel down that channel and start breaking the bulb apart from the inside, usually well before you notice anything wrong on the outside.
Curing closes that channel. Given time out of the sun and rain with air moving around it, the neck tissue dries and constricts until it seals like a knot, and the outer skins dry into thin, papery layers. The bulb is cured when the neck is dry and tight and the outer skins rustle, not before. That is the only sign that matters. Color, size, and how long the onion has been sitting since pulling tell you nothing about whether the inside of that neck has actually sealed.
Two bulbs from the same row can look identical from the top of a bin and have completely different winters ahead of them. One has a tight, dry knot at the neck and will still be sound in March. The other still has a soft, green stem at the top and will collapse into slime within weeks, no matter how good the rest of the skin looks.
Not every onion cures the same way
Onion types differ in how well curing pays off, and it is worth knowing which kind you grew before you decide how much shelf space to give it.
| Onion type | Example cultivars | Skin and flesh | Typical keeping life once cured |
|---|---|---|---|
| Storage, pungent | ‘Copra’ (about 104 days), ‘Patterson’ (about 105 days) | Thick, tight skins, strong flavor | Months, often well into spring |
| Sweet, mild | ‘Walla Walla’ (about 125 days), ‘Ailsa Craig’ (about 110 days) | Thin skins, high water content | Weeks to a couple of months at most |
Those days-to-maturity figures come off the catalog page, counted from transplant, and they shift by a week or two either way depending on how the season runs locally. The keeping difference isn’t about how well you cure them. A thin-skinned sweet onion simply doesn’t have the tight, dry skin structure of a storage type, so even a perfect cure only buys it a limited stretch before it starts to soften.
How to do it

Curing happens in the gap between harvest and storage, so get the bulbs out of the ground and off wet soil before you do anything else. This is one of the last steps in growing onions for the season, and it decides whether the crop actually keeps or spoils in the bin.
Steps to follow this week
- Pull or lift bulbs once the tops have started to yellow and fall over on their own, and shake off loose soil without scrubbing the skins.
- Cure out of direct sun and out of rain, with air moving around the bulbs. A garage floor, a covered porch, or a shed with the door propped works far better than a sunny driveway.
- Leave the tops and roots attached during this stage. The tops come off after curing, not before, because they keep pulling moisture out of the bulb while the neck dries.
- Turn the bulbs every few days so air reaches all sides, and spread them in a single layer rather than piling them where the center bulbs never dry.
- Check the neck of a few bulbs by hand every few days. When it feels dry and tight, and the outer skins rustle when you rub them between your fingers, that batch is done.
- Trim the tops to an inch or two above the bulb, trim the roots close, and move the bulbs into whatever setup you’re using for winter storage.
Direct sun during curing does more harm than good. It can scorch the outer skins and even cook the flesh underneath, which defeats the entire point of a step meant to protect the inside of the onion. Shade with good airflow beats full sun every time, even on a dry, breezy day that seems perfect for it.
There is no single day when a batch is guaranteed to be ready. Watch the bulb, not the calendar, since bulb size, skin thickness, and the weather during curing all change how long it takes any given batch to finish. Once a batch passes the neck-and-skin test, how you handle it from here matters just as much as the cure itself. Poor airflow or the wrong humidity during storing onions through winter can undo weeks of good curing in a matter of days.
What goes wrong
The most common failure is skipping the wait because the onions already look done. The tops have flopped, the skins look papery enough at a glance, and it’s tempting to trim and bag the whole harvest the same afternoon. A thick, soft, still-green neck is the single best predictor of rot in storage, and that is exactly what you get when curing gets cut short. If you find this has already happened, sort the bulbs by hand right away. Anything with a soft or green neck gets eaten first, this week, not stored.
Signs you’re looking at trouble
- Neck still thick and pliable when you squeeze it, days or weeks after other bulbs in the same batch have tightened up.
- A sour or yeasty smell rising from one part of the pile, often before any visible rot shows on the outside of a bulb.
- Skins that stay tight and shiny instead of drying into loose, papery layers.
- A slight give or soft spot near the neck when you press it with a thumb.
If curing happened somewhere with no airflow, such as a closed plastic bin or a tarp thrown directly over the pile, the bulbs sweat instead of drying, and a whole batch can turn soft at once rather than one bulb at a time. If you notice this, spread the pile out immediately, uncover it, and get air moving before writing off the batch as a loss. Bulbs that haven’t already gone soft usually recover once air reaches them.
Thick necks aren’t always a curing failure. Onions damaged earlier in the season by thrips, maggots, or other onion pests often develop an oversized, uneven neck that never tightens properly no matter how long you give it, because the tissue itself was damaged before harvest. No amount of curing time repairs damage that happened while the onion was still growing, so those bulbs are worth eating first regardless of how well the rest of the batch is doing.
Rain during curing is the other repeat offender. A pile that gets rewet after it has started to dry has to begin the drying process over, and any mold that got a foothold during that wet spell doesn’t reverse itself once the sun comes back out. If a curing batch gets soaked, sort out anything already soft or off-smelling and start curing the rest again from the beginning rather than assume it will still finish on the original timeline.