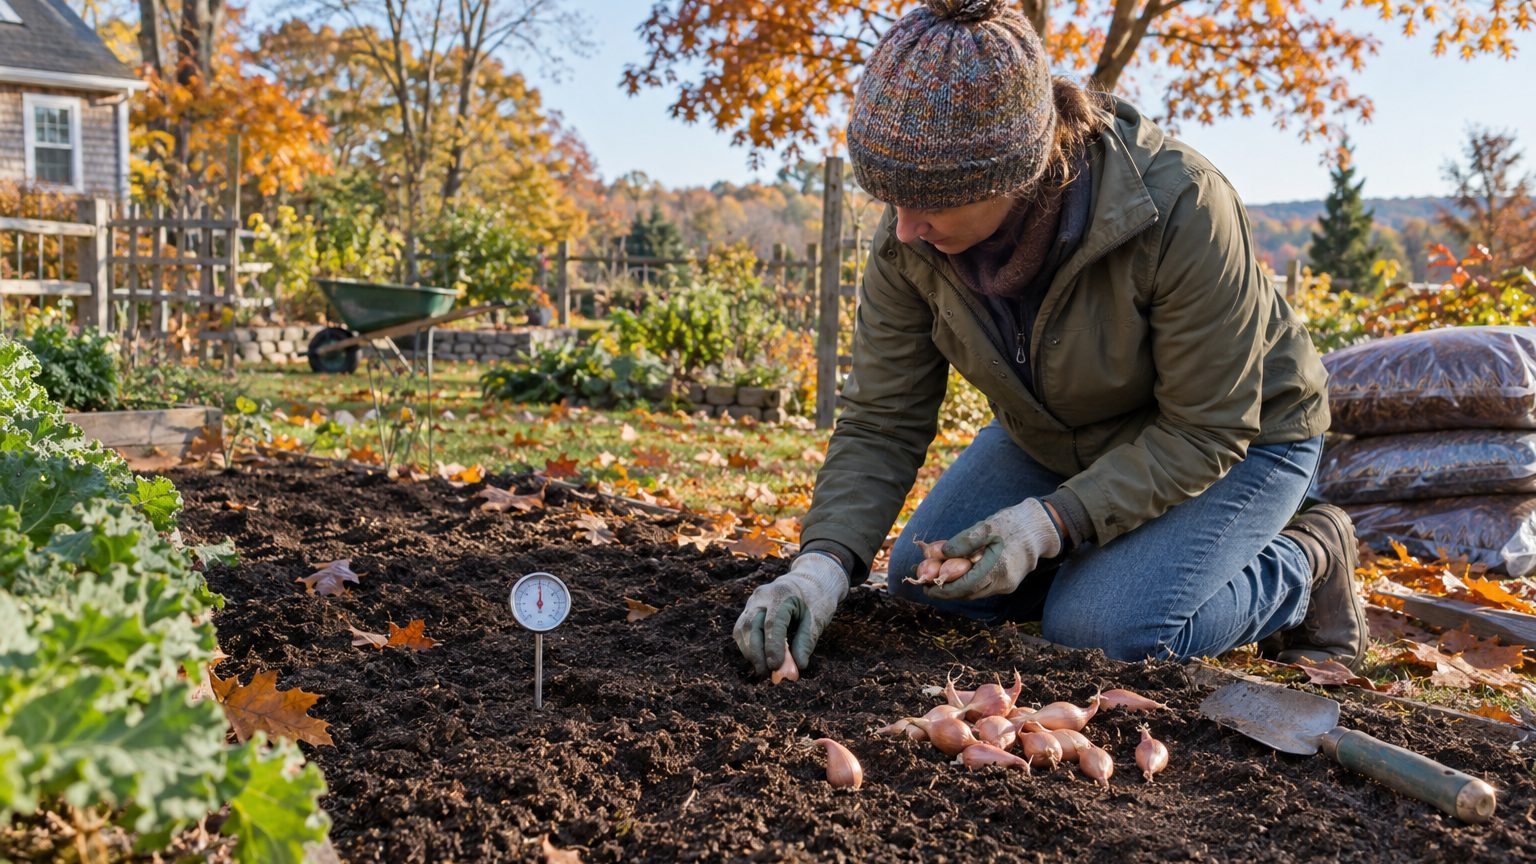

Plant shallots in fall about four to six weeks before the ground freezes solid, which usually means late September to mid-November across most of the U.S. The goal is roots, not leaves. A bulb that settles into cool soil, builds an anchor of roots, and then sits dormant under mulch will outgrow its spring-planted cousins and be ready for harvest a couple of weeks sooner. For the full picture of the crop, start with Growing Shallots: One Bulb In, a Handful Out. This page covers the fall window specifically.
Timing: Let the soil decide, then adjust for your region
Calendar dates are a rough guide. Soil temperature is better. Shallots, like garlic, root best once the soil at planting depth has dropped below roughly 60°F and is on its way down. Plant into warm September soil and you risk a flush of green top growth that winter will knock back. Plant too late, after the ground has frozen, and the bulbs have no time to root, so they heave or rot. A cheap soil thermometer pushed 3 inches down settles the question in about thirty seconds.
Rough windows by region, assuming a typical year:
- Upper Midwest, Northern Plains, northern New England: late September through mid-October, ideally four to six weeks before a hard freeze.
- Mid-Atlantic, Ohio Valley, central Midwest: October into early November.
- Pacific Northwest: October through November, once fall rains have settled in.
- Southeast and Texas: November into December, sometimes January, once nights are reliably cool.
- Southwest and inland California: late October through December, depending on elevation.
The far South is where fall planting gets tricky. In places where winter lows rarely dip below the 20s, shallots may keep growing through the cold months and bulb up early in spring, before the days are long enough to size them properly. Gardeners in zones 8 to 10 often do best planting in late fall or early winter and treating the crop as a cool-season vegetable, harvesting in late spring. Your county extension office can give you a local date, and it is worth a phone call because microclimates in places like the Appalachian foothills or the Hill Country can shift the window by weeks.
Preparing the bed and setting the bulbs
Shallots want loose, well-drained soil with a pH between about 6.0 and 7.0. They have shallow, sparse roots, so they sulk in compacted ground and rot in wet feet. If your yard holds water after a rain, build a raised bed or a mounded row 6 to 8 inches high. This matters more in fall than in spring, because winter wetness is the main killer of fall-planted alliums.
Work in an inch or two of finished compost a week or two before planting. Skip high-nitrogen fertilizer now. Nitrogen in autumn pushes soft, leafy growth that frost will burn, and the bulbs don’t need it until spring. A balanced organic fertilizer or bone meal worked into the row is plenty if a soil test shows low phosphorus.
Choosing bulbs worth planting
Buy planting stock from a seed company or garden center that sells shallots for planting. Grocery store shallots are a gamble: the variety is unknown, some are treated to stop sprouting, and they may carry disease. Look for firm, plump bulbs with dry skins, and plant the largest ones whole. Medium to large sets (roughly the size of a walnut) tend to produce bigger clusters than tiny ones. Most fall-planted shallots are grown from these bulbs (often called sets), not from true seed.
Any bulb that is soft, moldy, or showing blue-green fuzz at the base goes in the trash, not the row. Planting questionable stock into cold, damp soil for six months is asking for trouble.
Depth, spacing, and orientation
Set each bulb pointed end up, root end down, with the tip just below the surface in mild-winter areas, or about 1 inch below in colder regions. Don’t plant them as deep as garlic. Shallots form their clusters at and just above the soil line, and burying them too deep leads to thin, elongated bulbs with long necks. Space them 6 to 8 inches apart in rows 12 to 18 inches apart. Closer than that and the cluster will crowd itself, since each bulb multiplies into several.
Press the bulb into the soil rather than pushing it in by the top, which can tear the basal plate. Firm the soil gently over it and water once so the soil settles around the bulb. After that, nature handles the watering until spring in most regions.
Mulch, winter, and the spring restart
Mulch is what separates a good fall planting from a mediocre one. After planting, and ideally after the soil has chilled a little, spread 3 to 6 inches of loose, weed-free straw or shredded leaves over the bed. In the coldest areas, go to the thick end of that range. The mulch’s job is not to keep the bulbs warm but to keep the soil temperature steady so that freeze-thaw cycles don’t push the bulbs out of the ground. In regions with mild, wet winters, 2 to 3 inches is enough, and a thicker layer can hold too much moisture against the bulbs.
Green shoots poking through in November or December are normal and not a reason to panic. A few inches of top growth can take a hard freeze, and most varieties shrug it off, though the leaf tips may brown. What you want to avoid is a foot of lush growth going into winter, which suggests the bulbs went in too early or the soil was too rich in nitrogen.
Check the bed after the first hard freezes and again after any thaw. Frost heave occasionally lifts a bulb partly out of the ground, and the fix is easy: push it back in and add mulch. Deer generally leave alliums alone, but voles and mice will tunnel through mulch to reach bulbs. If rodents are a known problem in your yard, plant inside a bottomless hardware-cloth cage or use a lighter mulch layer, since thick straw is their favorite winter home.
When growth resumes in late winter or early spring, pull back heavy mulch to let the soil warm, leaving a thin layer to hold moisture and suppress weeds. This is the time for feeding. A side-dressing of a nitrogen source such as blood meal, fish emulsion, or a balanced fertilizer when shoots are 4 to 6 inches tall supports leaf growth, and leaves are what feed the bulb. Stop fertilizing once bulbs start to swell, usually around late May or early June in most climates. Late nitrogen produces thick necks and bulbs that don’t store well.
Water matters more in spring than anywhere else in the cycle. Aim for about an inch a week, from rain or a hose, through bulb formation, then taper off as the tops begin to yellow. Keep the bed weeded, too. Shallots have narrow upright leaves that cast little shade, so weeds compete hard. Shallow hand weeding or a stirrup hoe works better than deep cultivation, which can damage the shallow roots.
Fall versus spring, and what can go wrong
Fall planting wins on bulb size and timing. Because the roots are already established when spring arrives, the plants take off the moment soil warms and can finish bulbing before the worst of summer heat. Harvest typically comes in late June through July, depending on region, as the tops flop over and turn yellow-brown. That head start also frees up the bed for a second crop such as bush beans or fall greens.
The tradeoff is risk. A brutal winter with no snow cover, a waterlogged bed, or a hungry vole population can wipe out a planting, and you won’t know until March. Gardeners in the coldest, wettest, or most rodent-prone spots sometimes do better planting as soon as the soil can be worked in spring, a method covered in Planting Shallots in Spring Instead. A sensible hedge is to plant most of your stock in fall and hold back a handful of bulbs in a cool, dry spot for a spring backup. Store them in a mesh bag at roughly 35 to 45°F if you have a fridge or cold cellar, or just in a cool room, away from moisture.
A few specific problems come up often:
- Yellowing in spring: usually waterlogged soil or low nitrogen. Check drainage first, then feed.
- Soft, rotting bulbs: too much winter moisture or planting stock that was already compromised. Raised beds help.
- Bolting (flower stalks): often triggered by erratic cold-warm swings or stress. Snip the stalk, and use those bulbs first because they store poorly.
- Allium white rot: a soil fungus that can persist for years once it arrives. If you’ve had it, don’t plant alliums there at all.
Rotation helps with most of this. Keep shallots, onions, garlic, and leeks out of the same ground for three to four years. And don’t plant shallots right after another allium crop in a bed with any history of disease.
Harvest when about half to two-thirds of the tops have fallen and browned. Lift the clusters with a garden fork, not by pulling, and brush off the loose soil. One planted bulb commonly yields a cluster of several, sometimes eight or more in good conditions. What happens next determines how long they last: Curing Shallots So They Keep walks through the drying step, which takes two to three weeks in a shaded, airy spot.
One last detail worth knowing: save your best cluster. The biggest, healthiest bulbs from this year’s harvest become next fall’s planting stock, and gardeners who do this for several seasons end up with a strain that suits their own soil and winters, no seed catalog required. The one catch is that viruses can accumulate in saved stock over many years, so a fresh purchase of certified bulbs every five years or so keeps yields from slowly slipping.