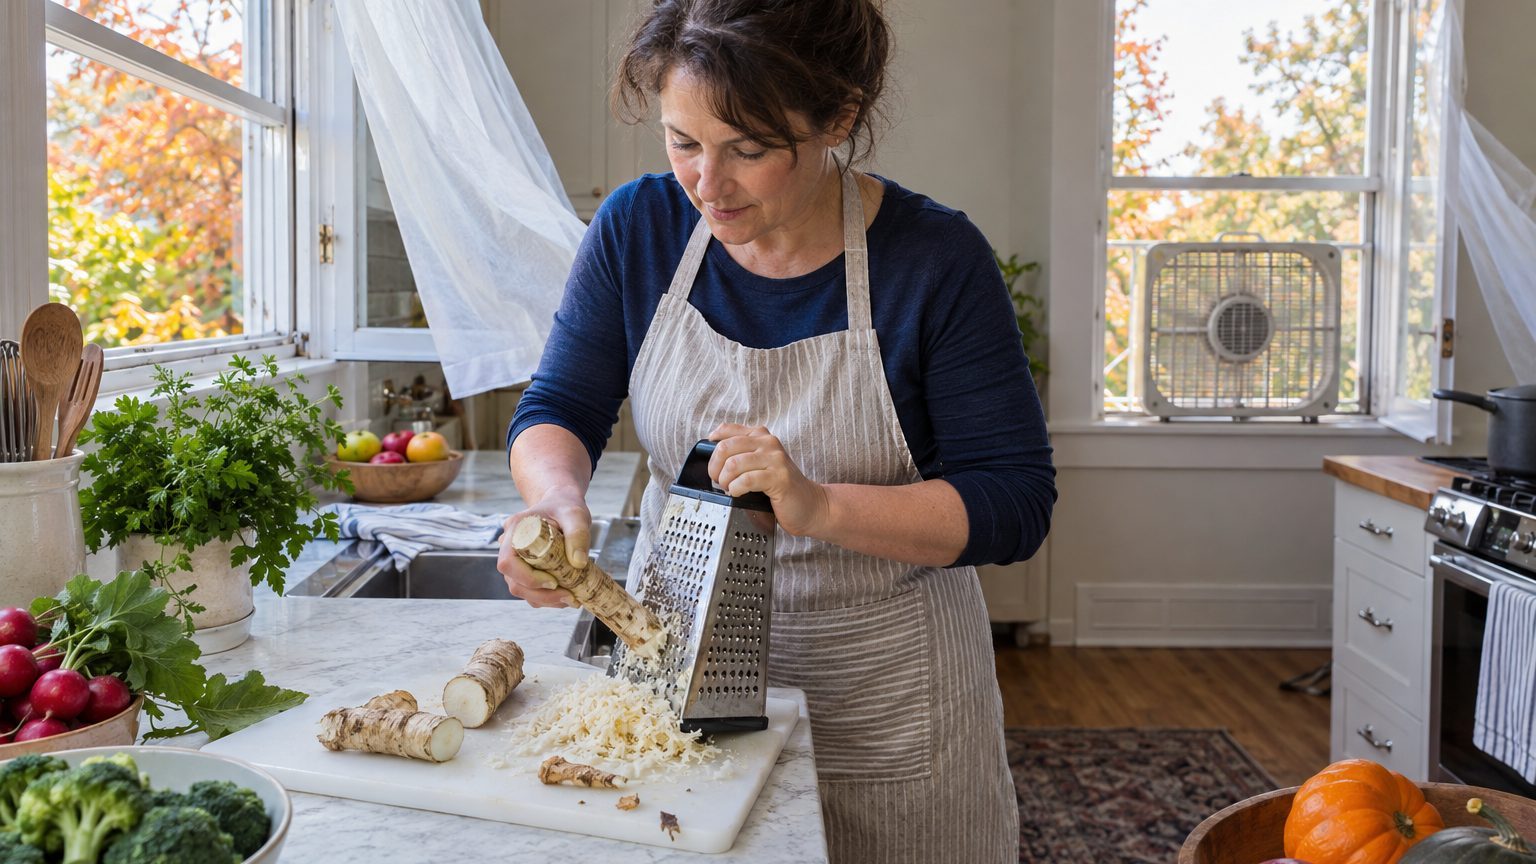

Open two windows, point a box fan outward, and grate the root where the fumes can escape. That is the whole secret to preparing fresh horseradish without ending up in tears. A freshly cut root releases a vapor sharp enough to sting your eyes and nose from across the kitchen, and a food processor makes it worse the moment you lift the lid.
The good news is that the pungency is predictable. Once you know what causes it and when it peaks, you can decide how hot your finished jar will be. The rest is a short list of habits: ventilate, grate fast, add vinegar on a timer, and get the jar into the refrigerator.
Where the burn comes from
An intact horseradish root is not very pungent. Snap off a small piece and sniff it, and you get a mild, earthy smell. The heat appears only when the cells are broken. Inside them, a compound called sinigrin sits apart from an enzyme called myrosinase. Grating, chopping or blending mixes the two, and the reaction produces allyl isothiocyanate, the volatile oil that makes your sinuses clear and your eyes water.
Mustard and wasabi run on the same chemistry. All three belong to the brassica family, which also includes cabbage, broccoli and radishes. That kinship explains why horseradish feels like a cousin of hot mustard rather than a relative of the carrot it resembles.
Two details matter in the kitchen. The compound is volatile, so it escapes into the air as fast as it forms, and that is why the fumes hit hardest in the first minute or two after grating. It is also unstable. Left on its own, grated root loses heat steadily, and heat plus air turns the pale flesh gray and then brown. A jar of horseradish that has sat open on the counter for an afternoon is a pale shadow of what you started with.
If you grew the root yourself, the timing of harvest helps. Roots dug in fall, after a few frosts, tend to be the most pungent and the firmest. In much of the country that means October and November, which makes right now a sensible time to sharpen your knives. Spring-dug roots work, but many growers find them milder and a bit more fibrous.
Set up the room before you cut anything
Ventilation is not a nicety here. Think of it as roughly the strength of a strong onion, multiplied several times and delivered all at once. In a closed kitchen, the vapor lingers, drifts into the living room and can set off coughing in anyone nearby, especially people with asthma. Pets and small children should stay out of the space until the lid is back on and the fumes have cleared.
A workable setup takes about five minutes:
- Open a window or door on two sides of the room if you can, so air moves through rather than just in.
- Set a box fan in one opening facing outward, or turn on the range hood if it vents outdoors.
- Close the kitchen door to keep fumes from traveling through the house.
- Put on safety glasses or snug goggles. Regular eyeglasses help a little, but the vapor sneaks around the edges.
On a mild fall day, the best ventilation is no walls at all. A porch table, a deck or a driveway workbench lets the vapor disperse instantly, and you can carry the finished jar inside once it is sealed. Stand upwind, keep your face back, and you will barely notice the fumes.
Cleaning and peeling the root
Scrub the root under cold running water with a stiff vegetable brush. Garden soil clings to every crevice, and the fine side roots hold the most. Then peel the thin brown skin with a standard vegetable peeler, as you would a parsnip. Cut away any dark or woody patches, and trim the root into chunks of about an inch if you plan to use a food processor.
Peeling is not strictly required for safety, since the skin is edible, but it is bitter and leaves dark flecks in the finished product. Peeled and rinsed pieces that will wait a few minutes can sit in a bowl of cold water, which slows browning.
Food processor or box grater
The food processor is faster and, for most people, more practical. A quarter pound of root chunks becomes a fine, even mash in under a minute with the shredding blade or the chopping blade. The catch is the lid. When you open the bowl, a dense cloud of concentrated vapor rises straight at your face. Let the machine stop completely, wait a minute or two with the fan running, and lift the lid away from you, not over you.
A hand-held box grater or rasp-style grater is slower, but it keeps the vapor release gradual and lets you control texture. The fine side gives a smooth, intensely hot paste. The medium side gives a coarser, juicier result that holds up better on a roast beef sandwich. Grating by hand also lets you stop and step away for fresh air, which is a real advantage if you are sensitive.
A blender works too, though it usually needs a splash of liquid to catch the root, and that changes the timing described below. Whichever tool you use, wash it promptly. Horseradish residue left on a grater or blade dries into a surprisingly stubborn crust, and its smell clings to plastic bowls for days.
Timing the vinegar to set the heat
Here is the one lever you control after grating. The enzyme reaction that creates the heat keeps running until something stops it, and acid does the job. White vinegar is the usual choice because it is clean-tasting and does not tint the root. The hotter you want the result, the longer you wait before adding it.
Many cooks follow a rough rule: wait about two to three minutes for a hot, full-strength paste, add vinegar right away for a milder one, and aim for somewhere in between if you are unsure. The numbers are approximate, because root freshness, grating fineness and room temperature all change the outcome. Treat your first batch as a calibration run and write down what you did.
A common starting recipe uses about a cup of freshly grated horseradish, three to four tablespoons of white vinegar and a quarter to half a teaspoon of salt. Stir the mixture well, taste a tiny amount on the tip of a spoon (a tiny amount, because it is strong), and add a bit more vinegar if you want it looser. Salt lifts the flavor and also helps the jar keep its character.
Two variations are worth knowing:
- Beet horseradish: grate a small raw or cooked beet into the mix for a pink-red color and a gentle sweetness. This version is traditional on many Ashkenazi tables, especially at Passover.
- Creamy horseradish sauce: stir a tablespoon or two of the prepared root into half a cup of sour cream, then adjust to taste. Make it fresh, since the dairy dulls the heat quickly.
A pinch of sugar or a squeeze of lemon juice rounds off the sharp edges. Neither is required, and a plain jar of root, vinegar and salt is perfectly good.
Storing, freezing and keeping the heat
Prepared horseradish belongs in the refrigerator, in a clean glass jar with a tight lid. Metal lids can corrode from the vinegar and vapor, so a plastic-lined lid or a layer of wax paper under the cap is a good idea. Stored this way, the jar holds its best flavor for roughly a month, and it stays safe to eat for longer, though the heat fades steadily. Over several weeks the paste darkens and softens. When it turns noticeably brown, tastes flat or smells off, replace it.
If you have a big harvest, there is no need to make a gallon at once. Unprepared roots keep well wrapped in a damp towel inside a perforated bag in the crisper drawer, and they stay usable for a few weeks. For longer storage, freeze grated root in tablespoon-sized portions on a parchment-lined tray, then move the frozen pucks to a freezer bag. Thawed portions lose some bite, so add vinegar and salt after thawing rather than before. That way each small batch is made fresh and the flavor stays livelier.
Keep the amount you prepare matched to how fast you eat it. A household that uses horseradish with a holiday prime rib or a few Sunday sandwiches does not need more than a half-pint jar. Smaller, more frequent batches beat one big jar that sits.
What to do with the rest of the plant
Gardeners often discover that horseradish grows far more root than any family needs. The plant spreads from any fragment left in the soil, so every digging session leaves a few pieces behind that will happily sprout. That persistence is the same trait that makes Jerusalem Artichokes: Plant Them Where You Mean It a lesson in careful placement, and horseradish deserves the same planning. Choose a spot you are willing to dedicate to it, and keep the bed edged.
If you are weighing where horseradish fits among your other beds, remember that it shares a family with cabbage and its relatives, which affects crop sequence and disease pressure. The guide to Rotating Four Crops From Four Families explains how to keep related crops from following one another. For the wider group of oddballs that grow underground, the overview of Celeriac, Kohlrabi, Horseradish and Jerusalem Artichokes puts each one in context.
One last practical detail concerns skin and hands. The juice can irritate sensitive skin and sting any small cut, so thin kitchen gloves are a sensible precaution if you will be grating for more than a few minutes. And do not rub your eyes mid-task. Wash your hands with soap and cool water afterward, since the oils cling longer than you would expect, and a stray fingertip near the eye is how most people learn this lesson the hard way.
The same oil that makes you cough is the reason horseradish was long used as a seasoning that cuts through fatty meat. A spoonful on a plate of roast beef does the work of a squeeze of lemon, only with more punch, and it fades within seconds rather than lingering the way chili heat does.