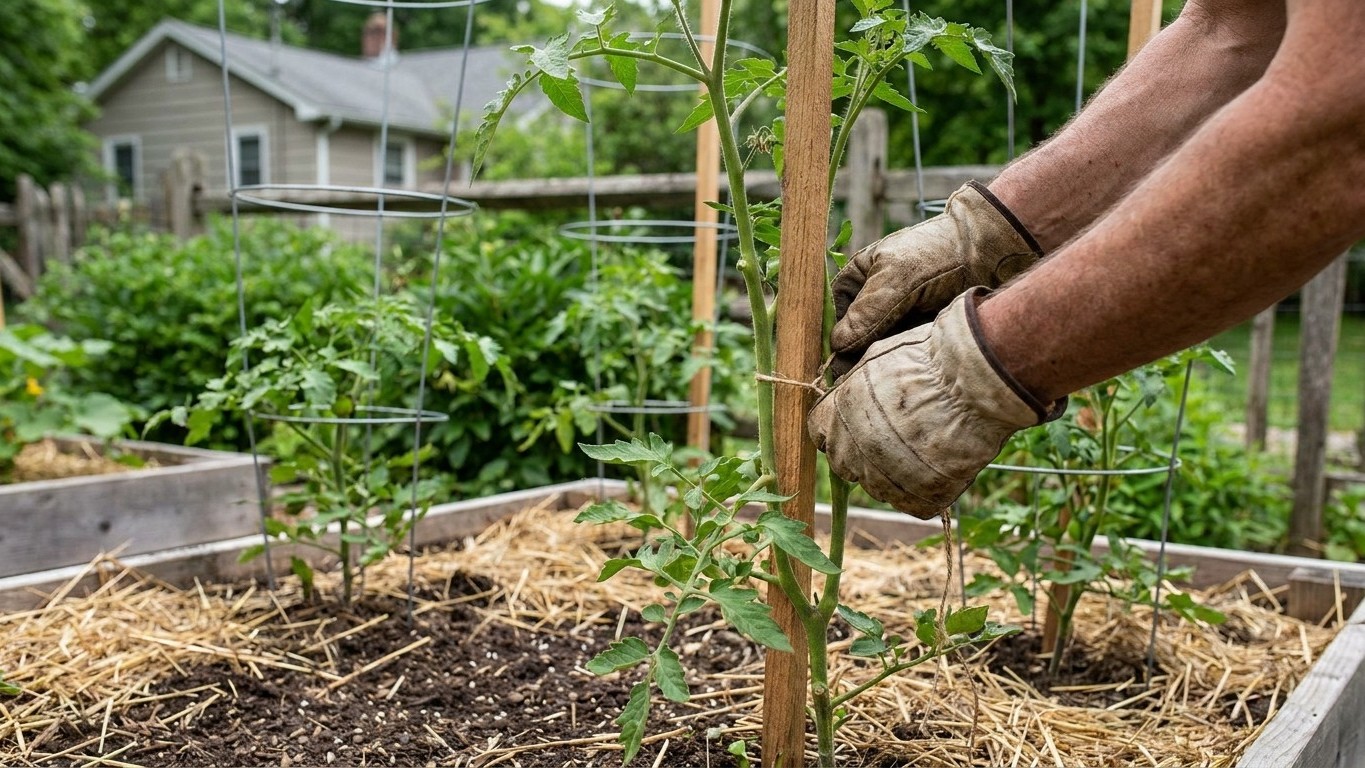

The right support depends on how your variety grows. Determinate tomatoes stay compact and usually do fine in a sturdy cage, while indeterminate varieties keep climbing all season and need a stake, a trellis, or a heavy-duty cage built to handle real height. Install whatever you choose within a week or two of transplanting, before the root ball spreads and the main stem thickens past the point where you can work a stake in close without stabbing through roots. Check the seed packet or catalog description for “determinate” or “indeterminate” before you buy anything.
Why this matters
An unsupported tomato plant sprawls across the ground, and once it does, the fruit sits in contact with damp soil. That’s where a lot of blossom end rot, soft rot, and early blight starts, not because the plant is unhealthy but because the lowest leaves and fruit never dry out and never see direct sun. A support keeps foliage and fruit off the soil, which does more for disease prevention than any spray you can buy afterward.
Skipping support, or putting it in too late, also costs you yield. A sprawling plant puts energy into the stems it’s already grown along the ground instead of into new fruiting branches, and the fruit that does set is harder to find and more likely to be damaged by slugs and ground insects before you spot it. A cage or stake installed early trains the plant to grow up, which concentrates its energy into height and fruit rather than lateral sprawl, and makes routine tasks like watering and checking for pests genuinely easier because you can see the whole plant at once.
When to do it
Timing matters more than most gardeners think. The best window is right after transplanting, while the plant is still small and the root system is shallow and centered directly under the stem. At this stage you can drive a stake or set a cage a few inches from the stem without damaging roots, and the plant will grow into the support naturally rather than fighting against one jammed in later.
Watch the plant itself rather than the calendar. Once you see the stem start to lean or flop under its own weight, or once the first flower clusters appear, you’ve waited about as long as you should. By the time fruit has set and the plant is heavy with green tomatoes, forcing a stake into the ground means cutting through a wide, established root system, and a cage has to be lowered over branches that have already sprawled outward, which means bending and breaking the stems you’re trying to protect. If you’ve missed the early window, it’s still worth staking late rather than not at all, just expect some damage and go slowly.
How to do it

Start by matching the support to the variety. A short determinate plant that tops out at a modest height needs far less structure than an indeterminate vine that will keep growing until frost. The table below is a rough guide to how the three common options compare.
| Support type | Best for | Approximate lifespan | Effort to install |
|---|---|---|---|
| Wooden or metal stake | Indeterminate varieties, single-stem pruning | Several seasons if wood is treated or metal is coated | Low, but needs regular tying as plant grows |
| Wire cage | Determinate and compact indeterminate varieties | Many seasons, cages are reusable | Low, one-time placement |
| Trellis or string system | Vigorous indeterminate varieties, greenhouse or high tunnel growing | Structure lasts for years, string is replaced yearly | Higher, needs a frame or overhead support |
Setting a stake
Drive a stake at least an inch or two thick into the ground a few inches from the stem, angling it slightly away from the plant so it doesn’t crowd the root zone. Sink it deep enough that it stands firm when you push against it, since a loose stake will lean under the weight of a full-grown plant later in the season. As the plant grows, tie the main stem to the stake every eight to ten inches using soft garden twine, strips of cloth, or purpose-made plant tape, always in a loose figure-eight so the stem isn’t pinched as it thickens. Staked plants are usually grown as a single stem, which means regular removal of side shoots. If you haven’t done that yet, it’s worth reading through Pruning Tomato Plants: Which Shoots to Remove and Which to Leave Alone before you commit to staking, since the two tasks go hand in hand.
Setting a cage
Cages are far simpler. Push the legs of the wire cage into the soil around the young plant so the plant sits centered inside it, then walk away and let the plant grow up through the wire on its own. As branches reach the sides of the cage, you can tuck them back inside every week or so, but cages need little of the ongoing tying that stakes demand. Choose a cage rated for the mature height and weight of your variety. A cage sized for a compact determinate plant will collapse under a heavily loaded indeterminate vine by midseason.
What goes wrong

Most staking failures come down to timing or force, not the materials themselves. The most common mistake is waiting too long, then trying to squeeze a stake or cage around a plant that has already sprawled and rooted along its lower stem. This tears roots, snaps branches, and stresses the plant right when it should be setting fruit.
A mistake that looks like extra care but isn’t: tying the stem too tightly or with a material that doesn’t give. Twine pulled taut, or wire twist-ties left in place without loosening, will cut into the stem as it thickens and can girdle it completely, which cuts off water and nutrients above the tie point. Always leave slack and check ties every couple of weeks.
- Stem pinched or scarred at a tie point, thinner above than below: retie looser immediately
- Cage leaning or tipped over after wind or rain: legs weren’t sunk deep enough, or the cage wasn’t anchored
- Lower leaves yellowing and spotted despite staking: foliage is still touching soil or nearby plants, check spacing and consider reading up on Tomato Diseases: Reading the Symptoms and Preventing the Common Ones
- Fruit still splitting or rotting despite a cage: uneven watering is the more likely cause, not the support itself
That last point matters. A support keeps the plant off the ground, but it does nothing for the soil moisture swings that cause blossom end rot and cracked fruit. That’s a separate job, covered in Watering Tomatoes: How Much, How Often, and Why Consistency Matters Most, and it’s worth sorting out at the same time you install support, since both jobs are easiest to get right early in the season.
Doing it differently
Container-grown tomatoes need support just as much as ones in the ground, but the anchor point changes. A stake driven into a pot often has nothing solid to grip, so a cage with a wide base, or a stake pushed all the way to the bottom of the container and against the drainage holes, holds better than one pushed only a few inches deep.
In a greenhouse or high tunnel, an overhead string trellis is usually the better choice for indeterminate varieties grown as a single stem. A length of twine is tied loosely at the base of the plant and anchored to a wire or bar overhead, and as the plant grows, you wind the stem around the string instead of tying it at intervals. This is faster to manage than staking dozens of plants individually and it’s the standard method for greenhouse tomato production, where plants can grow considerably taller than they would outdoors.
Raised beds usually behave like any in-ground bed for staking purposes, though the shallower soil depth in some raised beds means a stake needs to go in at more of an angle or brace against the bed frame itself to get a firm hold. If you’re growing several plants close together in a raised bed, a shared trellis panel across the whole row is often more stable than individual stakes or cages and takes up less space between plants. Whatever method you choose, it should match the plant’s mature size rather than what’s easiest to install on transplant day. For the broader context on getting plants to that point, see How to Grow Tomatoes.
Common questions
Can I stake a tomato plant that’s already sprawling?
Yes, but expect some damage. Lift the plant gently, work the stake or cage into place as close to the original planting point as you can, and don’t force branches that have already taken root along the stem, since those roots are now feeding the plant too.
Do determinate tomatoes need staking at all?
Most determinate varieties do fine with a simple cage rather than staking, since they stop growing at a set height and don’t need the ongoing tying a stake requires. A cage still keeps fruit off the ground and makes harvest easier, so it’s worth using one even on compact varieties.
How tall should my cage or stake be?
That depends entirely on the variety, and catalog descriptions or seed packets usually list mature height for exactly this reason. Indeterminate varieties can outgrow a short cage well before the season ends, so it’s better to oversize the support than to undersize it.
Is it okay to use string or twine instead of buying stakes?
Yes, string trellising is a legitimate method, especially in a greenhouse or high tunnel, but it requires an overhead anchor point like a bar or wire, and you’ll need to wind the stem around the string yourself as it grows rather than tying at intervals.