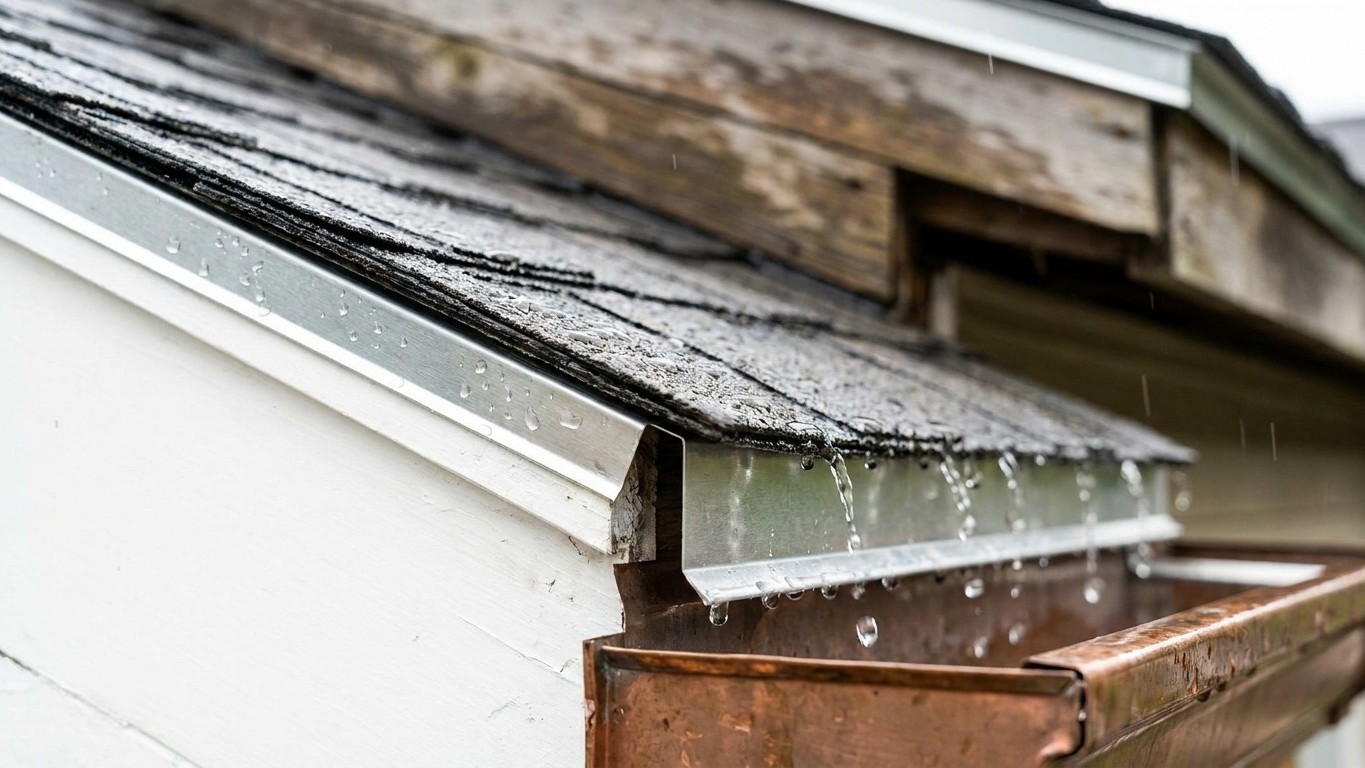

A drip edge is the L-shaped or T-shaped metal flashing installed along the roof’s edges, at the eaves and rakes, to guide water away from the fascia and into the gutter instead of letting it wick back Under the Shingles. It’s a small piece of hardware with an outsized job: without it, water follows the underside of the roofing material by capillary action and soaks the wood framing beneath. Most homes have it. Some older ones don’t, and that gap is often invisible until damage shows up indoors.
What is actually happening
Water doesn’t just fall off a roof the way it falls off a table. When rain runs down a shingle and reaches the edge, it doesn’t necessarily let go and drop straight down. Thin films of water cling to surfaces, and at a roof edge that surface tension pulls water sideways, under the shingle’s bottom lip, and onto the wood fascia board behind the gutter. This is capillary action, the same effect that lets a paper towel pull liquid upward against gravity. A drip edge breaks that path mechanically. The metal extends past the roof deck and bends downward and slightly outward, so water is forced to release from a sharp edge instead of curling back onto the house.
The thing to understand here is that this isn’t a cosmetic trim piece. It’s doing a specific physical job at two different locations on the roof, and the job is slightly different at each one. At the eaves, the horizontal lower edges, the drip edge directs water into the gutter trough. At the rakes, the sloped edges running up to the ridge, it keeps wind-driven rain from getting pushed sideways under the shingles during a storm. Roofers typically install the eave piece underneath the underlayment (the water-resistant membrane below the shingles) and the rake piece on top of it, because water behaves differently coming down a slope than blowing sideways across one.
Where a drip edge is missing or was installed poorly, the failure point isn’t the metal itself, it’s the wood behind it. Fascia boards are usually not treated for constant moisture exposure the way roofing materials are. They’re finish lumber, meant to look good and hold gutters, not to shed water directly. When water reaches them repeatedly, wood fibers absorb moisture, swell, and eventually stay damp long enough for rot fungi to take hold. That process depends on the manufacturer’s specification for the flashing itself and the roofer’s judgment on installation, not on a fixed number that applies to every house. What matters for a homeowner isn’t memorizing a spec, it’s recognizing that this strip of metal exists specifically to interrupt a physical process, and if it’s absent, bent, or disconnected from the gutter line, the process it was designed to stop restarts on its own schedule.
What you can see without climbing
Checking a drip edge doesn’t require a ladder trip onto the roof itself. Most of what matters is visible from firm ground or from inside the attic, and both views together give a fairly complete picture.
- Scan the roofline from the ground. Stand back far enough to see the full eave and rake edges, and use binoculars or a phone camera zoomed in rather than walking closer to the house. Look for metal that’s visibly separated from the roof deck, bent upward or downward out of line, or missing entirely along a stretch of edge. A continuous, straight line of metal following the roof’s shape is what you want to see; gaps, waves, or rust streaks running down the fascia are the signals worth noting.
- Check where the gutter meets the roof edge. From the same ground vantage point, look at whether water stains trail down the fascia board below the gutter line. Dark streaking, peeling paint, or a fascia board that looks swollen or discolored compared to the rest of the trim usually means water has been finding a way past the edge for a while.
- Move to the attic with a flashlight. This is the more reliable check, because problems at the roof edge often show up first as evidence inside before they’re obvious outside. Walk the perimeter of the attic floor, staying on joists or a stable walking board, and look upward along the roof deck near the eaves.
- Look for daylight, staining, and damp Insulation. Any point where daylight is visible through the roof deck is a gap, full stop. Dark or discolored streaks on the rafters or the underside of the decking, especially near the lower edges of the roof, indicate water has been tracking through. Insulation that feels damp, looks matted down, or has a musty smell near the eaves is often the earliest and most honest sign that something at the edge isn’t doing its job.
None of this requires touching the roof surface. A ground scan paired with an attic walk, done in daylight with a good flashlight, tells you almost everything a visual inspection from the roof itself would.
What it costs to leave it
The consequence of a missing or failed drip edge isn’t dramatic. It’s slow, and that’s exactly why it’s easy to ignore. Nothing collapses. There’s no leak dripping onto the living room ceiling in most cases, at least not at first. What happens instead is quieter and, in a way, more expensive to fix.
The fascia board takes the first hit. Repeated moisture exposure without a chance to fully dry between rains softens the wood fibers, and paint or stain on the surface starts to bubble, crack, or peel earlier than it would elsewhere on the house. Behind the fascia, the roof sheathing (the plywood or OSB panel the shingles are nailed to) can start absorbing water at the edge, since that’s exactly where a failed drip edge lets moisture in. Sheathing doesn’t need to be soaked through to be compromised. Localized dampness near an edge is often enough to soften the panel in that one spot, well before the rest of the roof shows any sign of an issue.
Once wood stays damp for a stretch, rot fungi and, separately, wood-destroying insects like carpenter ants become more likely tenants. Neither of those problems announces itself loudly. A soft spot on the fascia might just feel spongy when pressed. A damp patch on the sheathing seen from the attic might look like a stain rather than active decay. The gutter system connected to a failing edge often develops its own secondary issues too, since water finding the wrong path at the roofline tends to pool where it isn’t meant to, adding pressure on gutter hangers and seams that weren’t designed for standing water.
None of this happens on a fixed schedule. Climate, the amount of rain a region gets, how much sun and wind dry the wood between storms, and how the roof edge was originally built all shape how quickly a small gap becomes a real problem. What’s consistent is the order of events: cosmetic staining first, then softened wood, then structural compromise at the edge if nothing interrupts the pattern. Catching it at the staining stage is a trim repair. Catching it after the sheathing has softened is a roofing repair. The gap between those two points is where most of the avoidable cost lives.
What is not a householder job
Everything described above, the ground scan, the attic check, is meant to stay exactly where it is: observation, not repair. Fixing or replacing a drip edge means working at the roof’s edge, often standing on or near a slope, and that crosses a line worth being plain about.
Anything above a single story is not a homeowner task. A ladder tall enough to reach a second-story eave, combined with working at that height on an angled surface, is where most serious roofing falls happen. It doesn’t matter how comfortable someone is with tools. The physics of balance on a slope change once the ground is that far below.
A wet, mossy, steep, or frosted roof surface is off-limits regardless of height. Moss holds moisture and turns a surface slick in a way that isn’t obvious from the ground. Frost does the same on a cold morning, and a roof that seemed fine yesterday can be dangerously slick before the sun’s had a chance to warm it. Steep pitches remove the margin for error entirely, since there’s often nothing to grab if a foot slips.
Any task requiring both hands while standing on a slope, prying up old flashing, hammering in new nails, holding a replacement piece in place while sealing it, means no hand free for balance or a harness line. That’s a task for someone equipped and trained for roof work, not an afternoon project with a ladder from the garage.
If the ground and attic checks above raise a concern, the next reasonable step is a closer look by someone qualified, not a personal trip onto the roof. Our guide to a full roof inspection covers what a professional assessment involves and how to read the findings. If repair turns out to be necessary, the page on hiring a roofer walks through how to find someone qualified and what questions to ask before work begins. Both are the right next move once a drip edge issue is suspected, rather than a ladder.
Common questions
Can a drip edge be added to a roof that never had one?
Yes, and it’s a fairly common repair on older homes where it was skipped during original construction. It typically means lifting the edge of the existing shingles enough to slide the metal underneath at the eaves, which is roof work best assessed and carried out by a professional rather than attempted from a ladder.
Does every part of the roof edge need it, or just some sections?
Both the eaves and the rakes benefit from it, though the way it’s installed differs slightly between the two locations because water moves differently along a horizontal edge than along a sloped one. A partial installation, drip edge at the eaves but not the rakes, is something a roofer would flag during an inspection.
If I see rust on the metal, does that mean it needs replacing?
Surface rust alone isn’t necessarily a failure, but it’s worth having checked, since rust can indicate the metal has been sitting wet longer than it should. A roofer can tell from close inspection whether it’s cosmetic or a sign the material is thinning and losing its ability to shed water properly.
Does hail or wind damage to a drip edge get covered by insurance?
That depends entirely on the specific policy and the state it’s written in, since coverage rules, documentation requirements, and claim deadlines vary widely. The safest first step after storm damage is photographing what’s visible from the ground and attic, then contacting the insurer to confirm what the policy actually requires before any repair work begins.