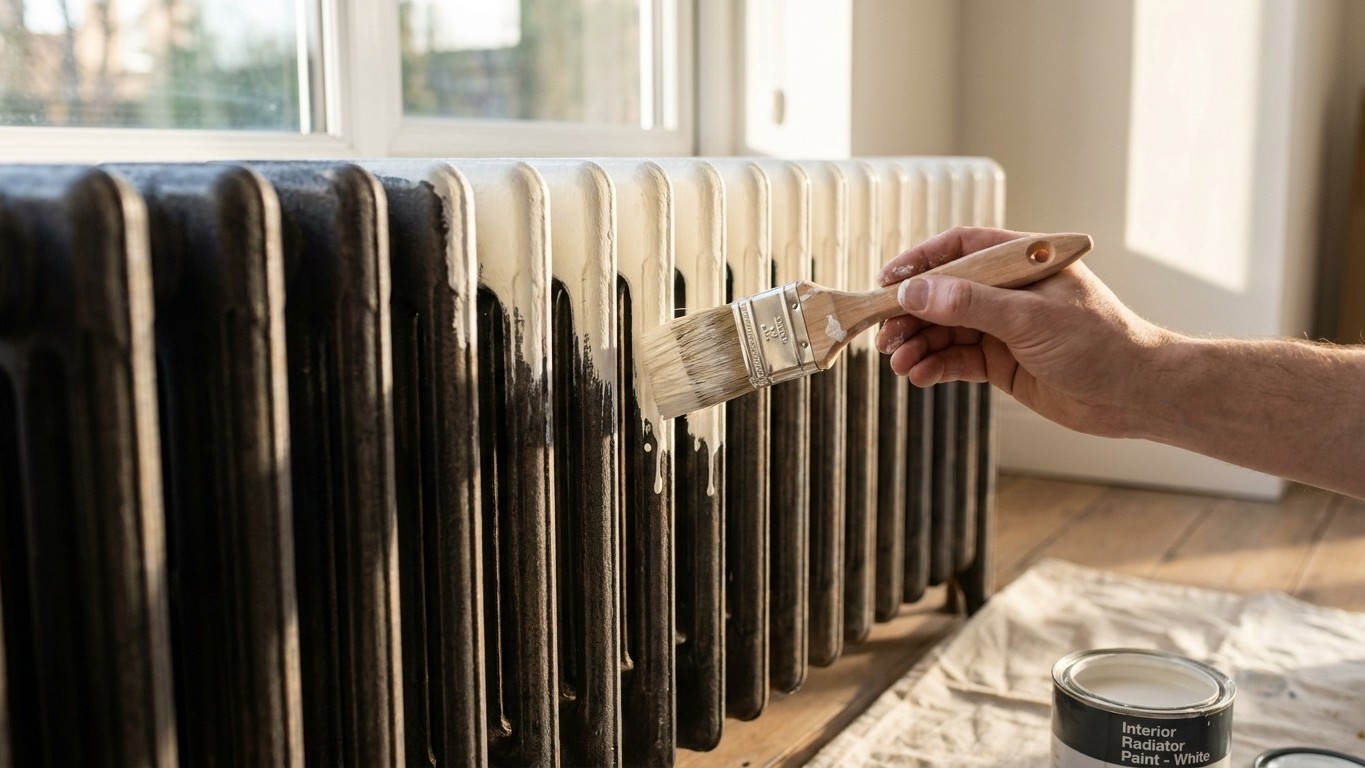

Yes, you can paint a cast-iron radiator, and a fresh coat is one of the cheapest ways to change how a room feels. The color itself barely touches how much warmth reaches you. What matters far more is the finish you choose, how many layers already sit under it, and whether the prep work before the brush ever comes out was done right. Get those three things wrong and you end up with a radiator that looks better and heats worse.
Does paint reduce the heat?
Before anything else: a radiator is not a heating system on its own. It’s the object a boiler pushes heat into, either as steam or as hot water, and it only gives off what that loop delivers. Any fault in output, temperature, or circulation is a fault of that steam or hot water system, not a flaw in the metal sitting under your window. Painting the radiator changes the surface. It does not touch the boiler, the pump, or the pipe run feeding it.
With that separated out, here’s the honest answer to what people actually want to know. An ordinary coat of paint, in whatever color, makes very little measurable difference to how much heat reaches the room. Cast iron is a poor insulator to begin with, and a thin layer of standard paint doesn’t change that meaningfully. Repaint a radiator white, sage green, or matte black and the room will feel about the same.
Metallic finish is the exception, and it’s the one thing worth thinking twice about. A shiny metallic paint, the kind with actual metal flake in it, reflects heat off the surface rather than letting the radiator radiate it outward the way it’s designed to. That’s the opposite of what you want from an object whose entire job is giving up heat to the air around it. If you like the look of a metallic or silver-toned radiator, understand that you’re trading a little bit of output for that finish.
Thickness is the quieter problem, and it’s the one that sneaks up over decades rather than over one weekend project. A radiator repainted every few years, without ever stripping the old layers, ends up wearing a shell of paint that’s thicker than most people realize. That buildup insulates the metal slightly, the same way a heavy coat insulates a person. One repaint won’t do it. Ten repaints over forty years, never removed, start to matter.
The practical takeaway is simple. Color is free, in the sense that it has no effect on heat output. Metallic finishes are not free, because they trade a little radiated warmth for shine. And thickness is something to watch across a radiator’s whole life, not something to worry about after a single fresh coat.
Preparation is the job
Painting a radiator is mostly prep work with a brief, satisfying finish tacked on the end. Skip steps here and no amount of careful brushwork later will save the result. Work through it in order:
- Let the system cool completely. Turn off the heat and wait until the radiator is fully cold to the touch, not just cooler than usual. Paint applied to warm metal skins over before it cures properly and lifts within weeks.
- Clean the entire surface, including between the columns where dust, pet hair, and old grime collect and never get touched during normal cleaning. A stiff brush or a vacuum with a narrow attachment works better than a rag for those gaps.
- Deal with rust down to sound metal. Surface rust needs to be sanded or wire-brushed off entirely; painting over it just traps moisture under the new coat and the rust keeps working underneath.
- Remove any flaking or blistered paint. If old paint is lifting in one spot, it will keep lifting, and new paint over it peels along with it.
- Mask the valves, the pipework, and the floor beneath. Cast-iron radiators have deep gaps between sections, and paint runs find the floor faster than you’d expect.
Never paint a radiator while it still holds heat. Beyond the finish failing to bond, warm surfaces push paint fumes into the room faster and more strongly, which is unpleasant in an enclosed space and worse if anyone in the house has respiratory sensitivity.
One more thing that gets skipped too often in older homes: a radiator that has been repainted many times over many decades may be carrying lead paint somewhere in those buried layers, even if the top coat is recent. Sanding, scraping, or heavily disturbing that surface can release lead dust, which is a genuinely different hazard with its own precautions around containment and cleanup. Don’t guess based on the age of the house or how the top layer looks. If you’re in a period home and planning to strip back to bare metal rather than just scuff and recoat, have the paint tested first. It’s a small step that removes the guesswork entirely.
Getting into the shape
Cast-iron radiators are awkward to paint well because the columns create narrow vertical gaps that hide runs and drips until the paint has already dried wrong. A technique built around that shape saves a lot of frustration:
- Work from the back and the inside of the radiator outward. Painting the hidden inner surfaces first means any drips run onto metal you haven’t finished yet, rather than down the front face everyone sees.
- Use a long, thin brush, or a narrow radiator roller made for getting between columns, to reach the inner surfaces without loading paint onto the outer edges first.
- Apply thin coats rather than one heavy one. Thin coats level out and dry evenly; a thick coat sags in the gaps between columns and takes far longer to cure without skinning over.
- Let each coat dry fully before the next. Rushing this step is the single most common reason a radiator repaint looks patchy or cloudy once it’s done.
Know what the finished job should not look like, because it’s easier to catch these while the paint is wet than after it’s cured. Runs pooling between the columns are the most common failure, usually from a coat applied too thick in one pass. A bridged gap, where paint has filled in and sealed the space between two columns instead of coating each surface separately, is another, and it’s a sign of paint applied too fast without working the brush into the actual gap. And paint that’s crept onto the valve spindle is a problem you’ll only discover the next time you try to adjust the heat and the spindle won’t turn.
The valves, and the first heat
Before touching the valve at all, know which kind of system you’re working on. A hot-water radiator has a valve with a spindle you turn to adjust flow, and often a separate bleed valve near the top to release trapped air. A steam radiator works differently: air is vented automatically through a steam air valve, there is no bleed key, and it should never be opened the way a hot-water radiator is. Painting instructions around the valve area only make sense once you know which type is standing in the room.
Two mistakes show up again and again once the main job is finished and people move to the valve area. The valve spindle should never be painted. Paint building up around the moving parts binds the mechanism, and a spindle that’s stuck from dried paint often needs the whole valve replaced rather than just cleaned. The union nuts, the fittings that connect the radiator to the pipework, should also stay bare. Paint over a union nut doesn’t just look sloppy, it hides a weep, a small ongoing leak that would otherwise show as a damp ring or a slow drip. Painting over that spot buries the early warning sign along with the paint.
Once the paint has fully cured and it’s time to turn the heat back on, expect a smell as the fresh coat cures under heat for the first time. It fades within the first heating cycle or two. Open a window or crack a door in the room while it runs through that first firing. Then, once the radiator is properly hot, walk around and check every joint, every union, every connection point. Heat expands metal and pressurizes the loop in a way that finds any seal that was already tired, even one that looked fine cold. A radiator that sat leak-free for months can show a weep the first time it runs hot again after being handled, and catching that in the first hour beats finding it as a stain on the ceiling below weeks later.
Common questions
Can you paint over an existing coat without sanding it all off?
In most cases, yes, as long as the existing paint is sound, not flaking, and free of rust underneath. A light scuff-sand to help the new coat grip is usually enough. Full stripping is only necessary when the old layers are already failing or when lead testing calls for a different approach.
How long should a radiator stay off before painting?
Long enough to be fully cold to the touch, not just cooler than during heating hours. On a hot-water system tied to a central boiler, this usually means turning off that zone or the whole system well ahead of time, since cast iron holds heat longer than the room around it suggests.
Does the paint color affect a room’s temperature at all?
Regular paint color has essentially no effect on how much heat reaches the room. The one exception is a metallic or reflective finish, which reflects some heat off the surface instead of letting it radiate outward, slightly reducing output compared to a standard matte or gloss color.
Is it safe to paint a radiator that’s part of a steam system?
Yes, the same prep and painting approach applies. The difference is around the valve, not the paint job itself: a steam radiator has an automatic air valve rather than a bleed key, and it shouldn’t be opened or adjusted the way a hot-water valve is, so keep painting confined to the radiator body and leave that valve mechanism untouched and unpainted.