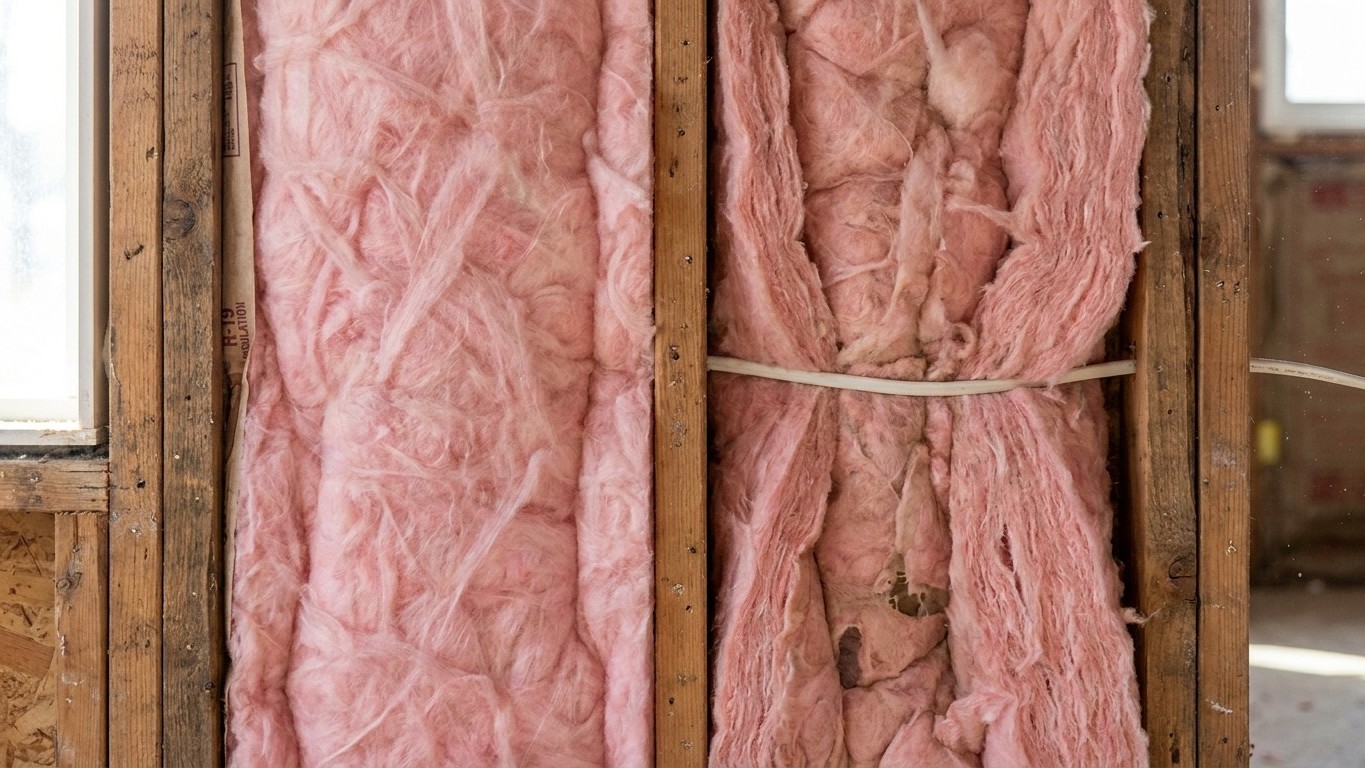

A batt that looks fine from the attic hatch can still be losing a third of its rated performance. The gap between “installed” and “installed correctly” is where fiberglass batts earn their reputation for underperforming, and it has nothing to do with the material itself. It comes down to contact, compression, and whether the batt was cut to fit or forced to fit.
What is actually going on

The R-value printed on a bag of fiberglass batts is a lab number. It’s measured with the batt at its full, uncompressed thickness, sitting flat, touching framing on all six sides with no voids anywhere in the cavity. That’s the condition the number promises. It’s also a condition that’s surprisingly hard to reproduce in a real stud bay or joist cavity, especially one full of wiring, electrical boxes, or an odd stud spacing left over from a remodel.
Compress a batt to fit a shallower space and you don’t get a smaller version of the same R-value. You get disproportionately less. Squeeze a batt rated for a full-depth cavity into three-quarters of that depth and the loss in performance is worse than the simple math of “used three-quarters the material” would suggest, because compression collapses the air pockets that the fiberglass fibers are there to trap. The Insulating value comes almost entirely from still air held in place by the fibers, not from the fibers themselves. Squash that structure and the air moves, and moving air carries heat.
Gaps do something different but just as damaging. A batt that’s cut a half-inch short at the end of a joist bay, or one that’s been tucked around a wire without splitting it, leaves a channel of open space right next to the insulation. Air doesn’t need much of an opening to start convecting through a cavity, and once it does, it’s carrying warm or cool air past the insulation instead of through it. A wall or attic with a gap in one out of every ten bays isn’t losing ten percent of its performance. Thermal bridging and convective looping around the gap drag down the whole assembly, because heat finds the path of least resistance and a gap is exactly that.
This is why two houses with the same rated insulation, installed by two different crews, can have measurably different energy bills. The bag says the same number. The installation doesn’t.
Where it belongs, and where it does not
Fiberglass batts are designed for open, regular cavities you can reach and see, framed at standard spacing, without much in the way. The moment a cavity stops being simple, the batt has to be cut and fitted by hand, and that’s exactly where quality starts to slip.
Situation by situation
| Where it’s used | What happens if it’s done wrong |
|---|---|
| Standard open stud or joist bay | This is the batt’s home turf. Full contact on all sides, no compression, performs close to rated value. |
| Around electrical boxes and wiring | If the batt is stuffed behind the wire instead of split around it, you get a compressed pocket on one side and a gap on the other. It should be split so both halves sit flat against the framing. |
| Behind a pipe or duct crossing the cavity | Stuffing the batt behind the obstruction leaves an air gap in front of it. Splitting the batt so it wraps the pipe on both sides keeps contact and avoids the void. Stuffing is the wrong move here, not a shortcut. |
| Irregular framing bays (odd widths, angled cuts) | An uncut batt jammed into a too-narrow or too-wide bay either compresses or leaves a gap on one side. It needs to be cut to the actual dimension, not forced. |
| Cavities you can’t see or reach fully (behind finished walls, tight crawlspaces) | A batt can’t be verified for full contact if it can’t be seen. This is where blown-in or spray products, installed by someone who can access the space properly, are often the better call. |
That last row matters. Fiberglass batts are not the right answer everywhere, and a page that pretends otherwise isn’t being straight with you. Wall cavities behind existing siding or drywall, oddly shaped attic framing, or any space where a person can’t physically see and press the batt into place are situations where a loose-fill or spray product usually does a better job, because those materials fill irregular space by conforming to it rather than requiring a hand-cut fit.
A few safety points apply regardless of where the batt goes. In an attic, walk only on joists or a rated walk board, never on the ceiling drywall between them. If you find older insulation that could be vermiculite or otherwise suspect, don’t disturb it and get it evaluated first. Keep insulation clear of recessed light fixtures and flue chimneys by whatever clearance the fixture or appliance manufacturer specifies. A garage ceiling under living space is a fire separation, not just a thermal one, and any combustion appliance in a space you’re about to air-seal or insulate around should be checked for backdrafting risk before you close things up.
The moisture side of the decision
Every insulation job is also a decision about which direction moisture is allowed to move, and this is where a well-installed batt can still cause a real problem if the vapor control is backwards. Fiberglass batts themselves don’t stop water vapor, but many come faced with a kraft paper or foil layer that does, and that facing has to go on the correct side of the assembly or it traps moisture instead of managing it.
The general principle is that vapor should be free to move toward the side of the assembly where it can dry out, and blocked, if at all, only on the side where humid air originates. Which side that is depends on your climate and even on the season in some parts of the country, which is exactly why this can’t be answered with one blanket rule for the whole nation. The model building code doesn’t even require an interior vapor retarder at all in the three warmest climate zones, because the drying dynamics there work differently than they do in a cold northern climate.
Getting the facing orientation wrong doesn’t just reduce performance the way a gap does. It can actively trap moisture inside a wall or ceiling cavity, where it condenses, soaks the insulation, and creates conditions for mold and wood decay that a poorly fitted but dry batt would never cause. This is a case where a mistake doesn’t just cost you some efficiency, it can cost you the wall.
It’s also worth being clear that a vapor retarder and an air barrier are not the same thing and don’t do the same job. A vapor retarder slows the diffusion of water vapor through a material. An air barrier stops bulk air movement, the kind that carries far more moisture, far faster, through gaps and cracks. A batt can have a perfect vapor retarder facing and still sit in a leaky, ungasketed cavity that’s moving moisture-laden air right past it. Both jobs matter, and they’re solved differently.
Because the correct facing orientation depends on where you live, this page isn’t going to assign you one. Check a vapor barrier guide for how the principle applies to your assembly type, and check your state’s specific guidance before you decide which way the facing goes.
What to settle before you buy anything
Before a single batt goes into a cavity, two things need to be settled, and both come before insulation, not after. The U.S. Environmental Protection Agency’s ENERGY STAR program treats air sealing and insulating as one project with sealing first, not two separate projects you can do in either order. Insulation slows heat transfer through a material. It does nothing about air moving through gaps, cracks, and penetrations, and no amount of added insulation compensates for a leaky building enclosure.
ENERGY STAR estimates that homeowners can save an average of 15% on heating and cooling costs (or an average of 11% on total energy costs) by air sealing their homes and adding insulation in attics, floors over crawl spaces, and accessible basement rim joists. That figure comes from energy modeling of a typical existing U.S. home doing both jobs together in those specific locations. It isn’t a promise for any single house, and it isn’t a number that applies to walls, windows, or doors.
The second thing to settle is How Much Insulation is already there and how much the location actually needs. ENERGY STAR’s recommended retrofit levels vary by climate zone and by whether an attic is currently bare or already has a few inches in place:
| Climate zone | Attic, if uninsulated | Attic, if you already have 3–4 inches | Floor |
|---|---|---|---|
| Zone 1 | R30 | R25 | R13 |
| Zone 2 | R49 | R38 | R13 |
| Zone 3 | R49 | R38 | R19 |
| Zones 4A and 4B | R60 | R49 | R19 |
| Zones 6, 5, and 4C | R60 | R49 | R30 |
| Zones 7 and 8 | R60 | R49 | R38 |
This table has a merged header for a reason: two of the three figures in each row describe the attic under two different starting conditions, and the third is a completely separate recommendation for floor cavities. Don’t read all three as attic numbers. This page also can’t tell you which zone your specific address falls into, since ENERGY STAR publishes that as a map, not a list. Check the ENERGY STAR climate zone map before buying material, because it’s the number the whole purchase is based on.
Last, check whether the cavity is even accessible enough to do a batt justice. If you can’t see the framing, can’t reach the far corners, or can’t verify full contact once it’s in, that’s a sign to reconsider the material before reconsidering the technique.
Common questions
Do fiberglass batts lose R-value over time even if installed correctly?
A properly installed batt that stays dry and uncompressed holds its rated value for a long time. What degrades performance is physical disturbance, moisture intrusion, or pests, not the fiberglass itself aging.
Can I just add a second batt on top of an existing one to boost R-value?
Adding a layer can work in some locations, like an attic floor, but only if the added batt is unfaced or the facing is removed, since a second vapor retarder layer trapped between two batts can cause the moisture problem described above. Whether it makes sense also depends on the climate zone recommendation and how much is already in place.
Is it better to compress a batt slightly than leave a gap?
Neither is correct, but a small, even compression across the whole batt generally causes less damage than a gap, because a gap allows air to bypass the insulation entirely through convection. The right fix in both cases is cutting the batt to the actual cavity dimension.
How do I know if my attic already has enough insulation?
Measure the existing depth and compare it against the recommended level for your climate zone in the table above. If you already have a uniform 3 to 4 inches, use that column rather than the “uninsulated” figure, since the recommended addition is lower once some insulation is already doing part of the job.