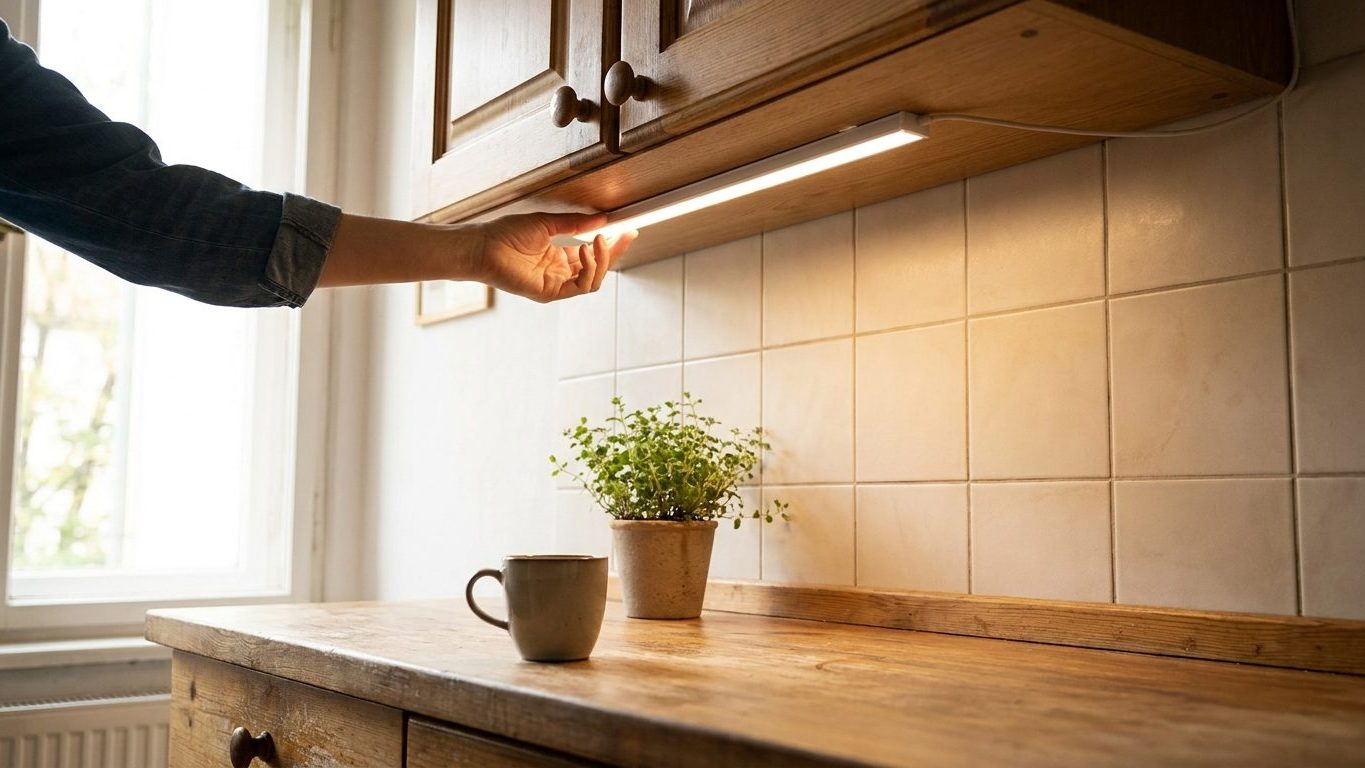

Mount the light strip flush against the back wall of the cabinet, the way most kits arrive from the factory, and you have already built the glare problem you’re trying to fix. The fixture belongs at the front edge of the cabinet underside, near the lip, not tucked against the wall behind it. That position throws light down onto the counter, not sideways into a glossy backsplash and back up at your face. Move every strip, puck, or bar light forward before you drive a single screw.
Front or back: the placement that decides everything

The Illuminating Engineering Society’s RP-1, the lighting industry’s recommended practice for how fixtures should be aimed and placed, puts the answer plainly: the fixture goes toward the front edge of the cabinet underside, not against the back wall where the cabinet meets the backsplash. RP-1 is a recommended practice, not a building code or an electrical code section. No inspector checks fixture position against it, and no permit hinges on it. It is the standard the lighting trade and kitchen designers use because it works, not because a jurisdiction adopted it.
What the front-edge placement actually measures is the throw of the light relative to the counter surface below it. A fixture mounted at the back of the cabinet, hard against the wall, sends its beam almost straight down onto the backsplash and only grazes the counter at an angle. Move that same fixture forward, close to the front lip of the cabinet, and the beam angles down onto the work surface where you’re actually cutting, chopping, and reading labels.
Why the cabinet’s own depth matters
Cabinet depth changes how much difference “front” makes. A deeper wall cabinet gives you more room to move the fixture forward from the back wall. A shallow cabinet, or one with a spice rack or wine rack built into the bottom, shrinks that room, and the front-edge position becomes more important, not less, because there’s less depth available to correct for a bad angle. The rule doesn’t change with cabinet depth. What changes is how much a mistake in either direction costs you in visible glare.
Why a glossy backsplash makes the mistake visible
Glare isn’t just about brightness. It’s about the angle at which light bounces off a surface and back at your eyes. IES RP-1 spells out the specific failure mode of a poorly placed under-cabinet light: a fixture mounted toward the back of the cabinet reflects off a glossy backsplash straight into the eyes of anyone standing at the counter. The wall becomes a mirror aimed right back at you.
A matte or heavily textured backsplash scatters that light in many directions, so some glare still happens but it’s diffuse enough that most people don’t notice it. Glass tile, polished stone, and high-gloss ceramic behave differently. They act almost like a mirror at a shallow angle, and a light source sitting close to that surface, aimed steeply downward, sends a hard, concentrated reflection back at head height. Anyone chopping vegetables or reading a recipe on a tablet looks straight into that reflected point of light every time they glance up.
Distance from the wall changes the angle
Move the fixture toward the front edge of the cabinet, away from the backsplash, and the geometry changes. The light travels down and slightly forward before it ever reaches the wall, so by the time it does reach the glossy surface, the angle of reflection sends the bounced light down toward the counter or out into the room, not back up at a standing adult’s eye level. That is the entire mechanical reason the front-edge placement in IES RP-1 works. It isn’t a brightness rule. It’s a geometry rule.
This matters more in a tight kitchen than a wide one. In a galley kitchen where the minimum width between two runs of counter leaves little room to step back from the counter, you’re standing closer to the backsplash and closer to that reflected glare than you would be at an island with open space around it. The same misplaced fixture that’s merely annoying in a spacious kitchen becomes hard to work under in a narrow one.
You can often spot the mistake without measuring anything. Stand at the counter where you’d normally prep food and look at the backsplash directly across from the cabinet. A bright, sharply defined patch of reflected light, rather than a soft general glow, usually means the fixture behind it is sitting too far back. A correctly placed strip lights the counter brightly enough that the backsplash reflection becomes secondary, not the main thing you notice.
Strips, pucks, and the scalloped light they leave
A handful of puck lights spaced along the cabinet, each throwing its own small cone downward, produces bright circles on the counter with dim gaps between them. IES RP-1 addresses this directly: continuous strips or closely spaced fixtures avoid the scalloped pools of light that a few spots produce. The gaps are where the eye notices unevenness most, not the bright spots themselves.
What counts as closely spaced
RP-1 doesn’t hand down one fixture-spacing number that fits every cabinet, because the spacing that avoids scalloping depends on the beam angle and output of the specific fixture, the mounting height above the counter, and the length of the run. That’s a manufacturer’s-spec-sheet question, not something a page like this can answer with a single figure. What the recommendation settles is the outcome to aim for: even, unbroken light along the counter, not a string of individual pools.
A continuous LED strip sidesteps the spacing question entirely because it’s, by design, one unbroken light source rather than several separate ones. That’s why strips have become the default for runs longer than a couple of feet, while individual puck lights tend to show up on shorter runs or where a cabinet has a gap, a vent, or a hood interrupting the underside.
Corners and the ends of a run are where scalloping shows up first, because that’s where a puck light’s cone tapers off before the next one begins. Extending a strip a little past the last few inches of counter, or choosing a fixture rated for edge-to-edge coverage, closes that gap.
No inspector checks this
Because RP-1 is a recommended practice rather than a code section, nobody enforces the strips-versus-pucks decision at permit or inspection. There’s no local adoption to check, because there’s nothing here for a jurisdiction to adopt. The decision comes down to the fixture you choose and how you space it, not a rule a building department signs off on. If your remodel involves new circuits for this lighting, the wiring itself is what your local electrical code and building department care about, and that’s a conversation for a licensed electrician, not for a lighting placement guideline.
Testing the position with a torch before installing

Before you drill a single mounting hole, hold a flashlight, or a battery puck light with double-sided tape, at the spot on the cabinet underside where you’re planning to mount the fixture. Turn off every other light in the kitchen first. Daylight through a window washes out glare that shows up clearly after dark, so test with the room lights off, not with the blinds open at noon.
What to check while the test light is on
- Stand at the counter in your normal prep position and look straight ahead at the backsplash, not down at the light.
- Move the test light forward and back along the cabinet underside, an inch or two at a time, and watch how the reflected patch on the backsplash moves with it.
- Check the position from a seated height too if anyone at home uses a stool at the counter.
- Look at the counter itself, not just the wall. The light should land as a bright, even band on the work surface.
The most common measurement error is testing from directly underneath the cabinet instead of from where you actually stand to chop, stir, or read a recipe. Glare shows up at eye level from a few feet back, not from directly below the fixture, so a test light held under your chin can look fine even in a position that glares badly once you back up to a normal working distance.
Once a position tests well, mark it with a pencil line along the cabinet underside rather than relying on memory. Fixture strips and puck brackets are easy to nudge a half inch out of place while you’re up on a ladder with a drill, and that’s enough to reintroduce the exact glare you just spent ten minutes testing out.
The task lighting that lights the wall
A fixture left at the back of the cabinet doesn’t fail all at once. It works fine on the shelf, works fine in the box, and looks reasonable the first evening you flip it on. The problem shows up over months of actually cooking under it. The reflected glare off the backsplash becomes the thing you unconsciously angle your body to avoid, while the counter itself, the surface the light was supposed to help you see, stays comparatively dim.
Rewiring it later costs more than doing it once
IES RP-1 also calls for under-cabinet lighting to be switched separately from the ceiling lights, on its own switch or its own circuit. Skip that at rough-in and you end up with task lighting tied to the same switch as the overhead fixture, which means you can’t run a low-glare work light without lighting the whole room, and you can’t leave a soft under-cabinet glow on at night without the ceiling fixture coming with it. Both the position mistake and the switching mistake are far cheaper to fix before the drywall goes back up than after.
If you’re already opening the wall for a new circuit at this stage of a remodel, it’s a reasonable time to check other kitchen electrical loads too. A range hood pulling over 400 CFM needs make-up air to work properly, and that’s a separate mechanical question your contractor should be looking at during the same rough-in phase.
None of this is something a page can verify for your kitchen specifically. A licensed electrician, a kitchen designer familiar with IES RP-1, or the lighting fixture’s own installation sheet is where a placement decision gets confirmed against the cabinet, backsplash, and wiring you actually have.
Common questions
Can under-cabinet lights share a switch with the ceiling lights?
They can be wired that way, but IES RP-1 recommends a separate switch so the task lighting doesn’t force the whole room to light up. Sharing a switch isn’t a code violation, it just limits how you can use the light day to day.
Do puck lights work as well as a continuous strip?
They can, but IES RP-1’s coverage guidance points toward continuous strips or closely spaced fixtures specifically because widely spaced pucks tend to leave scalloped gaps of dimmer light between the bright circles. Spacing them tighter, or extending coverage past the ends of the run, closes most of that gap.
What if my cabinet is too shallow to mount the fixture at the true front edge?
Move it as far forward as the cabinet allows. Some improvement over a back-mounted fixture is still an improvement, even if you can’t reach the exact front lip. Check the fixture’s own installation sheet for how much clearance it needs to stay hidden behind the cabinet’s face frame or valance.
Does a matte backsplash mean placement doesn’t matter as much?
Matte tile scatters reflected light instead of mirroring it, so it hides a placement mistake more forgivingly than glass or polished stone does. It doesn’t change the underlying recommendation. IES RP-1’s front-edge placement is still what gets light onto the counter itself, not just what avoids a visible glare spot on the wall.