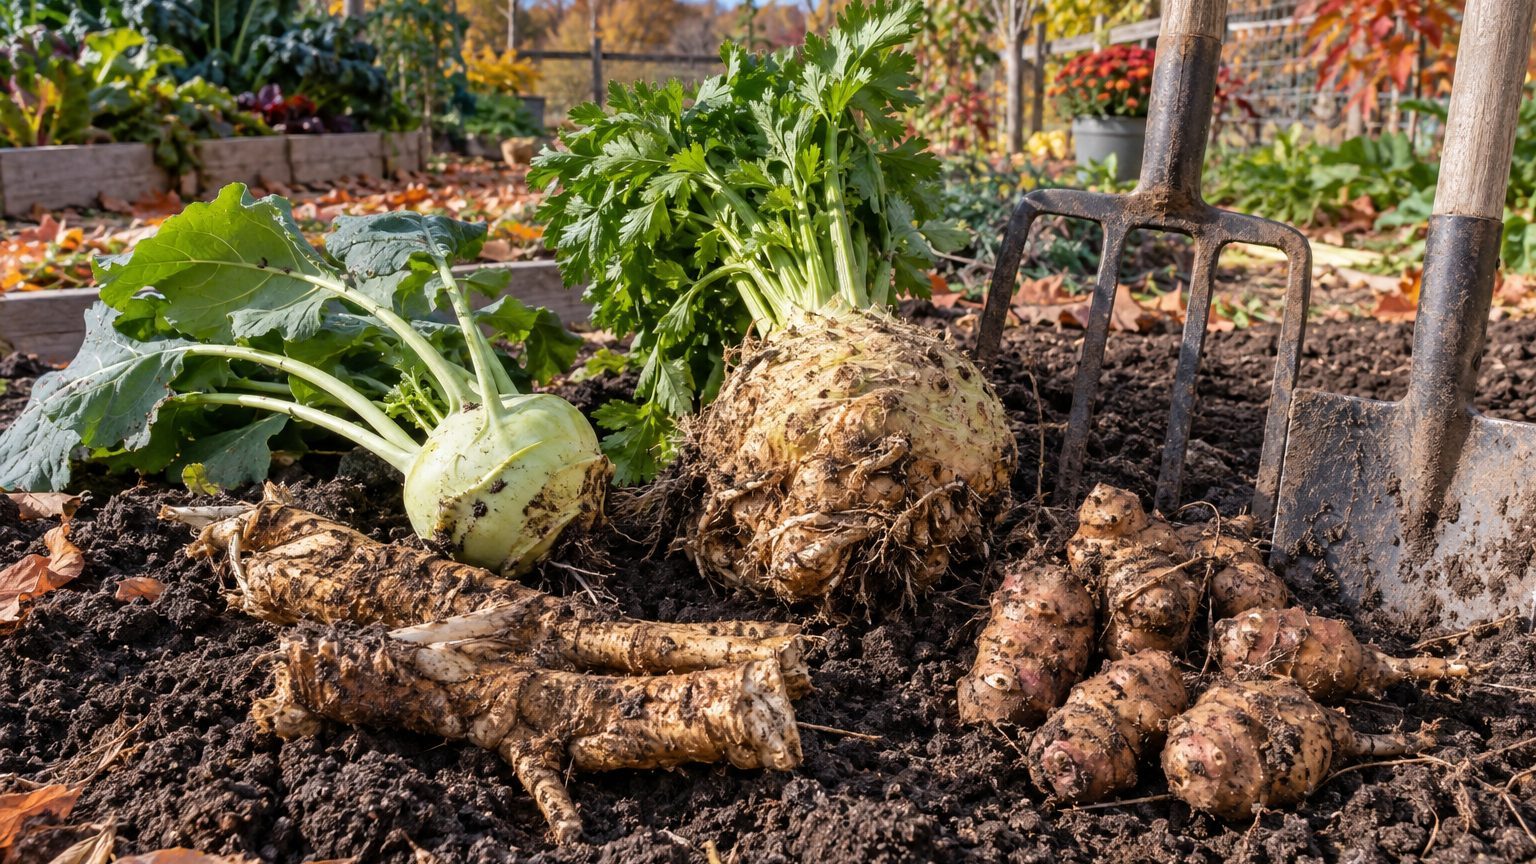

The four crops in this group come out of the ground on four different schedules. Kohlrabi is ready first, often within two months of sowing. Celeriac wants a long season and a few light frosts. Horseradish waits for the tops to die back in late fall, and Jerusalem artichokes want the stalks brown and the ground still diggable. Mix up those calendars and you get woody bulbs, shriveled tubers or roots that never reach their potential.
Digging them correctly matters just as much as timing. A shovel slices through horseradish and sunchoke tubers, while a spading fork lifts them. This guide covers when each crop is ready, how to get it out intact, and how to handle it afterward. It’s one piece of the larger series on Celeriac, Kohlrabi, Horseradish and Jerusalem Artichokes, so growing and cooking details live elsewhere.
Four Crops, Four Calendars
Start with kohlrabi, which isn’t technically a root at all. The round bulb is a swollen stem, and it has a narrow window. Pull it when it’s about the size of a tennis ball, roughly 2 to 3 inches across. Beyond that, most standard varieties turn woody and can split, and heat speeds the process along. Spring crops that mature in warm weather get tough faster than fall crops that ripen in cool air. Large storage varieties stay tender at bigger sizes, but they still need to come out before a hard freeze. Light frost is fine.
Celeriac moves slowly. Count on roughly 100 to 120 days from transplanting before the knobby bulb reaches 3 to 4 inches across. The shoulders often push up above the soil line, so you can check size without digging. Light frosts don’t hurt it, and many gardeners find the flavor improves with a little chill. A hard freeze is another matter. Pile mulch over the row if a cold snap is coming, and lift everything before the ground freezes solid.
Horseradish is the patient one. It’s a perennial, hardy across most of the country (USDA zones 3 through 9 is the usual range), and it can be dug twice a year: late fall after the foliage has been knocked back by frost, or early spring before new leaves emerge. Growers generally prefer the cold-weather harvest, since the roots are firm and the heat is strong. A root grown through a full season will be usable. A second season gives you thicker roots.
Jerusalem artichokes, also sold as sunchokes, give the clearest signal of all. The stalks, which can climb 6 to 10 feet, brown and collapse after frost. That’s the cue. Tubers can be dug anytime from then until the ground freezes, or all winter and into spring if you keep the soil workable. Many growers say they taste sweeter after a good cold spell. Unlike the other three, these tubers store poorly once dug, which shapes everything about how you handle them.
Digging Without Damage
Celeriac and kohlrabi: quick and tidy
Kohlrabi is the easy one. Grip the leaves and pull, or slice through the base just below the bulb with a sharp knife. Hand-pulling works in loose soil, but a knife leaves less disturbance for neighboring plants.
Celeriac needs a little more care. Push a spading fork into the soil 4 to 6 inches away from the bulb, rock it back to loosen, then lift by the shoulders. Yanking by the stalks snaps them off and can leave the bulb stuck in clay. Shake off loose soil, but save the real cleanup for later. The web of fibrous rootlets on the underside is part of what makes celeriac look rough, and it comes off easily with a knife once the bulb is out.
Horseradish and sunchokes: the ones that come back
Horseradish roots run deep. The main taproot can go a foot or more down, with thinner side roots branching off. Dig a trench along one side of the row so you can see what you’re doing, then lever the roots up with a fork instead of chopping into them. Wear gloves. The sap stings skin, and cutting a fresh root releases fumes strong enough to make your eyes water.
Here’s the part many first-timers skip. Before you take the harvest to the kitchen, set aside a few of the pencil-thick side roots, about 8 to 12 inches long. Those are your planting stock for next year, and they’ll establish quickly. The big, fat taproot is what you eat.
Sunchokes grow differently. The tubers spread sideways from the base of the stalk, often within about a foot, and the skin is thin enough to bruise or scrape. Cut the dead stalks to a few inches high so you have a handle and a marker, then dig a fork’s width away from the stem and work inward. Feel through the loosened soil by hand, because tubers hide. Even a small piece left behind will sprout in spring. For some gardeners that’s a bonus. For others it’s a weed problem that takes years to resolve, so decide before you plant whether you want a permanent patch.
Trimming, Cleaning and Storing
What happens in the first hour after lifting sets how long the crop lasts. Each of the four wants something different.
- Kohlrabi: twist or cut off the leaves (they’re edible, so cook them within a day or two). Bag the bulbs and keep them in the refrigerator for a couple of weeks, or longer for large storage types.
- Celeriac: trim the tops to about an inch and cut off the rootlets. Store at 32 to 40°F with high humidity, in a cellar, a spare refrigerator or a crisper drawer. It keeps for several months under those conditions.
- Horseradish: brush off soil, wrap the roots in a damp paper towel, and put them in a bag in the refrigerator for a few weeks. For longer storage, pack them in slightly damp sand in a cool cellar.
- Sunchokes: refrigerate in a perforated bag. Expect them to shrivel within a week or two if left out.
Washing is worth thinking about. Celeriac and kohlrabi can be rinsed and dried without trouble. Horseradish and sunchokes do better with their dirt brushed off and the real washing saved for just before use, since moisture on stored tubers invites rot.
Sunchokes deserve a second look on the storage question. Because they keep so poorly, the best “storage” is the soil itself. Dig only what you plan to eat in the next several days, and leave the rest in place. If you’re new to them, start with a small portion, as Why Jerusalem Artichokes Disagree With People explains. A big first plate of freshly dug tubers is a common mistake. Once you have a harvest on the counter and need ideas, What to Actually Do With These Four picks up where the digging leaves off.
For horseradish, one kitchen detail starts at harvest. Grated root loses its bite quickly once exposed to air, so grate only what you need. The heat builds in the first couple of minutes after grating, and vinegar added after that point locks it in. Add vinegar right away and you get a milder condiment. Wait too long and the flavor flattens.
What to Leave in the Ground
Two of these crops are designed to outlast your harvest, and treating them like annuals wastes the best part of the deal.
Horseradish regrows from nearly any root fragment left in the soil. That’s the reason replanting the pencil-thick pieces is so simple, and also why a bed that’s been dug carelessly will keep sending up leaves for years. Gardeners who want to keep it contained often give it a dedicated corner or a deep bed with a firm edge. If you’d rather start fresh, dig deeper than you think you need to and sift the soil for fragments.
Sunchokes work the same way, only more aggressively. Every tuber you miss becomes a plant. Some growers use a half-barrel or a raised bed with solid sides to keep the patch from wandering. Others accept the spread and harvest steadily to hold it in check. Either approach works, as long as it’s a choice you made on purpose.
Celeriac and kohlrabi, by contrast, are true one-and-done crops. Pull them, clear the bed, and plant something else. Their leftover roots rot down without regrowth. That makes them the easy members of this group, and a sensible place to start if the others seem like a commitment.
One tip for winter digging: before the ground freezes, spread about a foot of straw or shredded leaves over your sunchoke patch. The insulation keeps the soil soft enough for a fork, so you can pull fresh tubers well into winter instead of racing a frozen crust.