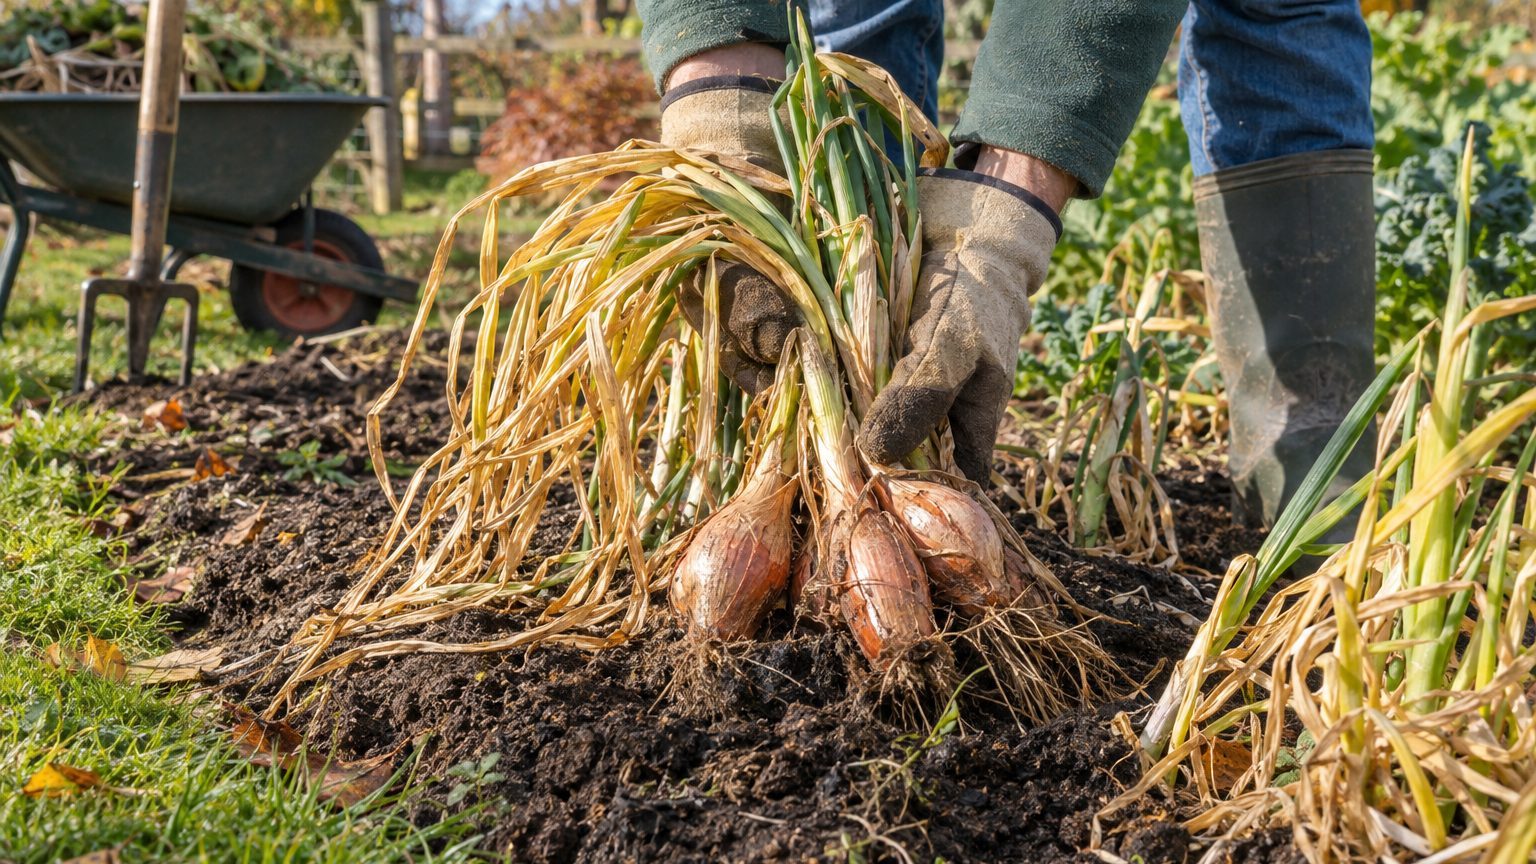

Lift shallots when about half to two-thirds of the green tops have yellowed and flopped over, usually 90 to 120 days after spring planting. In most of the country, that lands between mid-July and mid-August. Fall-planted shallots in milder climates come out earlier, often in June or early July. Calendar dates are a rough guide, though. The tops tell you far more than the date does.
Reading the Tops Instead of the Calendar
A shallot spends spring building leaves and early summer swelling bulbs. Once the bulbs are mature, the plant stops feeding them and begins to shut down. That shutdown is what you can see from the path: leaves lose their glossy green, turn yellow, then fall over at the neck. Falling over is the plant’s way of closing the door behind the bulb.
A few signs say a clump is ready:
- Most of the foliage is yellow or tan, and a majority of the tops have collapsed.
- The bulbs sit high in the soil, with the upper part of each one exposed.
- The outer skins feel papery and take on the color of the variety (coppery, gray, rosy, or golden).
- The necks have gone thin and soft rather than thick and green.
Don’t wait for every last leaf to turn brown. A few green tips on a clump with mostly collapsed foliage are fine. Waiting for total dieback in a wet summer invites rot, and bulbs left sitting in warm, damp soil can start to split or regrow roots.
How planting method changes the timeline
Sets planted in early spring, as soon as the soil can be worked, are the quickest route. Expect roughly three to four months, so a mid-April planting in the Midwest or Northeast is typically ready by late July or August. Shallots planted in fall in Zone 7 and warmer get a head start through winter and can be ready in late spring to early summer, which frees the bed for a second crop.
Seed-grown shallots run longer. Started indoors in late winter and transplanted, they commonly need four to five months before the tops fall, and the bulbs are often smaller and more variable than those from sets. If you’re deciding between the two approaches, Planting Shallot Sets, or Growing From Seed compares the timing, cost, and results in detail.
Each planted set divides underground into a cluster, usually three to ten bulbs, so a single clump takes up more room than you’d expect when you start digging. The overview in Growing Shallots: One Bulb In, a Handful Out explains why that multiplication happens and how to space plants for it.
Lifting Day: Weather, Tools, and Technique
Water matters more than most gardeners realize. Cut back on irrigation about two to three weeks before you expect to harvest, once the bulbs have reached size. Dry soil encourages the plant to finish ripening and makes the bulbs cleaner and easier to cure. If a summer thunderstorm is forecast and the tops are already down, you can let the rain pass and lift a few days later, but don’t keep irrigating just because the bed looks tired.
Pick a dry morning, ideally after two or three rain-free days. Soil that crumbles off the roots gives you cleaner bulbs and fewer skin tears. Heavy clay, common across much of the Southeast, the Ohio Valley, and parts of Texas, can hold moisture long after the surface looks dry, so push a trowel down a few inches and check before you commit.
A garden fork works better than a spade. Slide it in about 4 to 6 inches away from the clump, loosen the soil beneath it, and lift gently so the bulbs rise intact. A spade slices through clusters surprisingly easily, and any cut or bruised bulb is a poor candidate for storage. Pulling by the tops is tempting in loose soil, but the neck can snap off and leave an open wound where rot gets in. Loosen first, then lift.
Once the clump is out, shake off the loose soil by hand. Don’t wash the bulbs, and don’t scrub the skins. Moisture trapped between the layers is exactly what you’re trying to avoid. Leave the tops and roots attached, since the bulbs will finish drawing a bit of energy from them during curing. Trim only after the necks are fully dry.
When the Schedule Goes Sideways
Garden plans rarely run the way the seed packet suggests. A few common curveballs deserve a plan.
A wet summer is the biggest one. Persistent rain keeps the tops green, delays ripening, and raises the odds of fungal trouble. Neck rot, caused by a Botrytis fungus, shows up as a soft, water-soaked area at the neck that spreads into the bulb, and white rot (a soil fungus) can destroy a planting entirely. If the foliage is collapsing early and the bulbs look healthy, harvesting a little ahead of schedule and curing indoors is safer than leaving them in sodden ground. Bulbs pulled slightly early cure fine as long as the tops have started to turn.
Bolting is the second. A seed stalk that shoots up from the center of a shallot means the plant has switched from growing bulb to making flowers, and the bulb’s center turns woody. Seed-grown shallots are more prone to it, especially after a cold snap in spring. Pull bolted plants as soon as you spot the stalk and use them first. They won’t store well, though they’re perfectly good in the kitchen.
Heat and sun cause a quieter problem. After lifting, bulbs left lying in blazing afternoon sun can scald, leaving soft, translucent patches on the exposed side. A day in light sun before moving them under cover is fine. A week of direct sun in July is not.
Frost rarely matters for shallots in the way it does for tender crops, because most varieties handle a light freeze. The real risk is a long, wet autumn catching a crop that was planted late or slow to mature. In those years, lift on the first good dry window rather than waiting for perfect conditions.
And if you simply want fresh green shallots for cooking, you can pull plants well before the tops fall, from late spring on. They’ll have thin white stems and small bulbs, with a milder, scallion-like flavor. They won’t keep, so treat them as a seasonal treat rather than your storage crop.
From Garden to Pantry
The bulbs aren’t done when they leave the ground. Moving them from soil to storage happens in three stages: a short rest in the open, a longer period of curing, and then the final cleanup before they go in a cool spot.
Spread the lifted clumps in a single layer somewhere dry, shaded, and well ventilated. A covered porch, a garage with open doors, a shed with a fan, or a barn loft all work. Mesh screens, wire racks, or old window screens raised on blocks keep air moving underneath. Curing usually takes two to four weeks, and it’s finished when the necks are tight and dry, the roots are wiry, and the outer skins rustle when you handle the bulbs. The full routine, including what to do in a humid climate where air just won’t dry, is laid out in Curing Shallots So They Keep.
Once cured, trim the roots to about a quarter inch and cut the tops to an inch or so above the bulb, or braid them if the foliage is still pliable. Brush off any remaining dirt and peel away only the loosest outer skin. Sort the bulbs as you go. Any that are bruised, split, thick-necked, or soft should move to the kitchen counter and get used within days, not stored.
For storage, a cool, dry spot with good airflow keeps shallots best. Many gardeners aim for temperatures in the 32 to 40°F range with moderate humidity, such as an unheated but frost-free room or a refrigerator drawer for smaller batches. A basement that stays damp is a poor choice. Mesh bags, open baskets, and slatted crates beat sealed plastic containers, which trap moisture. Well-cured bulbs of a good keeping variety can last six months or more, and some stored varieties stay usable close to a year.
Decide at harvest which bulbs will become next year’s planting stock. Many growers hold back a portion of firm, healthy, mid-sized bulbs, roughly an inch across, since planting extra-large ones can encourage bolting in some varieties. Store them separately from the eating bulbs, and label the bag so they don’t get cooked by mistake. One more bit of kitchen math: a shallot bulb that starts pushing a green sprout in late winter isn’t ruined. The sprout is edible, much like a chive, though the bulb itself will soften as it spends its reserves.