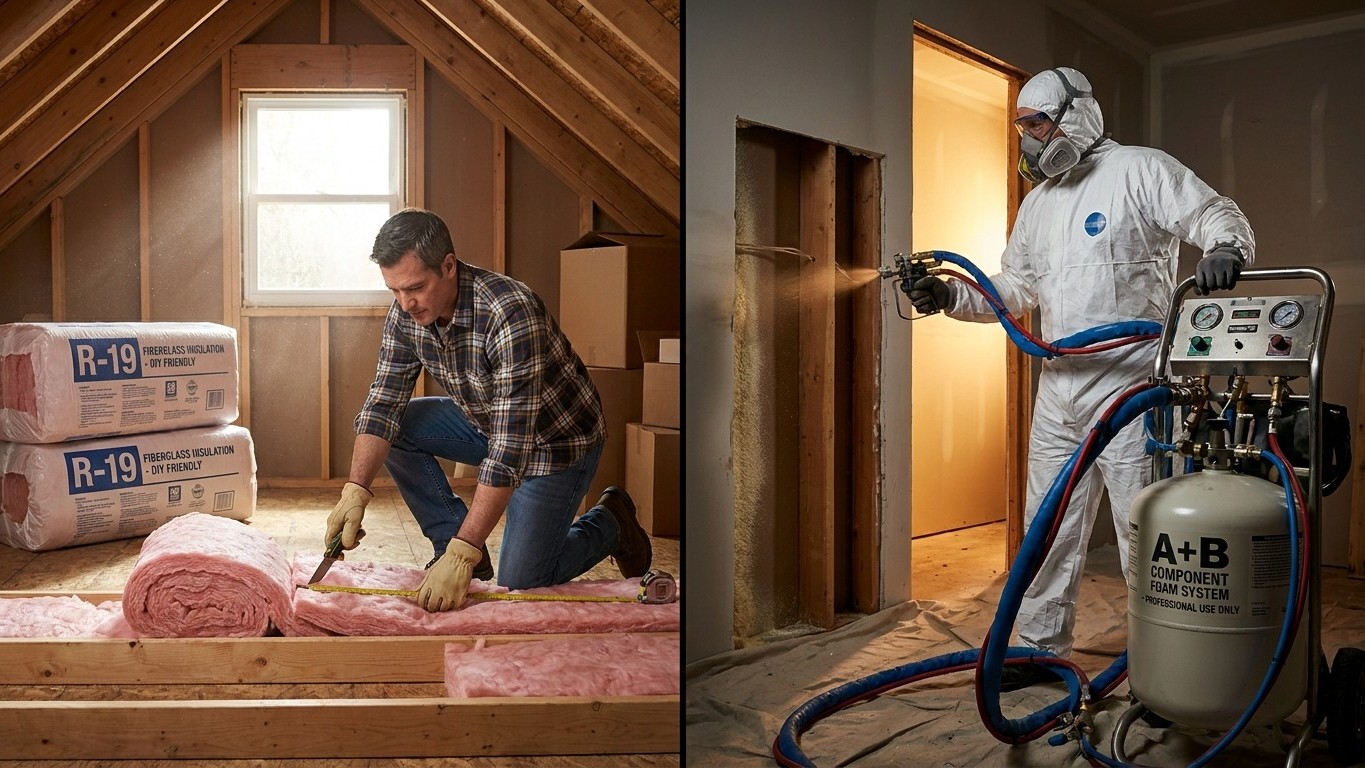

The split here isn’t about how handy you are. It’s about whether the job needs equipment you don’t own, measurements you can’t eyeball, or a safety check that requires training to interpret. Batts and rigid foam board are hand-tool jobs. Loose-fill needs a blower. Spray foam needs a rig, protective gear, and someone who knows what a bad mix ratio smells like. Get the category wrong and you either waste a Saturday or create a moisture problem that costs far more to fix than the insulation itself.
What is actually going on

Insulation materials split into two groups based on what installing them requires, and that split matters more than any skill level. The first group needs nothing but hand tools: fiberglass or mineral wool batts, rigid foam boards, and rolls that you cut and fit by hand. The second group needs equipment you almost certainly don’t have sitting in the garage: loose-fill cellulose or fiberglass needs a blowing machine to install at the right density, and spray polyurethane foam needs a proprietary two-component rig that mixes and applies the chemicals on site.
That equipment gap is the real dividing line. A blower for loose-fill can be rented at many home centers along with the material, which puts attic-floor blown-in insulation within reach for a careful homeowner. A spray foam rig is a different animal. The two components react on contact and generate heat as they cure; get the ratio wrong, work in bad ventilation, or skip the respirator, and you’re dealing with a health and fire-safety issue, not just a botched insulation job. That one stays with a trained installer.
The other half of “what is actually going on” is measurement, and this is where a lot of DIY attic projects go wrong before the first bag of insulation is even opened. You need to know your climate zone and How Much Insulation you already have, because both change the target.
The ENERGY STAR retrofit table
ENERGY STAR publishes recommended insulation levels for retrofitting existing wood-framed homes, broken out by climate zone. The table below has a header that combines two attic scenarios with one floor value, so read each row as three separate figures, not three attic numbers:
| Climate Zone | Attic if uninsulated | Attic if you already have 3-4 inches | Floor |
|---|---|---|---|
| Zone 1 | R30 | R25 | R13 |
| Zone 2 | R49 | R38 | R13 |
| Zone 3 | R49 | R38 | R19 |
| Zones 4A and 4B | R60 | R49 | R19 |
| Zones 6, 5 and 4C | R60 | R49 | R30 |
| Zones 7 and 8 | R60 | R49 | R38 |
This table is based on the 2021 International Energy Conservation Code (Table R402.1.3). None of these figures translate directly into inches. Depth depends entirely on the material’s density, and that number is printed right on the bag or roll, not in any code table. Which zone applies to your address is published by ENERGY STAR as a map, not a state or county list, so check that map yourself before you buy a single bag. Guessing your zone means guessing how much material to buy, and that’s not a corner worth cutting.
Where it belongs, and where it does not
Some insulation work is a reasonable weekend project. Some needs an assessment before anyone touches a tool. Here’s the honest breakdown, situation by situation, including what goes wrong when the wrong approach gets used anyway.
| Situation | Reasonable for DIY? | What goes wrong if handled the wrong way |
|---|---|---|
| Open attic floor, adding batts or renting a blower for loose-fill | Yes, for most homeowners | Uneven coverage if batts are compressed or gaps left around framing; low density if loose-fill is blown too thin |
| Accessible rim joists in a basement | Yes, with rigid foam board and sealant | Left uninsulated, this is one of the biggest heat-loss points in a house; skipping air sealing here undercuts everything else done in the attic |
| Crawlspace floor insulation | Conditionally, if the crawlspace is dry | Batts sagging or falling in a damp crawlspace trap moisture against the wood framing instead of Insulating it |
| Spray polyurethane foam, anywhere in the house | No | Bad mix ratios or poor ventilation create off-gassing and fire-curing hazards that a homeowner has no way to diagnose after the fact |
| Finished attic with knee walls, HVAC equipment, or ductwork | No, needs assessment first | Insulating around ducts or equipment without checking clearances risks trapping heat against equipment not rated for it |
| Wall cavities, only when siding is already off for other work | Conditionally, and only in that scenario | This is not a reason to remove siding just to insulate; done as a standalone project it rarely makes sense |
| Garage ceiling under living space | No | This assembly is a fire separation between spaces, and altering it without meeting fire-rating requirements is a code issue, not just an insulation one |
| Any material suspected to be vermiculite or to contain asbestos | Never, do not disturb it | Disturbing suspect material can release fibers into the air; this needs testing and, if confirmed, professional abatement |
A few safety points apply across several of these rows. Walk on joists, never on the ceiling drywall between them; it won’t hold your weight. Clearances around chimneys, flues, and certain recessed light fixtures are set by the fixture manufacturer or the appliance itself, not by preference, so check before covering anything near them. And if you’re sealing up a space that contains a combustion appliance (a furnace, water heater, or fireplace), that space needs a combustion safety assessment before you tighten it, because reducing air infiltration can affect how that appliance draws air.
The moisture side of the decision
Every insulation choice is also a decision about which direction moisture in that wall or roof assembly is allowed to dry. Get that backwards and the insulation itself becomes the thing trapping water against wood framing, and that’s where the expensive repairs start, not from the insulation failing to insulate, but from what happens behind it while nobody’s looking.
The principle is straightforward even though the answer isn’t the same everywhere: a wall or roof assembly needs at least one side that can dry out when moisture gets in, whether from a small leak, humid air, or just normal seasonal moisture movement. A vapor retarder controls how much moisture diffuses through a material over time. That is a different job from an air barrier, which stops bulk air movement (and the moisture that air carries with it). Installing a vapor retarder in the wrong place, or installing one where none is needed, can block the only drying path that assembly has.
This is exactly where a national page has to stop and hand off to something more specific, because the correct answer depends on climate. The 2021 International Energy Conservation Code does not require an interior vapor retarder in the three warmest climate zones at all. In colder zones, the guidance changes, and it changes again depending on the wall assembly and cladding. There is no single rule that applies from a house in Arizona to a house in Minnesota, and any page claiming otherwise is oversimplifying a decision that has real consequences if it’s wrong.
What that means practically: don’t install a vapor retarder because a product label recommends it in general, and don’t skip one because a neighbor didn’t need one. Check the vapor barrier guide for how this works assembly by assembly, and check your own state’s guidance for what applies in your climate zone before you make that call. Getting the face of the vapor retarder backwards, installing it on the warm side when it belongs on the cold side, can trap moisture inside the wall cavity for years before anyone notices the damage.
What to settle before you buy anything
Buying insulation before answering three questions is how homeowners end up with material that doesn’t fix the problem they had. Settle these first.
Is the space already air sealed? ENERGY STAR treats air sealing and adding insulation as two steps of one project, not two separate projects, and it puts sealing first for a reason: insulation slows heat transfer through a material, but it does nothing to stop air leaking around gaps, penetrations, and top plates. EPA estimates that homeowners can save an average of 15% on heating and cooling costs (or an average of 11% on total energy costs) by air sealing their homes and adding insulation in attics, floors over crawl spaces, and accessible basement rim joists. That figure covers the combined project in those specific locations, not insulation alone, and it’s an average from modeling a typical existing home, not a guarantee for any particular house.
How much is already up there? The retrofit table above has separate columns for “uninsulated” and “already have 3-4 inches” because the target changes based on what’s already in place. Pull back existing insulation in a couple of spots and measure before assuming either column applies.
Can you actually get to the cavity? An attic with a pull-down ladder and open joist bays is accessible. A finished attic, a wall cavity behind intact siding, or a crawlspace with 18 inches of clearance and no dry path to move around in is a different project, and sometimes not one that starts with buying insulation at all. If there’s a combustion appliance in or near the space you’re about to seal tighter, that’s the point to arrange a combustion safety assessment before, not after, the work is done.
Common questions
Can I mix insulation types in the same attic?
Layering loose-fill over existing batts, or batts over old loose-fill, is common and generally fine as long as the layer underneath isn’t wet, compressed, or contaminated with something like vermiculite. Check what’s already there before adding anything on top of it.
Do I need a permit to add attic insulation myself?
Requirements vary by jurisdiction and by whether the work involves anything beyond adding material to an existing open cavity. Check with your local building department before starting, especially if the project involves any change to ventilation, framing, or electrical clearances.
What’s the first sign that insulation was installed wrong?
Uneven room temperatures, ice damming along roof edges in winter, or a musty smell developing in a previously dry crawlspace or attic are all signs worth investigating. Any of these can point to gaps in coverage, a moisture problem behind the insulation, or both.
Are utility rebates available for insulation work?
Many state energy offices and utilities run rebate programs for insulation and air sealing, and the details differ by state and by program year. Check your own state’s energy office for what’s currently available before starting a project, rather than assuming a program you’ve heard about elsewhere applies where you live.