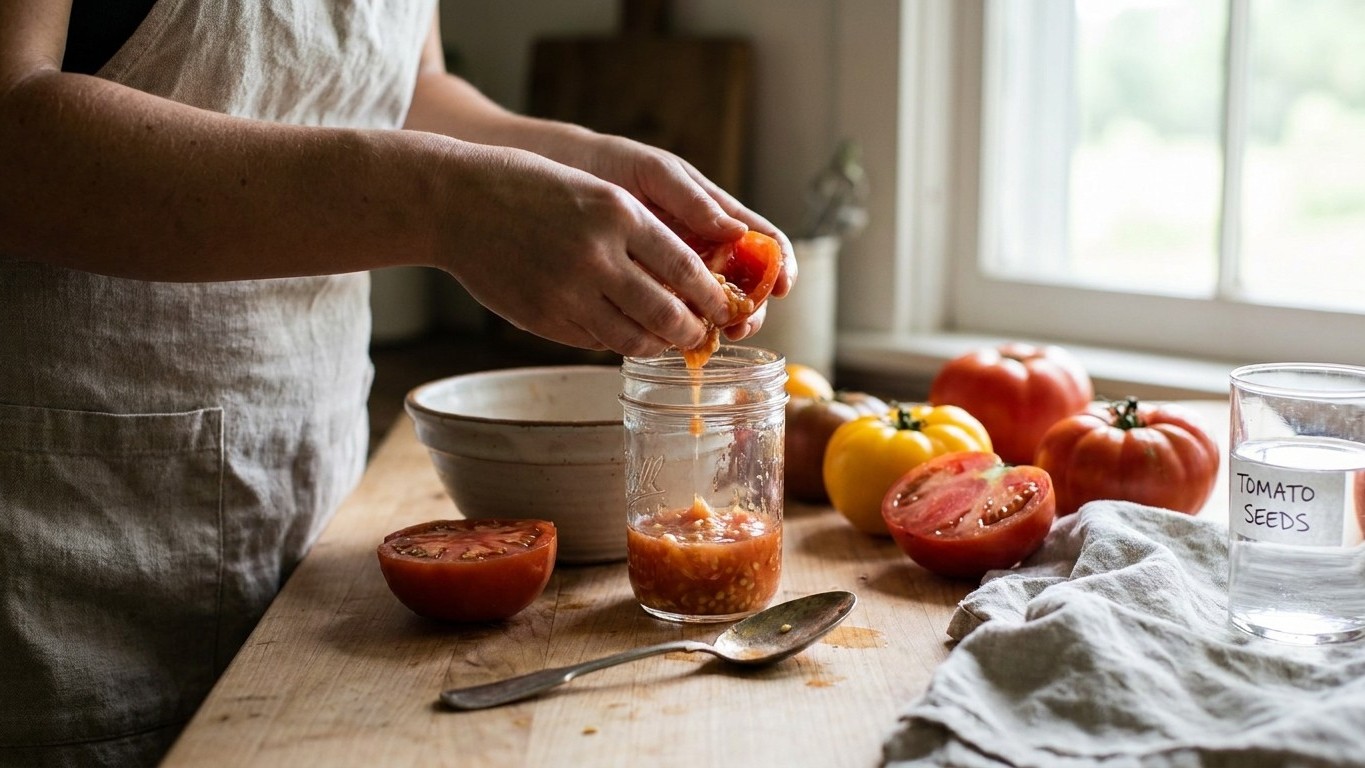

Seeds saved from an open-pollinated or heirloom tomato will grow true to the parent plant next season, while seeds from a hybrid (F1) variety will not. Fermenting the seeds for a few days strips off the gel coat that inhibits germination in the fruit. Pick your seed fruit from a plant you know is open-pollinated, and let it ripen fully on the vine before you touch it.
Why this matters
Every tomato seed sits inside a gel sac loaded with growth inhibitors. In nature, that gel stops the seed from sprouting inside a rotting fruit on the ground before conditions are right. If you skip removing it, the seeds you save won’t germinate reliably the following spring, and the ones that do come up will be slower and patchier than seed you bought from a packet.
Fermenting also matters for what it takes away, not just what it adds. The process mimics natural rotting closely enough to knock back some seed-borne diseases, including certain bacterial spot and canker organisms that can ride along on the seed coat. Done badly, saving seed just carries the same problems into next year’s crop. Done well, it gives you seed that germinates evenly and, if the parent was open-pollinated, produces fruit true to type.
When to do it
Timing is about the fruit, not the calendar. Wait until the tomato you’re saving seed from is fully vine-ripe, ideally a day or two past the point you’d normally pick it for eating. A tomato that’s slightly soft, fully colored, and just starting to soften at the shoulders has mature seed inside. Seed pulled from a fruit that’s still firm and just turning color is underdeveloped and won’t germinate well.
Pick from a plant that’s had a full, healthy season, not the first fruit that sets. Early fruit is useful for eating, but seed quality improves once the plant has settled into steady production. If you’re growing more than one variety in the same bed, watch for fruit that looks true to type in size, shape and color before you select it. Anything odd-looking on an otherwise reliable variety may be a stray cross from the year before, and that’s not the fruit to save from.
How to do it

Materials
- Ripe tomatoes from an open-pollinated variety
- A small jar, cup or bowl for each variety
- A fine mesh strainer
- A non-stick surface for drying (a coffee filter, ceramic plate, or window screen, not paper towel)
- Paper envelopes or small containers for storage, plus a pen for labeling
Cut the tomato in half at its equator and squeeze or scoop the seeds and surrounding gel into a labeled jar. Add a splash of water, about equal in volume to the pulp, and stir. Cover the jar loosely, or with a cloth secured by a rubber band, and set it somewhere at room temperature out of direct sun.
Over the next couple of days, a layer of white or grayish mold will form on the surface. That’s expected and it’s doing the work of breaking down the gel coat. Stir the mixture once a day to keep it from compacting. By the second or third day, you should see viable seeds sinking to the bottom while pulp, mold and any hollow, unviable seeds float. That’s your signal that fermentation is done. Leave it longer than three or four days and seeds can start sprouting right there in the jar, which ruins the batch.
Skim off the floating debris, then pour the jar’s contents through the strainer under running water, working the seeds with your fingers until they run clean and feel slightly gritty rather than slimy. Shake off excess water and spread the seeds in a single layer on your drying surface. Spread them thin enough that they don’t touch. Set the tray somewhere with good airflow, out of direct sun, and leave them for one to two weeks, stirring or flipping them every couple of days so they dry evenly and don’t clump.
Seeds are ready for storage when they feel hard and snap rather than bend, and no cool or damp spot remains anywhere in the batch. Label each envelope with the variety name and the year before you seal it. If you’re planning to grow these seeds out yourself, our guide to starting tomatoes from seed covers timing and light once you’re ready to sow them.
What goes wrong

The most common failure is under-fermenting: pulling seeds out after a few hours because the mold looks alarming. Under-fermented seed still carries gel residue, which clumps during drying and can trap moisture that leads to rot in storage months later. The opposite mistake, letting the jar sit too long, is just as costly. Seeds that have started to sprout inside the jar are done, even if you catch it early, because the embryo has already used up its stored energy.
Drying on paper towel looks like extra care, since it seems more absorbent and sanitary than a plate. In practice the seeds bond to the fibers as they dry and tear apart when you try to peel them off, destroying a portion of the batch. Use a coffee filter, ceramic surface, or fine screen instead. A related mistake is stacking seeds too thickly on the drying surface. Seeds in the middle of a clump stay damp long after the outer layer feels dry, and that’s exactly the moisture pocket that breeds mold in storage.
Skipping labels is a quiet failure that only shows up next spring, when you’re staring at three unmarked envelopes and no memory of which fruit came from which plant. Write the variety and year on the envelope before the seeds go in, not after, since it’s easy to forget once your hands are full of the next batch.
Doing it differently
Paste tomatoes and small cherry types carry less gel around each seed, so a shorter fermentation, closer to two days than four, is usually enough. Beefsteak types with heavy gel sacs often need the full three to four days to break down completely. Watch the jar rather than the clock either way, since gel volume varies even within a type depending on the variety and how ripe the fruit was when you picked it.
If you’re growing several tomato varieties close together, self-pollination in tomatoes means cross-pollination is less of a risk than it is in corn or squash, but it isn’t zero, especially with potato-leaf types or when pollinators are active nearby. Growers aiming for the purest possible seed sometimes bag a few flower clusters before they open to guarantee self-pollination, though for most home gardeners saving seed from a well-isolated plant or a variety with distinctive fruit is enough of a safeguard. Our guide to choosing tomato varieties by season is worth a look before you decide which plants to save from, since some varieties are simply more consistent seed producers than others.
Container-grown and raised bed plants don’t need a different fermentation method, but soil-splashed fruit sitting close to the ground picks up more surface bacteria before you even harvest it. Keeping a layer of mulch under the plants, as covered in our piece on mulching tomatoes, reduces that splash and gives you cleaner fruit to start the process with. For background on the crop overall, our main guide to growing tomatoes covers everything upstream of this stage.
Common questions
Can I save seeds from a hybrid tomato?
You can ferment and dry them the same way, but the resulting plants won’t reliably match the parent. Hybrid seed segregates into a mix of traits from its two parent lines, so fruit size, flavor and disease resistance can all shift, sometimes drastically, in the next generation.
Why did mold grow on my seeds and is that bad?
A thin layer of white or gray mold during fermentation is normal and is actually doing the work of breaking down the gel coat. Fuzzy black or green mold, or a foul smell rather than a yeasty one, usually means the batch sat too long or got contaminated, and it’s safer to start over with a fresh fruit.
How long do saved tomato seeds stay good?
Well-dried tomato seed stored in a cool, dark, dry place stays viable for several years, though germination rates drop gradually each season. Keeping seeds in a sealed jar with a moisture-absorbing packet in the refrigerator extends that further than an envelope left in a warm shed.
Do I need to remove every bit of pulp before drying?
Get the seeds as clean as you reasonably can, since leftover pulp holds moisture and invites mold in storage, but a few seeds with a bit of residue won’t ruin the batch. Rubbing the seeds gently against the strainer mesh under running water usually clears the rest.