
A slow-maturing heirloom and a fifty-day cherry tomato do not share a calendar, yet most seed packets get sown on the same weekend anyway. That’s the difference nobody mentions: the general rule says count backward from your last frost, but the variety in your hand should be setting that count, not the date on the wall. Miss it on the slower plant and you’re not looking at a stunted seedling — you’re looking at a season that ends before the fruit does.
Why this matters
The seed-starting window you pick decides almost everything about the plant’s first two months of life. Sow too early and the seedling sits indoors too long under weak light, stretching into a thin, pale stem that never fully recovers even after it goes in the ground. Sow too late and you lose weeks of the growing season the plant needed to set and ripen fruit before the weather turns against it.
This is also where variety choice and timing collide. A short-season cultivar and a long-season heirloom don’t forgive the same mistakes equally. Get the timing wrong on a slow-maturing variety and you may not get ripe fruit at all before the season ends. This one decision, made in late winter over a seed tray, sets the ceiling on what the rest of the season under tomato growing can achieve. A strong start is the cheapest insurance you’ll buy all year.
When to do it
Work backward from the plant’s transplant stage, not forward from a date on a calendar. Your target is a seedling with two to three sets of true leaves, a stem thick enough to resist flopping when you tip the pot, and roots that fill but don’t yet crowd the container. That combination usually takes about six to eight weeks from sowing, though cooler rooms and weaker light stretch it longer.
Watch the plant, not the clock, for the actual go-ahead to sow. If you’re germinating indoors under lights, sow once you know your expected transplant window, then simply count backward by the packet’s stated weeks. The single most useful habit here is checking your last frost data before you buy seed, so you’re not locked into a sowing date that doesn’t match your growing season length once you learn a variety’s days to maturity, a figure counted from transplant, not from seed, and one that shifts by a week or two with the season anyway.
Don’t start seeds simply because a neighbor did or because a big-box store display went up. That pressure is the single most common reason seedlings end up too old and too leggy by the time it’s actually warm enough to plant them out.
How to do it

Containers and mix
Use cell trays, small pots, or even repurposed yogurt cups with drainage holes punched in the bottom. Fill them with a sterile seed-starting mix, not garden soil and not the compost-heavy blend you’d use for beds. Garden soil compacts in small containers and carries fungal spores that kill seedlings before they get going. Save the richer amendments for later, once plants are ready to go into a properly prepared bed, which is a separate job covered in our soil preparation guide.
Sowing
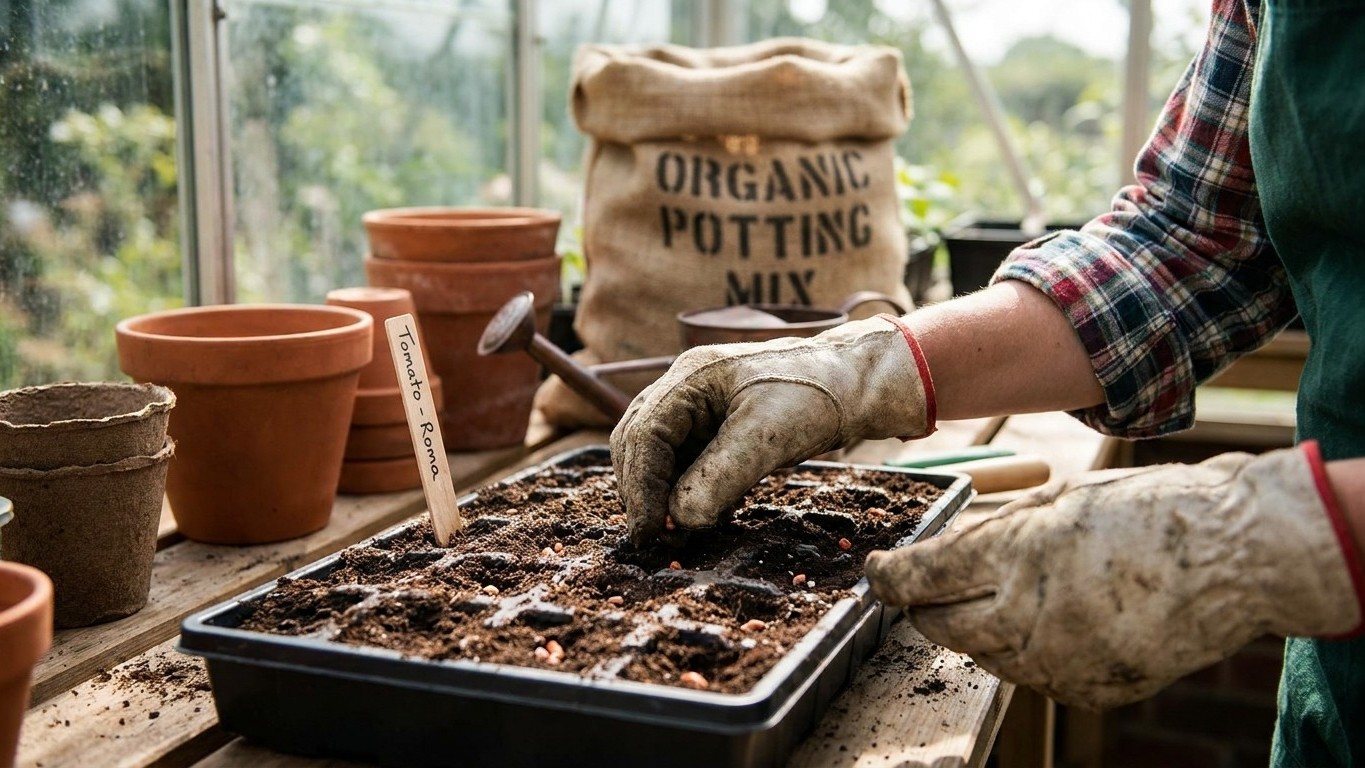
Moisten the mix before you sow so it’s damp like a wrung-out sponge, not soggy. Push each seed about a quarter inch deep, one or two seeds per cell, and cover lightly. Firm the surface gently with a fingertip so the seed keeps contact with the moist mix underneath. That’s the detail most first-timers skip, and it’s the difference between even germination and a scattered, unreliable stand.
Heat and light
Tomato seeds germinate fastest with steady warmth from below, which is why a seedling heat mat is worth the small cost if you’re starting more than a few trays. Once seedlings emerge, light becomes the limiting factor, not heat. A sunny windowsill rarely supplies enough intensity or duration for a stocky plant. The table below compares the common options.
| Light source | Typical result | Notes |
|---|---|---|
| South-facing windowsill | Leggy, leaning seedlings | Cheapest option, weakest result |
| Shop-light fluorescent tubes | Compact, upright growth | Keep bulbs 2-3 inches above leaves, raise as plants grow |
| LED grow lights | Compact, upright growth | More upfront cost, lower running cost, longer bulb life |
Thinning and hardening off
If two seedlings come up in one cell, snip the weaker one at the soil line rather than pulling it, which disturbs the roots of the one you’re keeping. As plants grow, pot up into larger containers once roots start showing at the drainage holes. In the final week or two before transplant, move plants outside for gradually longer stretches each day so the stem and leaves toughen against wind and direct sun. Skipping this step is one of the fastest ways to stall a seedling right after it goes in the ground. For more detail on getting a stocky, well-lit seedling rather than a leaning one, see our guide to growing tomato seedlings indoors.
What goes wrong

Most seed-starting failures trace back to a small number of repeat offenders:
- Damping-off: seedlings collapse at the soil line within days of emerging, usually from overwatering combined with poor air circulation.
- Sowing too deep: seeds buried more than about half an inch struggle to push through and germinate unevenly or not at all.
- Insufficient light: the classic leggy, pale, leaning seedling, almost always a light problem rather than a nutrient one.
- Cold water shock: watering straight from a cold tap can stall growth in young seedlings kept in a warm room.
- Skipped hardening off: plants that go straight from indoor conditions to full sun and wind often scorch or snap within a day or two.
The mistake that looks like extra care but isn’t is overwatering out of anxiety. New growers check their trays daily and, seeing dry-looking surface mix, water again before the root zone actually needs it. Constantly wet mix suffocates roots and is the single biggest invitation to fungal problems in a seed tray. Letting the surface dry between waterings is not neglect. It’s the correct rhythm for a container this small.
Doing it differently
Growers in a greenhouse or heated hoop house can sow earlier than someone relying on an indoor windowsill setup, because they’ve solved the light and temperature problem at a larger scale. If you’re working entirely indoors under lights, the setup described in our guide to growing tomato seedlings indoors is worth following closely, since light duration and distance matter more indoors than almost any other single factor.
Container growers and raised-bed growers don’t need to change the seed-starting method itself, but they do need to think ahead about where the transplant is headed. If you’re planning a mixed raised bed, it’s worth deciding on your companion planting layout before seedlings are ready to move, so you’re not scrambling to fit basil, marigolds or beans in around an already-planted tomato.
Variety type changes the calculation too. Determinate varieties tend to have a shorter, more compact growth habit and a tighter fruiting window, which can make a slightly later sowing date workable if your season is short. Indeterminate varieties keep growing and fruiting until frost, so they generally reward an earlier, more generous head start indoors. In warm-winter regions where frost isn’t a limiting factor at all, some growers skip indoor seed-starting altogether and direct-sow once soil temperatures are reliably warm, though transplants still tend to get a head start on the season over direct-sown plants.
Common questions
How many tomato seeds should I start per variety?
Start a few more than you think you’ll need, since germination is rarely 100 percent and you’ll want to cull the weakest seedlings anyway. Two to three seeds per cell, thinned down to the strongest single plant, is a reasonable margin for most home setups.
Can I start tomato seeds too early?
Yes, and it’s more common than starting too late. An overgrown, rootbound seedling stuck indoors past its transplant window rarely catches up to a plant started on time, even after it goes in the ground.
Do tomato seeds need light to germinate?
No, tomato seeds germinate underground in darkness and only need light once the seedling emerges. Warmth matters far more than light at the germination stage.
Why are my tomato seedlings falling over right after they sprout?
That’s almost always damping-off, a fungal problem caused by overly wet mix and poor airflow. Improve ventilation with a small fan, ease off watering frequency, and avoid reusing containers or mix from a previous year without cleaning them first.