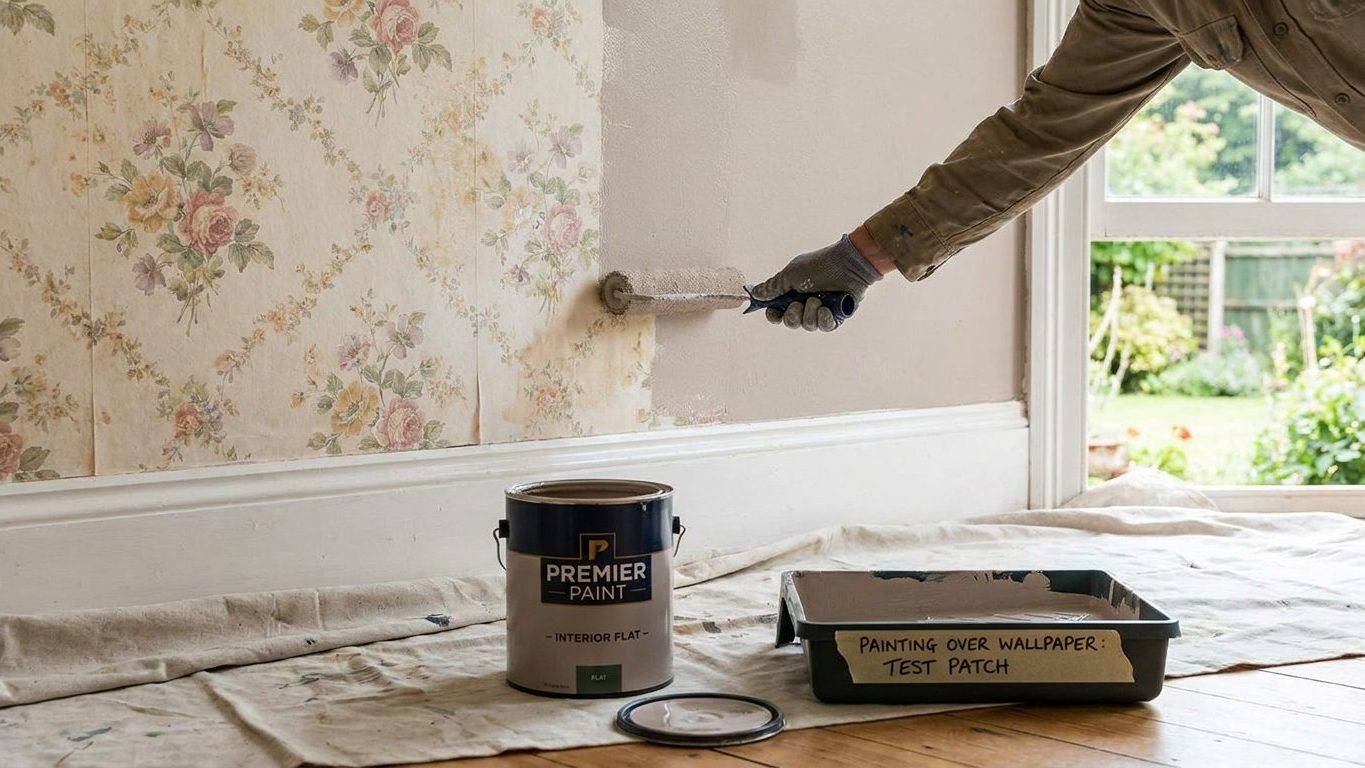

Seams that lift a week after you paint are the classic sign that wallpaper got painted over on a wall that was never ready for it. Painting over wallpaper works only when the paper is fully bonded to the wall, the seams lie flat, and you seal the whole surface with a stain-blocking primer before any topcoat goes on. Press every seam and corner with your palm before you open a tin. If anything lifts under your hand, that section needs to come off first, not get painted over.
What is actually going on

Why the seams give first
The thing that decides whether this works is moisture and adhesive. Wallpaper paste is built to soften when it gets wet again, which is exactly what lets a paper hanger strip old paper off a wall with nothing but water and a scraper. A water-based paint carries the same kind of moisture into the surface as it goes on. If the paper is intact and well bonded, that moisture mostly stays at the surface and does its job. If the paste underneath is already weak, or the seams were never glued down flat, the water works its way in and reactivates the same paste that was holding the paper up. The seam lifts, a bubble forms, and it usually shows up days after the paint has already dried, once you’ve moved the furniture back in.
When it’s worth trying
This is why the cases where painting over wallpaper actually holds are narrower than most people want them to be. It works when the paper is fully adhered with no lifting anywhere, when the pattern is light enough that a stain-blocking primer will actually hide it instead of letting it ghost through, and when you’re using a primer built to seal a porous surface rather than a standard wall paint. Textured or embossed vinyl papers are a poor candidate no matter how well they’re stuck down, because the texture telegraphs through every coat you put over it. A smooth, thin, well-glued paper on a dry interior wall is the best case you’ll find.
Humidity matters here too. A room that runs consistently damp, the kind of moisture swing you’d expect near a shower or a laundry sink, keeps testing that seam every time the air changes, long after your paint has cured. That’s a separate problem from what this page covers, and it’s worth reading Painting a Bathroom: What the Moisture Changes before you decide to paint over paper in a room like that at all.
One more thing to check before you touch a scraper or sander anywhere near this wall: homes built before 1978 may have lead-based paint under layers that came before the wallpaper went up, including paint that was papered over rather than stripped. Peeling back a loose seam to check what’s underneath, or scraping a test patch down to bare plaster, can disturb that paint and release lead dust. Check the EPA’s guidance on lead-safe work practices before you do either.
Doing it
Assuming the paper passes the seam test, the order you do things in matters more than the paint you eventually buy. Skip a step here and the wallpaper’s own weaknesses become the paint job’s weaknesses, just hidden until later.
The order that holds
- Wash the paper down with a mild detergent and a barely damp sponge, then let it dry fully. Skip this and grease or dust under the paint keeps the primer from gripping, and you get a dull patch that shows in raking light no matter how many coats go over it.
- Press every seam, corner and edge by hand, working the whole wall systematically. Skip this and you’re painting blind. A seam that looks fine from three feet away can still be loose enough to lift once it’s wet.
- Reglue any lifted seam with a wallpaper adhesive suited to the paper type, and let it set before doing anything else. Skip this and that one seam becomes the failure point for the whole wall. It’s the cheapest fix on this list and the one most people skip because it feels like a small thing.
- Score and reset any bubbles you can’t press flat, or cut that section out and patch it, rather than painting over a bubble hoping it disappears. A bubble under paint doesn’t shrink. It stays exactly the shape it was when you painted it.
- Apply a stain-blocking, oil-based or shellac-based primer in a thin, even coat, and let it cure fully before judging the result. How long that takes depends on the product, the room’s temperature and its humidity, so go by what’s printed on the can rather than a fixed number. Skip a real primer and use ordinary wall paint instead, and you’ll see the pattern ghosting through the topcoat within a season.
- Only after the primer has cured, apply your topcoat in two thin coats rather than one heavy one. A single heavy coat over a porous, papered surface is more likely to reactivate anything the primer didn’t fully seal.
If you’re working in a closed room at any point in this sequence, from washing the paper to the final coat, open a window or run a fan. Water-based products and primers both release vapor as they cure, and a closed bathroom or bedroom with the door shut is not where you want to be breathing that for an afternoon. This whole sequence assumes you’ve already done the general groundwork described in Interior Painting: Preparation Is Most of the Work, since a wallpapered wall still needs the same attention to trim, sockets and edges as bare drywall.
Removing the paper first is the faster route whenever the seam test in step two turns up more than a couple of loose spots, or when the paper is a heavily textured vinyl that will telegraph through paint regardless of how well it’s stuck. At that point you’re not saving time by pushing forward. You’re trading one afternoon of stripping now for a full repaint later, once the seams you painted over inevitably let go.
What it looks like when it goes wrong
Most of the failures here show up after the fact, which is what makes this job frustrating to get wrong. You don’t see the problem while you’re painting. You see it a few days or weeks later.
Reading the failure
Bubbles that appear after the paint has dried mean moisture got under the paper somewhere the seam test missed, or a section that looked flat was actually a soft spot in the paste. Small bubbles can sometimes be slit with a blade, pressed flat, and touched up. Bubbles larger than a coin, or ones near a corner where several seams meet, usually mean the adhesive underneath has failed more broadly, and the only real fix is cutting that section out and patching it, which means repainting that patch to match.
Seams that lift and curl at the edge are the same problem as a bubble but concentrated along the line between two strips of paper. Once a seam has curled and the paint has cured over it, you’re not gluing it back down cleanly. The curled edge has paint on both faces now, and pressing it flat leaves a visible ridge. This one generally means stripping that seam and repainting the patch, not touching it up.
Pattern ghosting through the topcoat, where you can still make out the wallpaper’s print or texture under the paint, is a primer problem rather than a paint problem. It happens when the primer coat was too thin, wasn’t the stain-blocking kind, or wasn’t given time to cure before the topcoat went on. This one is recoverable: a second coat of proper primer, cured fully, then a fresh topcoat usually solves it without pulling anything off the wall. It’s the same principle that comes up when you’re Painting a Room a Dark Colour, where an underprepared surface shows through no matter how many coats of the final color you add.
A dull, patchy sheen across sections of the wall usually traces back to the washing step. Grease, nicotine residue or old cleaning product left on the paper’s surface stops the primer from bonding evenly, and no amount of extra topcoat fixes an adhesion problem. That patch needs to be washed, dried and reprimed on its own before it will match the rest of the wall.
What to settle before you open the tin
Before any of this, settle the age of the house. If the home was built before 1978, treat every layer under that wallpaper as a possible lead hazard until you know otherwise. A homeowner doing this work in their own house is legally exempt from the EPA’s Renovation, Repair and Painting rule that requires paid contractors to be lead-certified on pre-1978 housing, but that exemption is a legal one, not a medical one. The dust from scraping or sanding old paint is exactly as harmful to your household whether a professional is doing it or you are. Check the EPA’s guidance on lead-safe practices before you scrape a test patch, strip a seam, or sand anything on a wall of that age. No home test kit should be treated as the final word on whether a wall is safe to sand. If there’s real doubt, that’s a question for a certified inspector, not a scrape-and-see approach.
Light, moisture and the surface itself
Check the wall in raking light, ideally with a work lamp held low and to the side, before you decide anything. Daylight from a window straight on hides exactly the seams and bubbles that a low, angled light reveals. Run your hand over the whole surface, not just the parts at eye level. Corners near the ceiling and baseboard get skipped more than any other part of a wall.
Confirm the room’s moisture pattern too. A wall that stays dry year-round is a different bet than one in a room with regular humidity swings, and that difference doesn’t show up in a single afternoon’s inspection. If you’re not sure how the room behaves through a full season, that uncertainty alone is a reason to lean toward stripping the paper rather than betting a paint job on it.
Finally, make sure whatever room you’re working in has real airflow for the whole job, not just the topcoat. Washing the paper, reglueing seams, priming and painting all put moisture and vapor into a closed space, and a fan or open window matters at every one of those stages, not only the one that smells the strongest.
Common questions
Can you paint over wallpaper glue that’s still tacky?
No. Tacky paste means the paper isn’t fully bonded yet, or moisture is already active in that spot, and paint will only trap that moisture against the wall. Let the wall dry out fully and reglue any loose section before priming.
Do you need to prime wallpaper before painting even if it’s white?
Yes. A white paper can still have a printed pattern, a coating, or a texture that shows through ordinary paint once it dries, and the paste underneath still needs sealing regardless of the paper’s color. Skipping primer because the paper looks plain is one of the more common ways this job goes wrong.
What happens if you paint over wallpaper seams that were never glued down right?
They lift, usually within days to a few weeks of the paint drying, once ambient humidity or the moisture from the paint itself works into the gap. There’s no primer or paint thick enough to hold down a seam that was already loose. That section needs to be reglued or cut out before you paint, not covered over.
Is it cheaper to paint over wallpaper than to strip it?
It can save time up front, but only if the paper genuinely passes the adhesion test. If a third or more of the seams are loose, or the paper is heavily textured, the labor and materials spent priming and patching failures later usually cost more than stripping would have taken at the start.