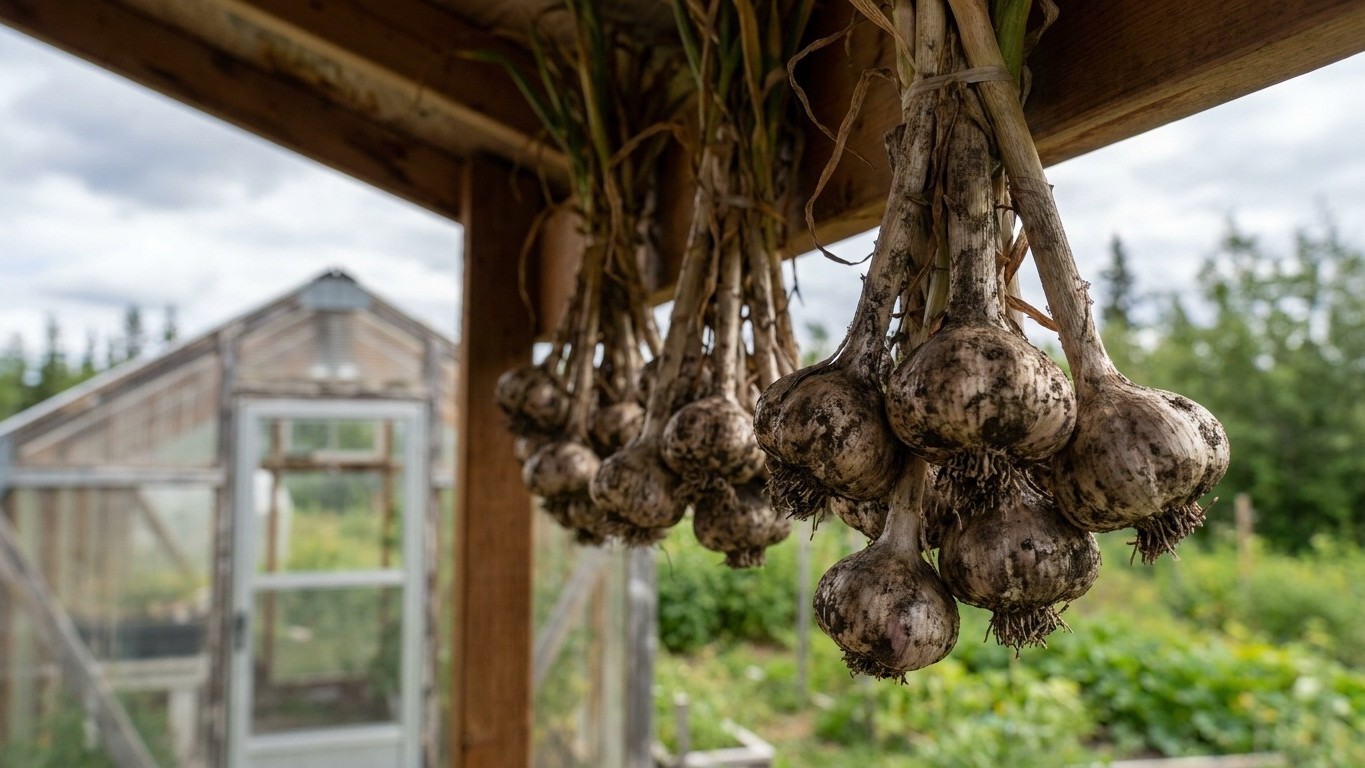

Garlic Harvest And Storage Wisconsin comes down to two windows: lifting in mid to late July when the lower leaves have browned but four to six up top stay green, then curing for three to four weeks in a shaded, airy spot before trimming and storing through winter around 45 to 55°F. Miss either window and the bulbs either rot in the ground or shrivel in the pantry by January.
When garlic is ready to lift in Wisconsin
Garlic planted the previous autumn spends roughly nine months underground before it’s worth digging up. That stretch runs from planting, usually in the weeks before the ground locks up for winter, straight through to a harvest that lands half a year past the region’s first fall freeze. That freeze, based on NOAA NCEI’s 1991-2020 Climate Normals, typically arrives between October 17 and October 29 near Lake Michigan. It’s a midpoint, not a guarantee: in one year out of two, the first hard freeze shows up later than that window. Inland southern Wisconsin usually sees frost earlier than the lakeshore, and the northern part of the state earlier still.
None of that changes the harvest signal itself, which comes from the plant, not the calendar. The leaf count is the real clock. Each green leaf corresponds to a wrapper layer around the bulb, and a garlic bulb with no wrappers left is a garlic bulb that won’t store. Growers watch for the bottom third to bottom half of the leaves turning brown and dying back while five or six leaves up top stay green. That’s usually mid-July for many gardens, sometimes stretching into early August depending on the season and the planting stock.
Pulling one test bulb settles any doubt. Dig it (don’t yank it by the stalk, which snaps the neck off), then slice it in half across the middle. Plump cloves with distinct, snug wrappers mean the rest of the row is ready. Cloves that look small and cramped, or wrappers that have already started splitting apart, mean waiting another few days pays off. Waiting too long backfires just as badly: bulbs left in wet soil past their point start splitting their own wrappers underground, and split bulbs don’t cure or store.
Soil moisture at lift time matters more than most gardeners expect. Digging in soggy ground drags mud into the wrapper layers and invites rot before curing even starts. A dry stretch of a few days before harvest, or simply holding off after a heavy rain, makes for cleaner bulbs and an easier cure. The University of Wisconsin-Madison Division of Extension is the reference point for regional growing guidance if a specific season runs unusually wet or cool and the timing feels off from year to year.
Curing it, and where to hang it here
Curing is the step that decides whether a bulb lasts until spring or turns soft by Thanksgiving. Fresh-dug garlic is still roughly 80 percent water in its outer layers, and curing pulls that moisture out slowly enough that the neck seals and the skins tighten without cooking the cloves. Rushing it in full sun does the opposite: direct sunlight and heat can scorch bulbs and start actual cooking inside the wrapper, which shows up later as soft, translucent cloves.
The setup that works in most Wisconsin garages, sheds, and covered porches is simple: garlic out of direct sun, air moving past it, humidity kept moderate rather than damp. A few practical spots that fit that description:
- An open garage bay with a fan running, out of direct light through the door
- A covered porch or breezeway, shaded from afternoon sun
- A shed with the door cracked for airflow, screened to keep bulbs off the ground
- A barn loft, if one’s available, away from direct roof heat
Bulbs get bundled in small bunches of six to ten, hung by the stalks, or laid in a single layer on screens or mesh trays so air reaches every side. Crowding them into a pile is the most common mistake at this stage: the bulbs in the middle stay damp, and damp plus warmth is exactly the setup mold prefers.
The cure itself runs three to four weeks. The tell that it’s done isn’t a date on a calendar, it’s the neck. A cured neck feels dry and papery all the way through when squeezed between two fingers, with no give, no moisture, nothing soft. Wrapper skins should feel dry too, sometimes rustling slightly. Cutting the cure short and trimming a neck that’s still got moisture in it seals dampness inside the bulb, which shows up as rot weeks later in storage, often invisible until the smell gives it away.
Once cured, roots get trimmed close to the base and stalks cut down to about an inch above the bulb (or braided, for softneck types, before trimming). Any bulb with soft spots, mold, or a stalk that never dried out gets pulled aside for the kitchen right away rather than going into long-term storage.
Storing it through a Wisconsin winter
Cured garlic stores best somewhere cool, dark, and dry, roughly 45 to 55°F with moderate humidity and steady airflow. That’s a narrower target than most people expect, and it rules out several places that seem convenient. A refrigerator runs too cold and too humid, which pushes cloves toward early sprouting. A heated basement or a spot near a furnace runs too warm, and warmth is the single biggest driver of garlic drying out from the inside or sprouting months early. An unheated but insulated mudroom, an attached garage that stays above freezing, or a cool closet on an exterior wall often lands closer to that range than a kitchen pantry does.
Mesh bags, paper bags with holes punched in, or shallow crates work better than sealed containers or plastic bags, because trapped moisture is what starts rot in storage the same way it does during curing. Braided softneck garlic can simply hang in that cool spot. Hardneck bulbs, with their stiff central stalk, usually go into mesh or crates instead, since hanging bulky hardneck bunches is awkward and airflow around a hanging clump is uneven anyway.
| Storage location | Typical fit for cured garlic |
|---|---|
| Cool closet, exterior wall | Often close to ideal range, dark, dry |
| Attached, unheated garage | Workable most of winter if it stays above freezing |
| Refrigerator | Too cold and humid; pushes early sprouting |
| Heated basement near furnace | Too warm; accelerates drying and sprouting |
| Sealed plastic bin or bag | Traps moisture; invites mold and rot |
Checking the stored bulbs every few weeks catches problems early. One soft or moldy bulb left in a crate with the others can spread that rot to its neighbors, so a quick look through the bag or box in December and again in February is worth the five minutes it takes. Cloves saved for next year’s planting stock get set aside from the eating stash early, since the biggest, healthiest bulbs from this year’s harvest make the strongest planting stock for fall.
What goes wrong here
Most storage failures trace back to one of two mistakes made weeks earlier: an incomplete cure, or a storage spot that’s too warm or too damp. But a few pest issues also show up in Wisconsin garlic beds and are worth watching for before harvest, not just after. The University of Wisconsin-Madison Division of Extension documents onion maggot and seed corn maggot, wireworms and sap beetles, aphids, and tarnished plant bug and thrips as pests found in this territory, and any of those can affect allium crops like garlic during the growing season.
Onion maggot damage typically shows up as wilting or stunted plants, with maggots visible in the bulb or root area when a plant is pulled. Wireworms tunnel into the bulb itself, leaving narrow holes that open the door to rot both in the ground and later in storage. Thrips feed on the leaves, leaving a silvery streaking that weakens the plant’s ability to bulk up the bulb before harvest. None of these are unique to garlic, and none of them guarantee trouble in a given season, but a bulb that’s already stressed by pest feeding tends to cure poorly and store worse.
Beyond pests, the recurring problems are almost always about moisture and timing:
- Harvesting after a heavy rain, which drags soil and dampness into the wrapper layers
- Cutting the cure short because the neck looks dry on the outside but isn’t dry all the way through
- Storing in a sealed bag or bin that traps humidity
- Keeping stored garlic somewhere too warm, which shortens its shelf life fast
A bulb that fails in storage rarely fails alone. Checking bins periodically and pulling any soft or moldy bulb the moment it’s spotted is the simplest way to keep one bad bulb from taking down a whole crate.
Common questions
How do I know if I harvested garlic too early?
Cloves will look small, underdeveloped, and the wrappers around them won’t be fully formed yet. The bulb still cures, but it’s smaller and won’t store as long as one lifted at the right stage.
Can I still eat garlic that was harvested too late?
Yes, but it won’t keep. Bulbs left in the ground too long often have split or already-separated wrappers, which means they’ve lost their storage protection even though the cloves themselves are fine to cook with right away.
Should I wash garlic bulbs before curing them?
No. Brushing off loose dirt is fine, but washing bulbs adds moisture right before the curing process is supposed to remove it, which slows the cure and raises the risk of rot.
How long does properly cured and stored garlic actually last?
That depends heavily on variety and storage conditions, and no specific duration is published for this territory here. What’s documented is the target range for storage (45 to 55°F, moderate humidity, good airflow), and bulbs kept in that range with a full cure behind them consistently outlast bulbs stored too warm, too cold, or too damp.