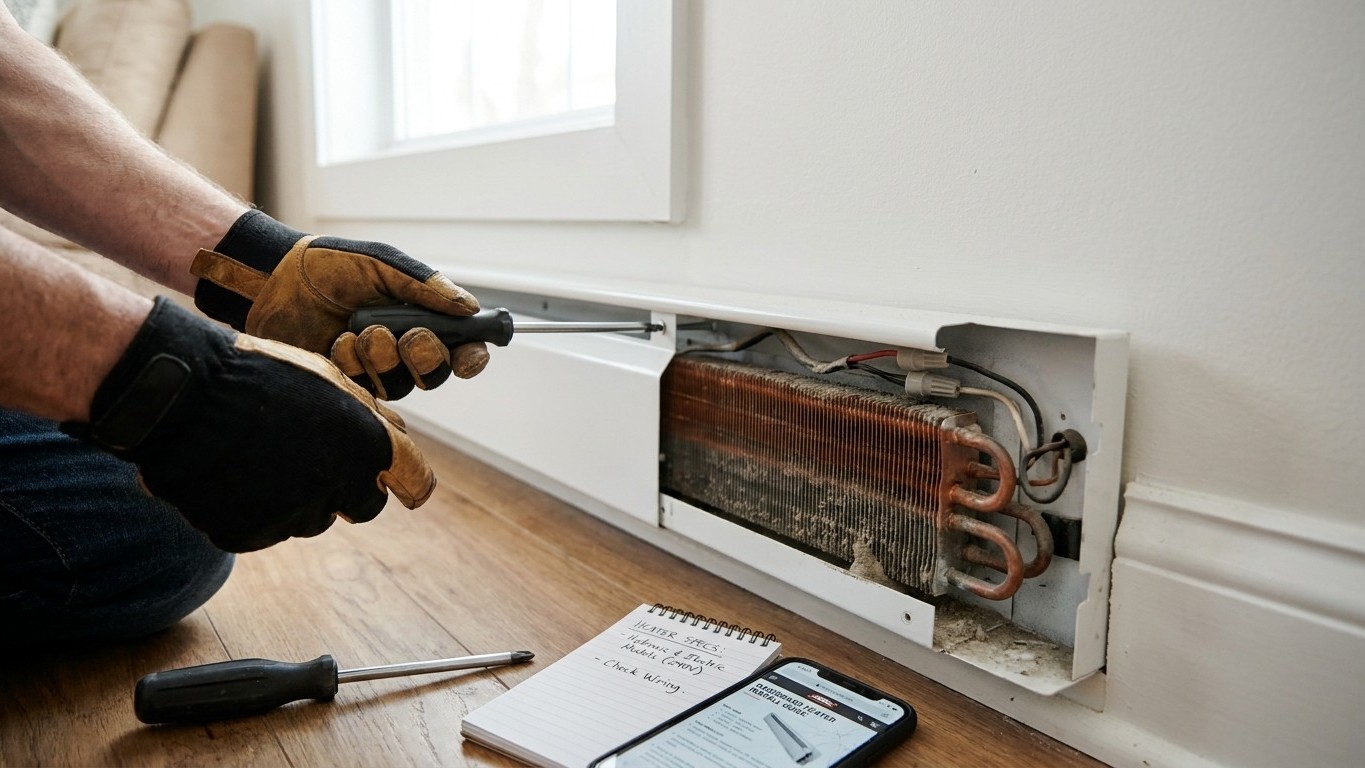

The cover comes off in minutes and most homeowners can do it themselves. The heater itself is a different matter: an electric baseboard is live wiring at line voltage, and a hydronic one is part of a sealed water loop. Which job you’re actually facing, and how far you can go alone, depends entirely on which of those two appliances is bolted to your wall.
What you are actually touching
Before any wrench or screwdriver comes out, figure out which appliance is in front of you, because the two look similar and behave nothing alike. An electric baseboard heater is a resistance element sealed inside a metal enclosure, wired at 120 or 240 volts and controlled by a line-voltage Thermostat. A hydronic baseboard is an emitter on a boiler loop: a finned copper tube that hot water flows through, heated somewhere else in the house and circulated to the room. One is an electrical device. The other is plumbing. That distinction has to come first, because a confident instruction handed to the wrong half of the audience is exactly how people get hurt on this kind of job.
There’s a third wrinkle worth knowing about. Some units sold and marketed as “hydronic baseboard heaters” are actually electric appliances filled with a fluid, used only to spread heat evenly along the element inside a sealed housing. There’s no boiler, no loop, no plumbing anywhere near them. The name suggests a water system; the wiring says otherwise. If a heater’s data plate mentions voltage and amperage rather than a boiler connection, treat it as electric no matter what the label on the box called it.
Once you know which one you have, the stakes get simple to state. Removing an electric baseboard heater means disconnecting line-voltage wiring at the unit and then dealing with the cable that fed it, because that cable cannot be left loose behind drywall or tucked into a wall cavity and forgotten. It has to be terminated properly, whether that means capping it in an accessible junction box or removing it back to the panel. Removing a hydronic baseboard means opening a water loop, which involves isolating that section of piping, draining it, and making sure the rest of the heating system still works once the unit is gone.
Neither of those is a decoration-day task, and it’s worth saying so plainly rather than tiptoeing around it. But most people asking about baseboard heater removal aren’t trying to pull the whole appliance out of the wall. They’re trying to paint behind it, or lay flooring up to it, or move it a few feet over. Those jobs have very different levels of difficulty, and the next three sections split them apart.
Taking it off to paint or lay a floor
This is the version of “removing a baseboard heater” that’s genuinely within reach for most homeowners, because in this case you’re not removing the heater at all. You’re removing the cover, the metal shell that hides the element and directs airflow, while the wiring and the heating element itself stay exactly where they are, untouched and undisturbed.
- Cut power to the unit at the breaker, or, if you’re only doing quick work and the heater has been off long enough to cool completely, confirm it’s cold to the touch before handling it.
- Open the damper (the small flap or louver on top that controls airflow) so you can see how the cover engages with the frame underneath.
- Unclip or unscrew the cover from the base. Most residential covers snap onto tabs or are held with a couple of screws near the bottom edge; there’s no single universal fastening, so look for what’s holding yours before forcing anything.
- Work the end caps off carefully. These are usually the most fragile part, held with small tabs that can bend or snap if pried at the wrong angle.
- Note how everything came apart before you set it aside. Covers and end caps are often not interchangeable side to side, and a cover forced back on backwards won’t seat flush against the wall.
Two mistakes show up constantly with this kind of DIY job, and both are worth avoiding. The first is painting the fins themselves, the metal fingers inside the enclosure that actually radiate heat. Paint on the fins insulates them, which cuts into how much heat the unit can put out even though it looks fine once the cover’s back on. The second is loading so much paint onto the cover, coat after coat over the years, that it no longer slides or seats properly against the wall bracket. That buildup is one of the more common causes of the rattling and ticking noise that shows up in baseboard heaters after they’ve been repainted a few times, a separate problem covered elsewhere in this guide on baseboard heater noise.
Moving it to another wall
Relocating a baseboard heater sounds like a furniture job. It isn’t. Moving the appliance a few feet, or to an entirely different wall in the same room, touches every system the heater depends on, and none of those pieces are optional.
- The electrical circuit (for an electric unit) has to physically reach the new location and be sized correctly for the heater’s load. That sizing is not a guess made on site; it’s determined by the appliance’s rating and the existing circuit, and it’s the kind of judgment call that belongs to a licensed electrician rather than a manual online.
- The old cable can’t just be left behind. A wire that used to feed a heater and now feeds nothing has to be properly terminated, capped in an accessible box or removed entirely, not buried in a wall as a “just in case.”
- The new position has to suit how the heater actually breathes. Baseboard heaters draw cool air in at the bottom and push heated air out at the top, and they need clearance from furniture, drapes, and flooring to do that safely. That clearance isn’t a rule of thumb; it’s printed on the appliance’s own data plate, and it’s the only source worth trusting for it.
- For a hydronic unit, the loop itself has to be drained before anything moves, then reconfigured with new piping runs to the fresh location. That’s plumbing and heating-system work, not electrical work, and it usually falls to whoever installed or services the boiler.
Notice that none of those four points is something a homeowner resolves solo, even the ones that sound like carpentry. The wall opening and patching, sure, that’s DIY territory. But the circuit relocation and the loop reconfiguration are jobs for a licensed electrician or a qualified heating contractor, respectively, and pretending otherwise is how “I moved my baseboard heater” turns into an insurance claim.
Taking it out and not replacing it
Strip away the specifics and most people asking about baseboard heater removal are really asking one question: what happens if I take this out and put nothing back? The honest answer is that the room still needs a way to stay warm, because pulling a heat source out of a space doesn’t change how much heat that space loses through its walls and windows in January.
In a room with ductwork already running to it, replacing baseboard heat is usually the simplest case, since a supply register can often be added to an existing duct run. The harder version is a room with no ducts at all, which is common in additions, converted porches, and older homes built around baseboard or radiator heat from the start. For that situation, the practical options (ductless mini-splits, electric wall panels, radiant floor systems, among others) are covered in more depth in this site’s guide to heating a room without ductwork, since the right choice depends heavily on the room’s size, insulation, and how it’s used.
One detail gets missed more often than it should: if the baseboard heater sits along an exterior wall that also carries plumbing, removing that heat source can leave those pipes exposed to freezing temperatures they were never designed to handle, because the baseboard heat was doing double duty as pipe protection all along. That’s not a reason to abandon the project, but it is a reason to check what’s inside that wall before the heater comes out, not after a pipe bursts the following winter.
Common questions
Can I remove a baseboard heater myself?
Removing the cover, yes, that’s straightforward DIY work. Removing the appliance itself, whether it’s electric or hydronic, involves disconnecting line-voltage wiring or opening a water loop, and that part is generally a job for a licensed electrician or a qualified heating contractor.
How do I know if my baseboard heater is electric or hydronic?
Check the data plate. Electric units list voltage and amperage; hydronic units connect to boiler piping rather than an electrical circuit. Watch out for units marketed as “hydronic” that are actually electric appliances filled with fluid, since the label can mislead even when the wiring tells the real story.
What happens to the wall cavity after a baseboard heater is removed?
It depends on what was feeding the unit. An abandoned electrical cable needs to be capped or removed rather than left loose in the wall, and a hydronic loop needs to be properly capped and pressure-tested before the wall is closed up.
Do I need a permit to remove or relocate a baseboard heater?
Requirements vary by state and municipality, and they often depend on whether electrical or plumbing work is involved. Checking with the local building department before starting is the safest first step, especially for a relocation rather than a simple cover removal.