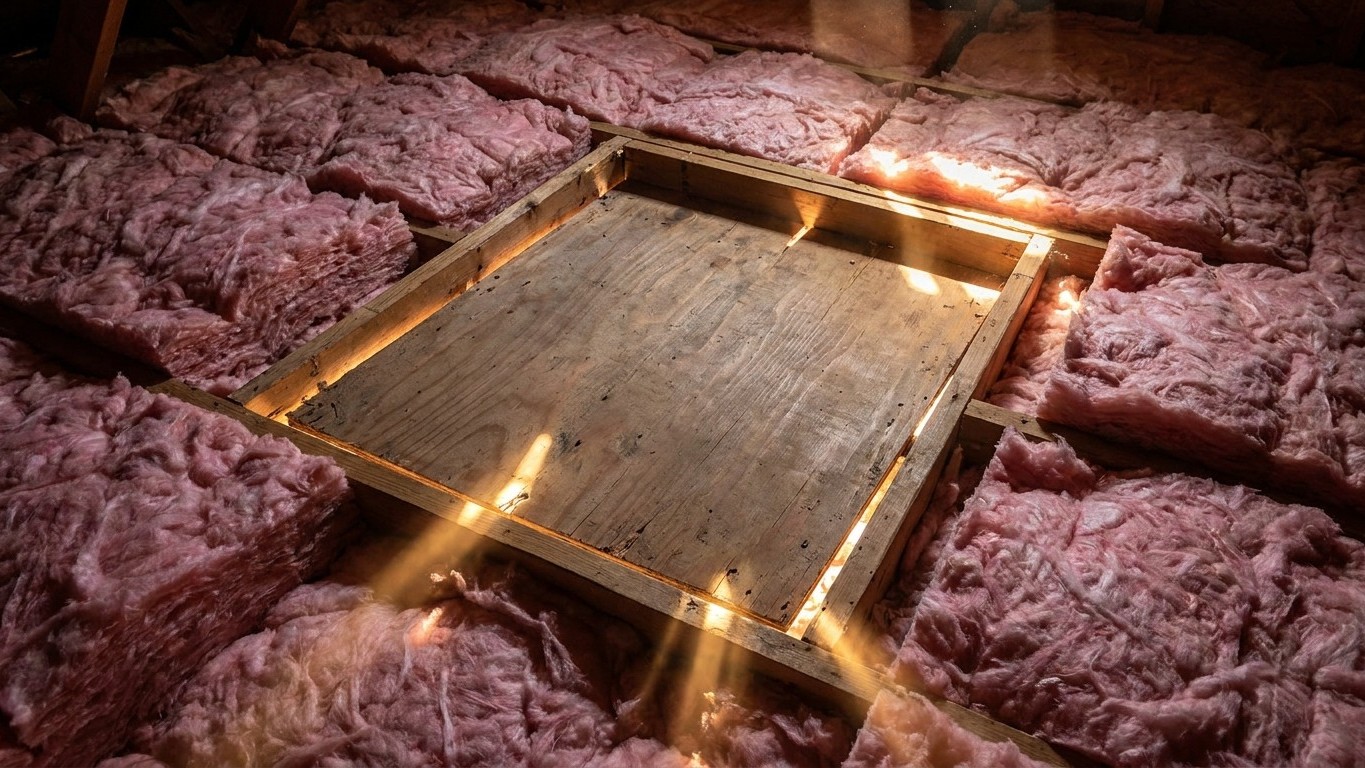

A perfectly insulated attic floor with an uninsulated hatch in the middle of it is still a poorly insulated attic. That thin plywood or drywall panel, sitting loose in its frame, acts like a skylight for heat in winter and a chimney for cool air in summer. Fixing it means two separate jobs: sealing the frame so air stops moving through the gap, and adding Insulation to the panel itself so it stops acting like a hole in the blanket.
A hole in the middle of the work

Here’s the math nobody thinks about: a standard attic hatch opening is roughly 4 to 6 square feet. That sounds small next to a 1,200-square-foot attic floor. But that panel usually has zero Insulation on it, and it sits in a frame with a gap around the edges wide enough to slide a business card through. A homeowner can spend a full weekend laying batts or blowing loose-fill across every square foot of open floor, do it correctly, and still leave a bare, leaky rectangle right in the middle of the ceiling below the most-used part of the house, often a hallway or a closet.
The reason this gets missed so often is that it looks like one problem when it’s actually two, and they don’t share a fix. The first failure is the lack of Insulation on the panel: the wood or drywall itself has an R-value barely above zero, so heat moves straight through it regardless of how well the rest of the ceiling performs. The second failure is the air leak around the frame: the panel rests on a ledge with no gasket, no Weatherstripping, nothing to stop conditioned air from leaking up past the edges every time the furnace or AC runs.
Most people who bother with the hatch at all address only the first failure. They tape a piece of foam board to the top of the panel, call it done, and leave the frame exactly as leaky as it was. The U.S. Department of Energy’s ENERGY STAR program treats air sealing and insulation as two steps of the same project on purpose, and its own project guidance puts attic air sealing before attic insulation, not after. That ordering matters here more than almost anywhere else in the attic, because a hatch is one of the few places where the leak and the insulation gap sit in exactly the same square foot. Insulating over an unsealed frame doesn’t stop the air movement underneath it; it just hides the gap from view.
One safety note worth stating plainly: attic access openings sit between ceiling joists, and the drywall or plaster around the hatch will not support your weight. Step only on the joists themselves, or on a plank laid across them, when working near the opening.
The seal comes first
Sealing the frame is a short job, and it follows a specific order. Skipping a step, or doing them out of sequence, is why so many hatch weatherstripping jobs fail within a season.
- Clean the frame. Wipe down the ledge the panel rests on. Old caulk, dust, and insulation debris keep new weatherstripping from making full contact, which defeats the seal before it’s even installed.
- Fit compressible weatherstripping to the frame. A foam or rubber gasket run around the ledge gives the panel something to close onto. The strip needs to compress when the panel sits down on it, not just touch it. Too thin and it doesn’t seal; too thick and the panel won’t close flush.
- Add a catch or latch. This is the step that makes the first two steps matter. Without something pulling the panel down tight against the weatherstripping, gravity alone won’t compress the seal evenly, and even a light gust or the pressure difference between attic and living space will find the path of least resistance around one edge.
That third step is the one almost everyone skips, and it’s worth being blunt about why that’s a mistake. A gasket that isn’t compressed isn’t sealing anything. It’s just foam sitting next to foam. A latch, a hook-and-eye, or a simple turn-buckle style catch is what turns a gasket into a functioning seal by holding the panel firmly against it every time the hatch is closed. Skip the latch and you’ve done the visible half of the job while leaving the part that actually stops air movement undone. This is a small, inexpensive step, but it’s the difference between a hatch that seals and one that just looks sealed.
Then the insulation
Once the frame seals properly, the panel itself needs insulation on its upper face, the side facing the attic. There are two common approaches, and which one makes sense depends on a single constraint: whether the added weight and thickness still let the panel close and latch properly.
Rigid board on the panel
For a fixed hatch panel, rigid foam board cut to fit and fastened to the attic-side face is the straightforward option. It adds insulating value without adding much weight, and because it’s rigid, it doesn’t sag or shift out of place the way batt insulation would if simply laid on top. The board needs to be sized so it doesn’t interfere with the weatherstripping seal around the edges or block the latch from closing.
An insulated cover box
For openings where the panel is light, poorly fitted, or part of a built-in surround, a purpose-made insulated box that sits over the entire opening from the attic side is the better fit. Instead of insulating the panel directly, the box covers the whole frame, panel included, and provides the air seal and the insulating layer in one piece. This approach also sidesteps the weight problem entirely, since nothing is added to the panel itself.
Here’s the point worth being honest about: there is no published thickness or R-value target for an attic hatch the way there is for open attic floor. The goal isn’t to hit a specific number, it’s to bring the hatch closer to the insulating performance of the floor around it, so it stops being the obvious weak point in an otherwise well-insulated ceiling. Whatever you add should be sized to what the panel or box can physically carry while still closing and latching correctly. A hatch that seals well and carries a couple inches of rigid board is doing real work, even without a number attached to it.
Pull-down stairs, which are worse
If a fixed hatch is a leak, a folding attic stair is a bigger one. The opening itself is larger, often 2 feet by 4 feet or more. The frame around it is built for hinges and hardware, not for sealing, so it rarely closes tight against anything. And the folding panel is thin plywood or sheet metal, hinged in three or four places, built to fold flat and support foot traffic, not to carry rigid board or hold a weatherstripped seal under latch pressure the way a fixed hatch can.
The practical fix for pull-down stairs is different from the fixed-hatch approach: an insulated cover box or tent that sits over the entire folded stair assembly from the attic side. It’s a boxed enclosure, insulated on all sides, that drops down over the stairway opening after the stairs are folded up, sealing and insulating the whole assembly at once rather than trying to treat the thin folding panel directly. Some versions are rigid and hinge open like a lid; others are a flexible, zippered enclosure that opens and closes each time the stairs are used.
The objection people raise is obvious and fair: who wants to move a box or unzip a cover every single time they need to go up to the attic? But the honest answer is that a cover box left unused, or removed once and never put back, does nothing at all, and a stairway that’s never covered is worse than one that’s covered inconsistently. The whole point of the box is that it goes back into place after each use. If that’s not going to happen in practice, the household is better off putting effort into whatever weatherstripping and latch hardware the stair frame will actually accept, rather than buying a cover that ends up permanently pushed to the side of the attic.
Common questions
Does an attic hatch really lose that much energy compared to the rest of the ceiling?
Per square foot, yes, because it combines the two problems in one spot: near-zero insulation on the panel and an unsealed frame around it, while the rest of the ceiling typically has neither issue once it’s insulated.
Should I seal the hatch or insulate it first?
Seal first. ENERGY STAR’s own project guidance places air sealing before insulation for the attic generally, and it matters even more at the hatch, since insulation laid over an unsealed frame just hides the leak rather than stopping it.
Can I use spray foam instead of weatherstripping around the frame?
The frame needs a seal that compresses each time the panel closes, which is what gasket-style weatherstripping is built for. A rigid foam bead around a moving panel won’t compress the same way and can crack or lose contact over repeated openings.
Is it worth insulating the hatch if the rest of the attic floor isn’t fully insulated yet?
It’s a small, self-contained job either way, and it stops the hatch from undermining whatever floor insulation is already in place. It doesn’t need to wait for the rest of the attic project to be finished.