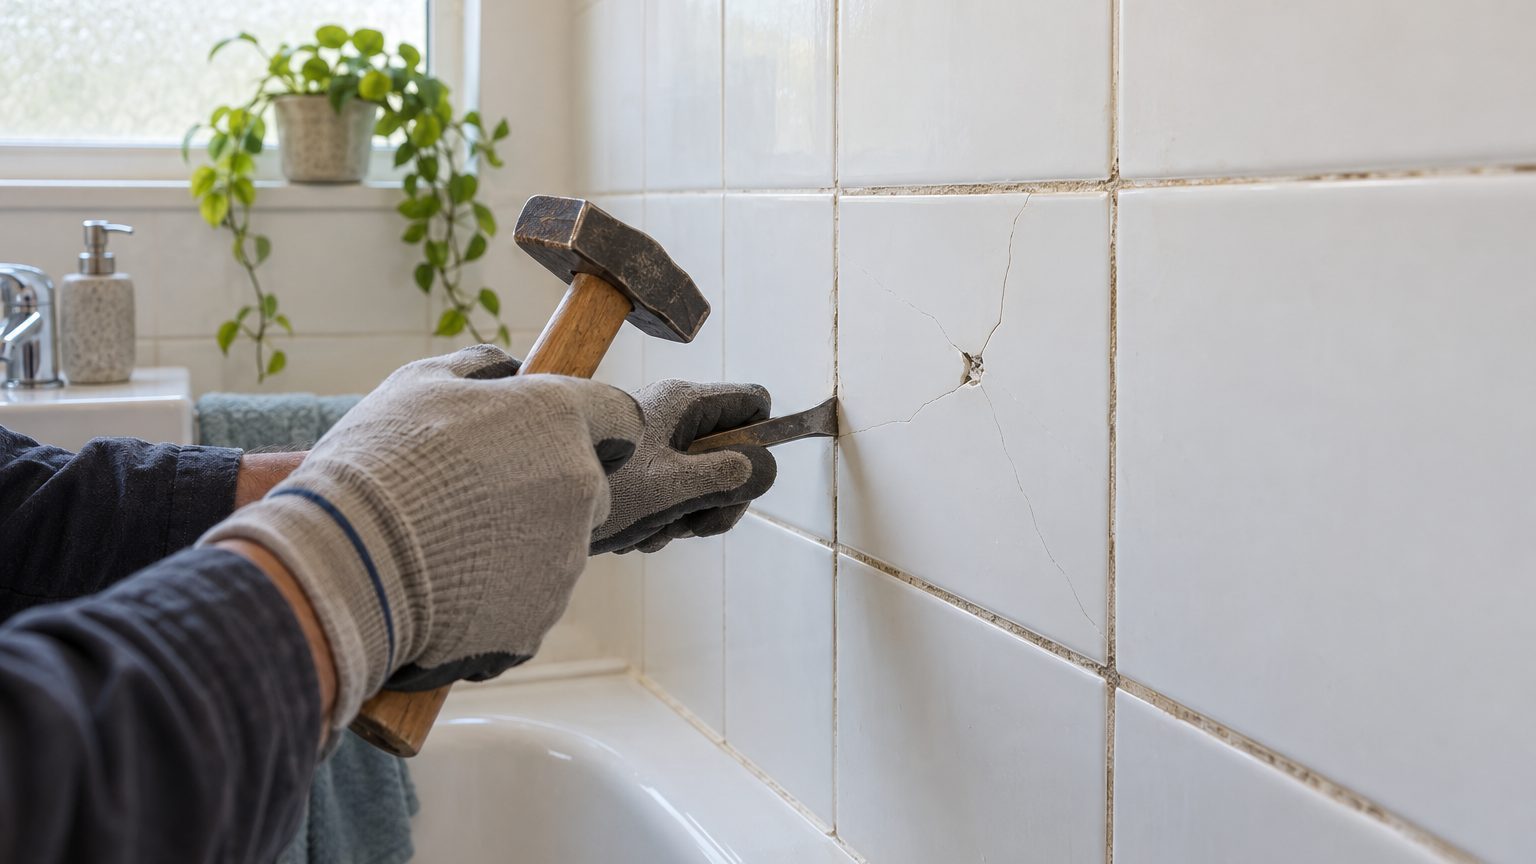

A single cracked wall tile is one of the easier tile repairs to do yourself. You cut out the grout around it, break the tile into pieces from the center, scrape off the old adhesive, set a new tile in fresh adhesive, and regrout. Hands-on time runs a few hours spread over two days, mostly spent waiting. The neighbors only get damaged when people skip the grout-cutting step and go straight to the hammer.
The repair is simple. What trips people up is the question that comes before it: why did the tile crack in the first place? Replace it without an answer and you may be back in a year, with a second crack and a wetter wall.
Find the cause before you pick up a chisel
Tiles crack for a handful of reasons, and they point to very different fixes. An impact crack is the friendliest kind. A shampoo bottle, a dropped razor, or a hard knock from a towel bar install leaves a spiderweb or a chip radiating from one spot, and the tiles around it look healthy. Replace it and move on.
A crack that runs in a straight line, especially one that continues through the grout into neighboring tiles, usually means the wall behind is moving. Seasonal framing shifts, a settling foundation, or a sagging floor can all do it, and so can a missing flexible joint where the tile meets the tub or an adjoining wall. Tile and rigid grout don’t flex, so a new tile over a stress line will crack along it again.
Then there’s the moisture scenario, the one worth taking seriously. Tap the cracked tile and several around it with a knuckle or the handle of a screwdriver. A solid tile sounds dense and flat. A hollow, drummy sound means the tile has lost its bond to the wall, and in a shower that often means water has been getting behind it. Other warning signs include grout that stays dark or crumbly, a musty smell, caulk that’s pulling away, tiles that shift under light finger pressure, and a wall that feels soft beside the tile.
If you find that much damage, a one-tile fix is no longer the job. Drywall or old greenboard that has absorbed water behind a shower wall needs to come out. The same questions come up in a tub-to-shower conversion, where what’s behind the tile matters more than the tile itself. If hollow tiles are widespread across a wall, a patch won’t hold, and it’s worth reading about when tiling over old tile works on a wall before deciding between repair, overlay, and full demolition.
One more check for older homes. If the house predates the 1980s and you find black, tar-like adhesive under the tile, or older cement-asbestos or textured materials nearby, get a sample tested before you scrape, grind, or sand anything. Some old mastics and wall products contained asbestos. Your state or local health department can point you to accredited labs.
Take the tile out without disturbing its neighbors
Gather the gear first: safety glasses, work gloves, a dust mask (N95 or better, since grout and thinset dust contains silica), a utility knife, a grout saw or an oscillating multi-tool with a carbide grout blade, a hammer, a small cold chisel or wide putty knife, a drill with a masonry or tile bit, and a vacuum. Painter’s tape and a drop cloth help with cleanup and protection.
Cut the grout first, all the way around
This step protects the neighbors. When you hammer a tile that’s still locked in by grout, the shock travels sideways through the joints and can crack or loosen the tiles next to it. Cut the grout out completely on all four sides, as deep as you can, ideally the full depth of the tile.
A manual carbide grout saw is slower but gives excellent control, which matters when joints are narrow. An oscillating tool is faster, though it can skate and chip glazed tile edges if you rush. Keep the blade centered in the joint, run it at low speed, and never let it touch the face of the tiles you’re keeping. Where the tile meets a tub, countertop, or corner, slice through the caulk with a utility knife too.
Break the tile from the middle outward
Put tape across the tile in a big X to hold shards together and keep chips from flying. Then drill a few holes through the middle of the tile, well away from the edges, with the drill at slow speed so you don’t punch into the wall behind. Be especially careful on drywall, which is soft.
Now tap with the chisel and hammer, starting at the center and working toward the edges. The holes weaken the tile so it breaks into pieces instead of popping off whole and taking a chunk of the wall with it. Use gentle, short taps. A tile that’s already hollow often comes away easily. A well-bonded one fights, and that’s normal.
Work outward, lifting pieces away, and stop when you reach the last strip along the edge. Hold the chisel at a low angle, almost flat to the wall, and pry the edge pieces toward the center of the opening rather than toward the neighbors. Prying sideways against an existing tile is the most common way a second tile gets cracked.
Clear the opening and inspect the surface
Once the tile is out, scrape off the old thinset or mastic until the surface is flat and clean. Small ridges of old adhesive will tilt the new tile and make it sit proud of its neighbors. A stiff scraper, a chisel held flat, or a carbide scraper works. Vacuum the opening and the joints.
Now look at what’s behind. Healthy cement board or properly prepared drywall should be firm, dry, and smooth. If the paper face is torn, the board is crumbly, or you see mold, stop and plan a larger repair. Small paper tears on drywall in a dry area can be sealed with a coat of primer or thinned adhesive. In a shower or around a tub, anything beyond surface scuffs deserves a closer look before you set a tile over it.
Match the tile and set it flush
Finding a matching tile is often harder than the repair. Many installers leave spare tiles behind, so check the garage, attic, basement, and any closet near the bathroom. The label on a box often includes the style name, size, and dye lot number, which helps if the product is still sold.
If no spares exist, take a fragment of the broken tile to a tile shop or home center, and bring the thickness too, since a new tile even a fraction of an inch off won’t sit flush. Tiles from the same line can vary slightly in color between production lots, and that gap shows more on glossy solid colors than on speckled or patterned ones. Discontinued tile is common. Some people salvage a tile from a hidden spot, such as behind a vanity or under a removable fixture, and replace that spot with a similar tile nobody will see.
For adhesive, the room decides the product. In a dry area, such as a backsplash outside the splash zone, a premixed organic mastic is easy to use. In a shower, a tub surround, or anywhere that gets regular water, use a polymer-modified thinset mortar instead. Mastic can soften with persistent moisture, and many labels say it isn’t for wet areas. Read the label on whatever you buy, and look for the standard it meets (the ANSI A118 series covers most thinset types).
Spread the adhesive on the wall with a notched trowel in the size recommended for the tile, and also apply a thin layer on the back of the tile, a method called back-buttering. On a repair, back-buttering matters more than on a full wall, since you can’t see whether the tile has full contact. Press the tile into the opening with a slight twisting motion, then check it against its neighbors with a straightedge or level held across several tiles. It should sit flush, not above or below.
Use spacers or small wedges to keep joint widths even, and strips of painter’s tape across the new tile and onto its neighbors to hold it while the adhesive sets. Wipe squeezed-out adhesive from the joints and tile faces right away. Dried thinset on a glazed face is a nuisance to remove, and you want the joints clean and about two-thirds of the tile thickness deep for regrouting.
Regrout, caulk, and wait
Leave the new tile alone for at least 24 hours, or longer if the adhesive label says so. Cooler or more humid rooms slow curing. Pull the tape and spacers, then check the joints for debris.
Grout choice comes down to joint width and color. Unsanded grout suits joints narrower than about 1/8 inch, which is common on wall tile, while sanded grout is for wider joints because it resists shrinking and cracking. Matching the existing color is where most people struggle. Grout darkens with age, dirt, and soap residue, so a fresh batch of the original color will often look lighter than the wall around it. Test a small mix where it won’t show, and let it dry fully before you judge, since many grouts lighten or darken as they cure.
Press the grout into the joints with a rubber float held at an angle, working across the joint rather than along it. Wait the time on the package, usually 15 to 30 minutes, then wipe the surface with a barely damp sponge, rinsing often. Avoid drenching the joints, which washes out color and weakens the grout. A hazy film will show up as it dries, and a soft cloth takes it off later.
Anywhere the wall meets something else, use a flexible sealant, not grout. That means corners, the joint above a tub or shower pan, and the edge of a countertop. The Tile Council of North America’s handbook calls for flexible sealant at changes of plane because those joints move. If the cracked tile sat near one and the caulk had failed, replace the caulk now with a 100% silicone or a siliconized product rated for bathrooms. Wait until the grout has set before caulking next to it.
Cement-based grout generally needs 48 to 72 hours before it’s sealed, and many products ask for several days before heavy water exposure. If this is a shower wall, skip the shower for that stretch, or at least stay away from that wall. Once the cure window passes, apply a penetrating grout sealer if the product you chose calls for one. Some newer grouts, like epoxy or pre-sealed formulas, don’t need it.