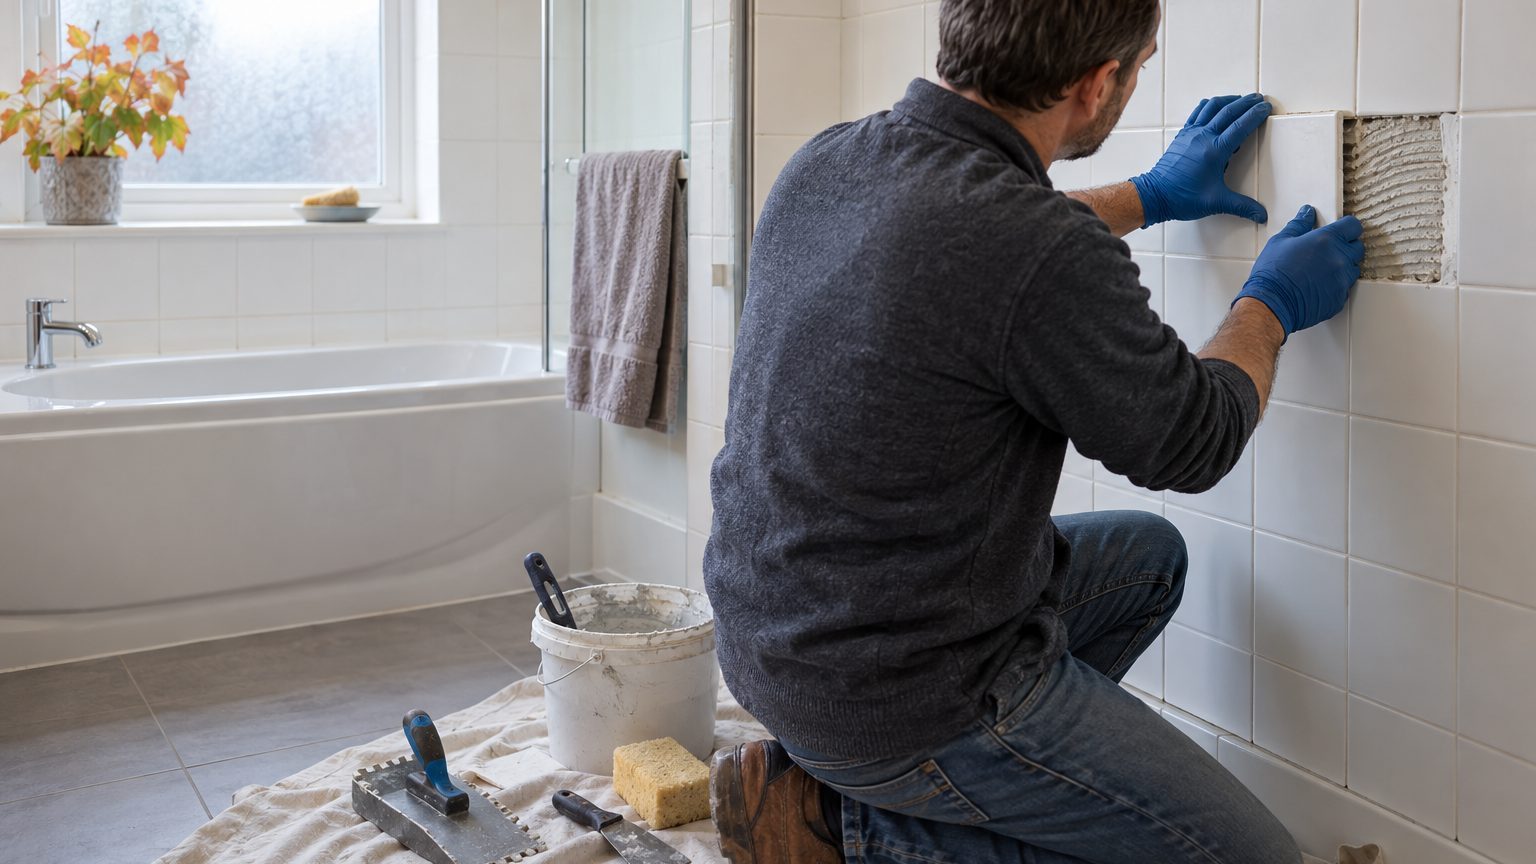

Most loose wall tiles can be re-stuck in under an hour of hands-on work, with no demolition, as long as the wall behind the tile is dry and solid. The job comes down to three moves: pop the tile off, clean both surfaces down to a bare, flat base, and bed the tile back in fresh thin-set or a suitable adhesive. The part that decides whether the repair lasts is checking why the tile came loose in the first place.
That check takes five minutes. Skip it and you risk gluing a tile onto a wall that is quietly rotting.
Find the cause before you reach for adhesive
Tap the tile with your knuckle, then tap its neighbors. A tile bonded properly gives a dull, solid knock. A loose one sounds hollow and a little higher in pitch, like rapping on a door instead of a wall. Work outward from the problem tile in a ring of two or three tiles in every direction. Hollow spots tend to travel in clusters, and the cluster tells you the size of the problem.
One tile, with the rest of the wall sounding solid, usually points to a local failure: a thin spot in the original adhesive, a tile that was set with little coverage, or a hairline grout crack that let water seep in at one corner. This is the good scenario, and the rest of this guide is written for it.
Several loose tiles in a row, especially around the faucet, the tub rim or a shower niche, is a different story. Water is getting behind the tile. Press a screwdriver tip gently into the grout line beside the loose tile. If it sinks in or the surface feels mushy, the backing is wet or deteriorating. Look at the back of any tile that comes off. A clean back with the adhesive still attached to the wall suggests a bond failure. A back coated with crumbly brown paper or gray powder means the wall surface itself came off with the tile, and gluing that tile back would be pointless.
Homes built before the 1980s add a wrinkle. Old black or brown mastic and some older backing materials can contain asbestos. If your house is from that era and the adhesive looks like dark, tar-like glue, hold off on scraping and sanding until you have had a sample tested by a lab. A single tile is a small job, but dust from the wrong material is not a small problem.
Whatever the cause, find the water source before you repair. Common culprits are:
- Cracked or missing grout near the tub or shower floor
- Caulk that has pulled away at the inside corners or where the wall meets the tub
- A leaking shower valve or showerhead arm behind the wall
- A shower door track that spills water into the wall instead of the pan
If the room is a full bathroom with a shower, how the family uses it matters here too. A wall that gets a long daily shower sees far more water than a tub surround that gets used for a quick bath, a point that comes up in Shower or Tub: Who Actually Uses the Room. More use means more exposure, and more exposure means more reason to keep caulk and grout in good shape. For the wider picture of how the room’s decisions connect, the Bathroom section covers it.
Re-sticking the tile, step by step
Gather the tools before you start. You will need a utility knife or grout saw, a stiff putty knife, a small flat chisel or an oscillating multi-tool with a grout blade, a notched trowel (a 1/4-inch square notch suits most tiles up to about 8 inches), painter’s tape, tile spacers or folded cardboard, and a bucket and sponge. Safety glasses are worth wearing, since ceramic edges can chip when you pry.
Free the tile without hurting its neighbors
If the tile is already off the wall, skip ahead. If it is hanging on, cut the grout all the way around it first. Run the grout saw or multi-tool along each joint, going slowly, and stop when the blade touches the tile’s side. A rushed pass can chip the glazed edge of the tile next to it, and then you have two repairs instead of one. If a neighbor already has a hairline crack, A Cracked Wall Tile: Replacing One Without Cracking Its Neighbors walks through the cutting and prying techniques that protect the rest of the wall.
Once the grout is cut, slide the putty knife behind one edge and lever the tile out gently. If it resists, stop and cut more grout. Force transfers through the wall and loosens adjacent tiles, which is how a one-tile fix quietly turns into a five-tile fix.
Clean both surfaces down to bare, flat material
This step gets skipped more than any other, and it is the reason re-stuck tiles fall off again a year later. Scrape the old adhesive off the back of the tile until the surface is flat and free of ridges. Scrape the wall too, removing loose thin-set, mastic and grout crumbs. A hand scraper and a few minutes of patience work better than power tools here. You want a wall that is flat within the thickness of a business card, because even a slight hump keeps the tile from sitting level with its neighbors.
Vacuum the dust, then wipe the area with a damp sponge and let it dry. A dusty surface acts as a release layer between the new adhesive and the wall. If the wall surface is painted drywall or sealed with a glossy coat, scuff it lightly with sandpaper so the adhesive has something to grip. If the paper on the drywall is torn or fuzzy, seal that spot with a primer that the adhesive manufacturer approves, and let it dry fully.
Choose the adhesive, then butter the tile
For a bathroom wall, a polymer-modified thin-set mortar is the standard choice. It bonds to cement board, plaster and properly prepared drywall, and it tolerates moisture. A premixed organic mastic is sold for dry wall areas, but many manufacturers do not recommend it for showers or tub surrounds, where water exposure is constant. Read the label, and when the instructions and the wall’s job disagree, follow the more conservative one.
Mix a small batch of thin-set to a peanut-butter consistency and let it slake for the time the bag specifies. Then spread it on the wall with the flat side of the trowel, comb it with the notched edge in straight lines, and also spread a thin layer on the back of the tile. This technique, called back-buttering, matters more than it sounds. The ANSI standard for installing ceramic tile with thin-set (A108.5) calls for roughly 80 percent mortar contact in dry areas and 95 percent in wet areas such as showers. A tile that merely looks stuck can have half its back sitting over air. Those voids are where water collects and where the tile eventually pops.
Press the tile in with a slight sliding motion, perpendicular to the trowel ridges, until it sits flush with its neighbors. Hold a straightedge across the surface to check it. If the tile sits proud, pull it and trim the thin-set. If it sits low, add a bit more under it. Space it evenly with spacers or small wedges, and tape across the face, tile to tile, with painter’s tape to stop it from sliding downward while the adhesive sets. Wall tile, especially heavier porcelain, has a habit of creeping.
The no-removal option: injection
Sometimes the tile is hollow but sits tight, the grout is intact, and the surrounding wall is sound. Taking it off risks more damage than it solves. In that case, some repairers drill a small hole through a grout joint or a discreet spot, at an angle toward the void, and inject a bonding adhesive (often epoxy) with a syringe or small applicator. A masonry or diamond bit is needed for tile, and you will want to run it slowly with light pressure. The hole is then patched with grout. The method suits a tile that is only slightly loose. It does not suit a tile with water damage behind it, since you cannot see what you are gluing to.
Grout, caulk and the days after
Leave the new tile alone for at least 24 hours, or whatever the thin-set bag specifies. Rapid-setting products shorten that, but the same rule applies: follow the label rather than your impatience. Then remove the tape and spacers and clear any thin-set from the joints with a utility knife, taking care to leave room for grout. Grout that sits over a thick layer of adhesive in the joint will crack.
Use grout that matches the existing joints in width and type. Sanded grout fills joints wider than about 1/8 inch, and unsanded suits narrower lines. Matching color is harder than it sounds, because old grout darkens with age and soap film. Mix a small test batch, let it dry (it lightens as it cures), and compare it to a clean spot on the wall before committing. Press the grout in with a rubber float, wipe the haze with a damp sponge and then let it cure. Many cement grouts benefit from a sealer after a few days, though the exact timing depends on the product.
Where the tile meets another plane, such as the tub, a corner or a countertop, use caulk instead of grout. Those joints move as the house expands and contracts, and rigid grout cracks there. A flexible silicone or a tile-and-tub caulk handles the motion. Caulk failure is a leading reason water ends up behind tile, so recaulking those lines every few years is cheap insurance. Keep the shower out of use for the period the adhesive and caulk labels recommend, which is commonly a few days for full cure.
Signs the wall has to come down
Re-sticking is a repair for a healthy wall. Open the wall up, or call a tile or remodeling professional, when you find any of these:
- Soft, spongy or crumbling backing when you press with a screwdriver
- Black or green growth on the back of the tile or on the exposed wall surface
- Loose tiles spreading in a band along the tub, or a bulge in the wall
- A musty smell that persists after you dry and clean the area
- Rusted fasteners or stained wood visible through an opening
Even then, the cut is often smaller than people fear. Water damage tends to follow the leak path, so a section a couple of feet wide may be all that needs replacing. A moisture meter, available at most hardware stores, can map how far the dampness has traveled before anyone swings a hammer.
One last practical detail: keep a few spare tiles and a baggie of leftover grout from any tile job. Wall tile lines get discontinued, and a loose tile in 2026 is much easier to replace when you can match the glaze exactly. Without spares, check the box stamps or ask a local tile shop whether they can match from a photo. Do it before the tile goes to the landfill.