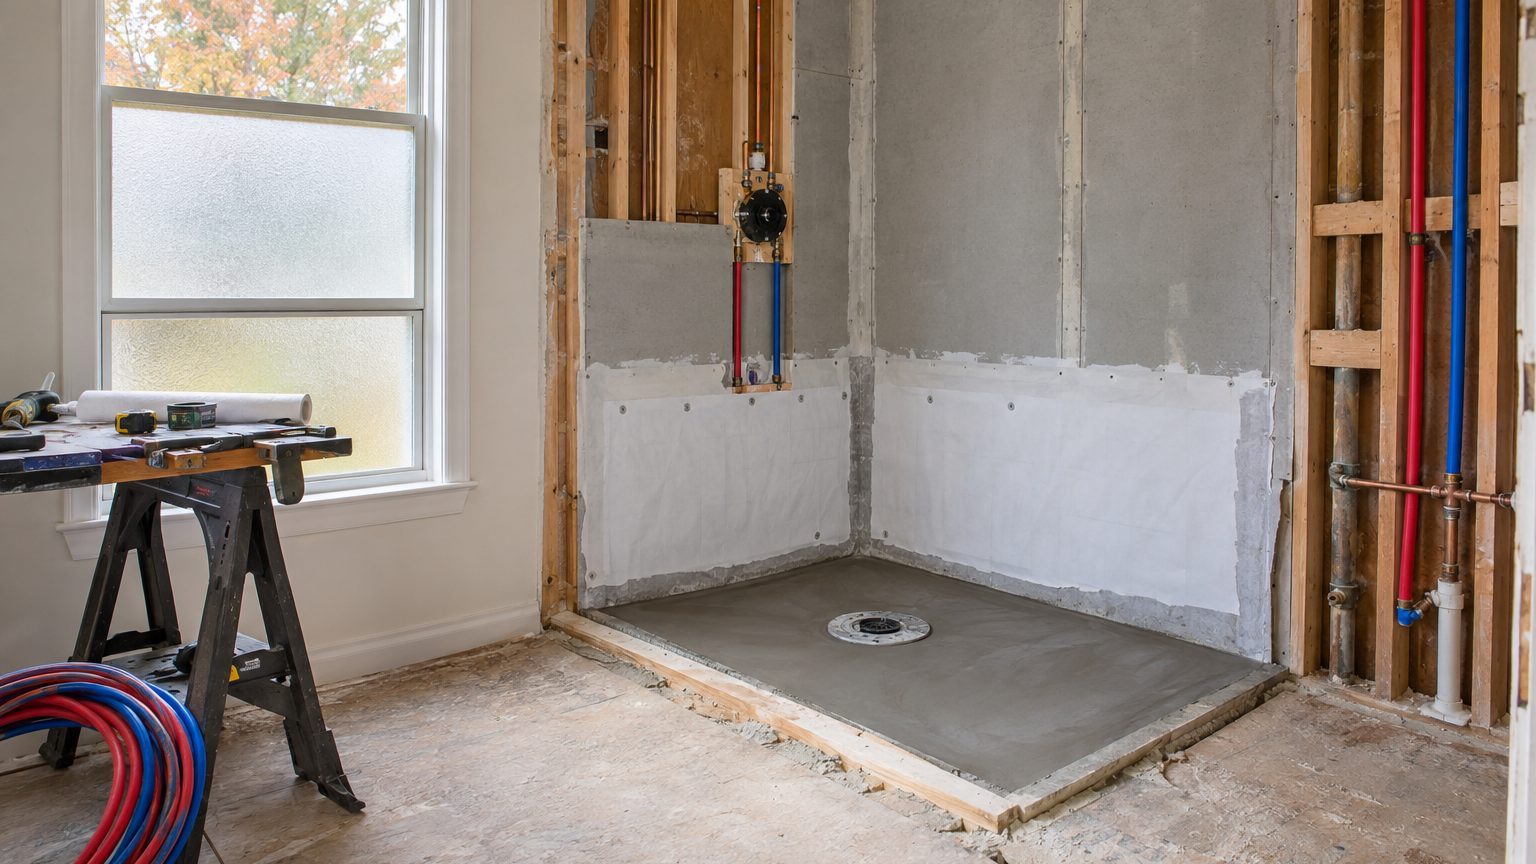

A tub to shower conversion is mostly a plumbing and waterproofing job that happens to end in tile. Behind the wall, three things change: the valve moves higher, the drain gets bigger and shifts location, and the wall assembly that used to rely on a tub flange now has to hold back water on its own. Everything you see afterward (glass, tile, a new showerhead) is the easy part.
Plenty of homeowners assume the swap is a weekend of demo followed by a pretty surface. It rarely is. The tub was doing quiet work for decades, catching splashes, forming a watertight base, and hiding the drain below the floor. Take it out, and you inherit all those jobs.
The plumbing: valve height, drain size, and where the pipes go
Start with the valve, since it’s the most visible change. In a tub and shower combo, the valve typically sits around 28 to 30 inches off the floor so you can reach it while bending over the tub. In a shower-only stall, it moves up to roughly 48 inches so you can turn it on without stepping under the spray. The showerhead arm rises too, commonly to somewhere near 78 to 80 inches. Those numbers are habits, not law, so measure for the tallest person in the house.
Moving a valve means opening the wall. If the existing valve body is in decent shape and the supply lines are copper or PEX with some slack, a plumber can often raise it and add a few inches of pipe. If the house still has old galvanized lines or a valve that’s been dripping for years, this is the moment to replace it. You will never get cheaper access.
The valve type matters more than the height. Current plumbing codes call for showers to have a pressure-balancing, thermostatic, or combination valve that protects against sudden scalding when someone flushes a toilet or starts the dishwasher. Many older tub valves are simple two-handle or single-handle models without that protection. An upgrade here is a safety item, not a luxury. Federal rules also cap showerhead flow at 2.5 gallons per minute, so any new fixture you buy will already comply.
The drain is where conversions get expensive. A tub drains through a 1.5-inch trap, and the drain sits at one end of the tub, usually off to the side near the plumbing wall. A shower floor drain is typically located in the middle of the pan, and the Uniform Plumbing Code calls for a 2-inch drain for showers (the International Plumbing Code is more lenient in some cases). Which code your town adopted decides which rule applies, and your local building department can tell you in one phone call.
Either way, the trap has to move. That means cutting into the subfloor, and in a second-floor bathroom, working between joists. Codes limit how much you can notch or drill a joist, generally no deeper than one-sixth of its depth for a notch and never in the middle third of the span. Cutting a big hole in a joist to make the new drain fit is a classic way to turn a weekend project into a structural repair. If the room below has a finished ceiling, expect to open that too, or at least cut an access panel. On a slab, it means breaking concrete.
The vent is the last piece. A new trap location may put the drain farther from the existing vent than allowed. Trap arm limits run roughly 6 feet for a 1.5-inch pipe and 8 feet for a 2-inch pipe under the model codes, though local amendments vary. When the distance is too long, a plumber has to add or reroute a vent line through the wall.
The wall and the floor: where waterproofing replaces the tub
A tub’s rim does a clever thing. The wall materials sit on top of or behind a lip (the flange), so any water running down the wall drops into the tub instead of the framing. In a shower, there is no such lip. Water running down the tile reaches the floor of the stall and has to be kept inside it, which is what the shower pan does.
Two basic routes exist. A prefabricated base, usually fiberglass or acrylic, is the simpler path. A standard 60-by-30-inch tub alcove accepts a base of the same footprint, so the walls on three sides stay put. The base sets in a bed of mortar or thin-set (check the manufacturer’s directions), connects to the new drain, and the wall surround lands on its edge. A tiled pan is more custom: a pre-slope of mortar goes down first, a waterproof liner or membrane follows, and then a second layer of mortar sets the final slope before tile goes on.
That slope is not decorative. Water needs a pitch of at least one-quarter inch per foot toward the drain, and the layer under the membrane needs it just as much as the surface. Skip the pre-slope, and water pools on the liner, wicks into the mortar, and sits there. A flood test, filling the pan to just below the curb and letting it sit for 24 hours while watching the water line, is how installers confirm the liner is tight before burying it. It costs nothing but patience.
Then the walls. This is the part people get wrong most often, because a lot of tub surrounds were built with cement board and nothing else. Cement board tolerates moisture, but it isn’t waterproof. Water passes through tile grout, soaks the board, and the framing behind it can stay wet for years. Tile industry guidelines call for a separate waterproofing layer in showers, either a sheet membrane or a liquid-applied one, sealed at seams, corners, and around the valve and showerhead penetrations. Some foam backer boards come with their own sealing systems, which also work when installed to the maker’s instructions.
Height is another change. The model plumbing codes require wall surfaces in a shower to be smooth, hard, and nonabsorbent to at least 72 inches above the drain inlet. A tub surround that stopped at 60 inches or only covered the lower half of the wall will not meet that standard once the tub is gone. Taking the tile or panels to 72 inches or higher (many people run them to the ceiling) solves that and keeps steam from reaching painted drywall.
If you plan to keep some of the existing wall tile, think carefully about it. Tile that has been sitting behind a tub for 30 years is not necessarily waterproofed, and it often hides a damp backer. Patching it is possible, and there’s a method for swapping out individual pieces covered in A Cracked Wall Tile: Replacing One Without Cracking Its Neighbors. But once the bottom courses of a wall come down for the valve and pan work, most people end up retiling the whole wall to get a consistent result.
Framing and blocking you only get one chance at
Open walls make it easy to add what nobody thinks about until later. Horizontal blocking between studs, set at a consistent height, gives you solid backing for grab bars, a fold-down seat, or a heavy glass door. Adding it takes minutes now. Finding studs through a finished tile wall and a waterproof membrane years later is a miserable job. Even if no one in the household needs grab bars today, the lumber is cheap and the option is worth having.
Removing the tub itself is the muscle part. Acrylic and fiberglass tubs lift out relatively easily, but a cast-iron tub weighs well over 200 pounds, and many installers break it up in place with a sledgehammer, wrapped in a blanket, instead of carrying it down a staircase. Steel tubs sit in between. Plan the route out before you start.
Before you demolish: permits, size, and what a shower can’t do
Size is rarely the problem. The residential code sets a minimum shower interior of 900 square inches that can contain a 30-inch circle. A standard tub footprint is 1,800 square inches, so you start with double the required space. The question is usually what to do with all that room: a larger bench, a wider opening, or a curbless entry. If you’re leaning toward that last option, A Walk-In Shower With No Door: Where the Water Goes goes through splash zones, floor pitch, and how big the opening can be before the room gets wet.
A curbed shower, on the other hand, is the straightforward version. Codes call for a finished curb at least 2 inches below the side and back walls of the compartment and no taller than 9 inches, so the practical window is wide. Most installers build somewhere in the 4-to-6-inch range for a conventional stall with a door or curtain.
Permits deserve a phone call, not a guess. Swapping a faucet generally needs none. Relocating a drain, cutting a joist, or moving a vent usually does, and in many places a licensed plumber is required to pull it. An unpermitted bathroom shows up at sale time when an inspector asks about the work, and fixing that after the fact costs more than doing it right. The inspection itself happens at rough-in, with the pipes exposed and pressure-tested before they’re covered.
Houses built before the late 1970s add two more questions. Paint from before 1978 may contain lead, and federal rules require certified practices when contractors disturb it. Older tile adhesives, floor backing, and joint compound can contain asbestos. Neither is a reason to panic, but a lab test on a small sample before demolition is inexpensive compared with spreading dust through the house.
Resale is the one real trade-off. Real estate agents commonly advise keeping at least one bathtub in a house, particularly in family neighborhoods where buyers have small children. That advice is a rule of thumb, not a law, and it depends on your market. If the home has a second full bath with a tub, converting the primary bath is a low-risk call. If the tub you’re removing is the only one in the house, think harder about it.
One last practical step happens before the wall closes. Photograph the open framing, with a tape measure showing valve depth, drain location, and blocking height, and note the distances from fixed points like a corner or doorframe. A drain line buried under a tiled floor and a valve hidden behind a membrane are very hard to find later, and a dozen phone photos taken in ten minutes will save a future plumber (or you) from probing. Browse more projects like this in the Bathroom section.