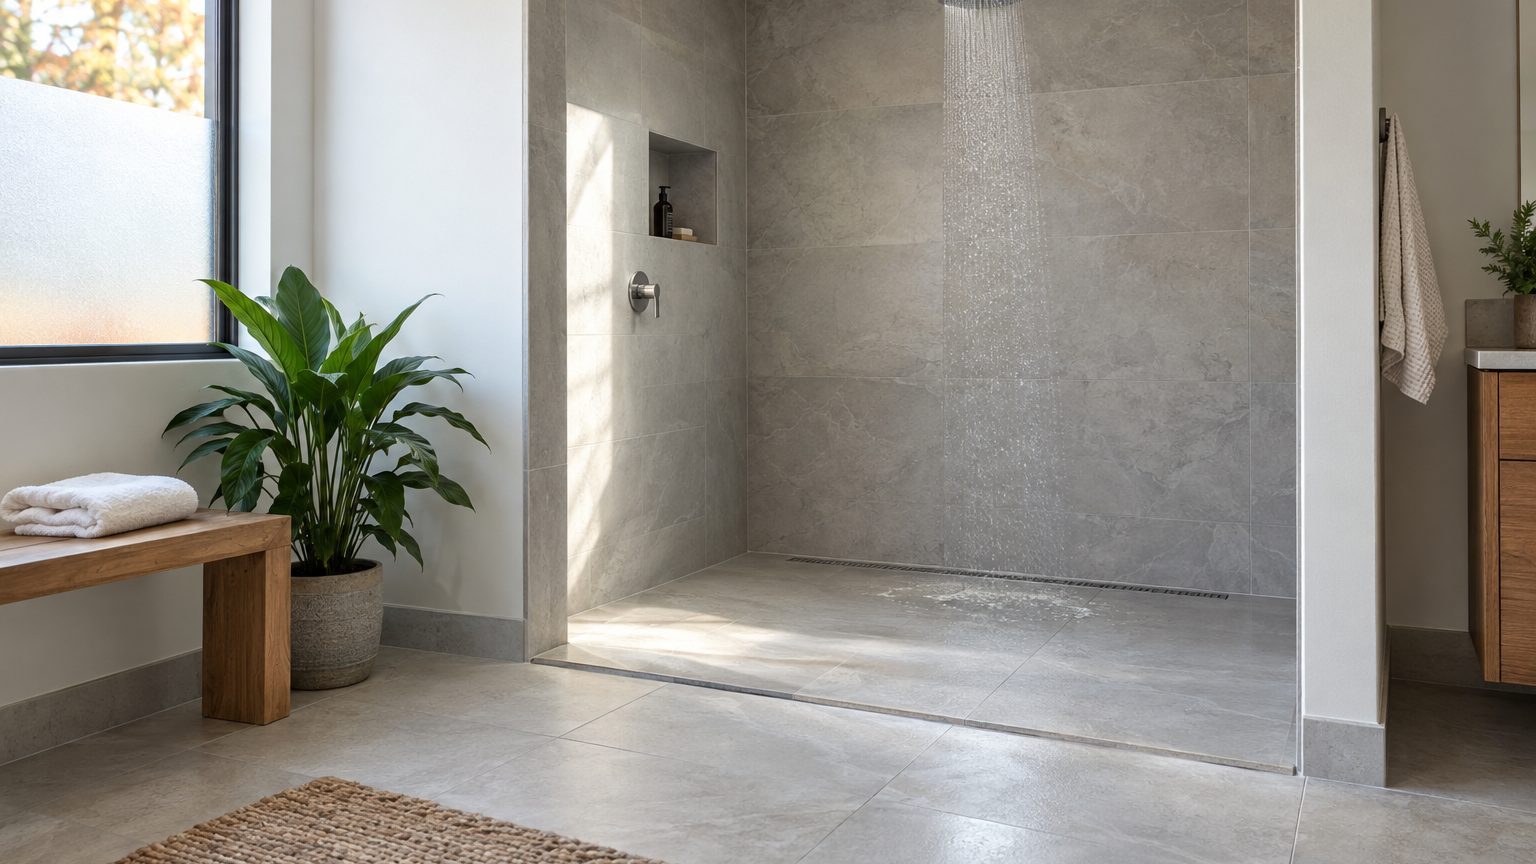

A doorless walk-in shower keeps water inside through three things working together: a floor sloped firmly toward the drain, a layout that aims the spray away from the opening, and enough distance between the showerhead and the entry. Skip one and the bathroom floor pays for it. The rest of the design (glass, curb, fancy tile) is mostly decoration compared to those three.
That matters because the doorless look is popular for good reasons. There is no glass to squeegee, no track to scrub, and no curtain liner to replace. But “no door” does not mean “no rules,” and most of the complaints about these showers (cold drafts, wet floors, soggy towels) trace back to layout decisions made before a single tile was set. For the door-versus-curtain tradeoffs, see Shower Door or Curtain: Cleaning, Space and Splash. Here the focus is on where the water actually goes.
The floor does most of the work
Start at the ground, because gravity is the only thing guiding water in a shower with no barrier. Most US plumbing codes call for a shower floor that slopes toward the drain at a minimum of 1/4 inch per foot, and not steeper than 1/2 inch per foot. Under 1/4 inch and water lingers in low spots (which also grows a film of soap scum and, eventually, mildew). Over 1/2 inch and the floor feels tilted underfoot, and you start to notice it when you stand still to shave.
Drain type changes how that slope is built. A traditional center drain needs the floor to slope in four directions toward the middle, like a very shallow pyramid. That forces installers to cut tile into small pieces or use mosaics, which is why so many older showers have those tiny one- and two-inch squares. A linear drain, the long narrow channel you see in newer showers, lets the whole floor slope in a single plane. One tilt, one direction, and large-format tile works fine. Linear drains cost more up front and need a compatible waterproofing flange, but they simplify the tile layout.
Where you put a linear drain matters too. At the far wall, under or near the showerhead, the floor slopes away from the entry, which is the best bet for keeping water off the bathroom floor. At the entry, the drain acts as a last line of defense, catching water before it leaves. Some installers like that because the slope near the opening is gentle and the floor can sit nearly flush with the bathroom. The tradeoff: you step on or across the grate, and hair collects in a spot you see every day.
Then there is the curb. A fully curbless entry looks seamless and works well for people who use a walker or wheelchair. Building one usually means lowering the shower floor framing (recessing the subfloor between joists, sometimes by an inch and a half or more) so that the slope fits without raising the finished floor. It is routine for a professional with new construction, and hard to retrofit on a slab or over finished flooring. A low curb of an inch or two solves the problem cheaply. It gives the water a small dam, and honestly, most people stop noticing it after a week.
For accessibility, the ADA standard for a roll-in shower compartment is a minimum of 30 by 60 inches with a beveled threshold no higher than 1/2 inch. Those rules apply to public and commercial buildings, not private homes, but they are a handy benchmark if you are planning to stay in the house for decades.
Size and spray: how big is big enough
A shower can be technically legal and still be a bad doorless candidate. Code minimums for a shower compartment run around 30 by 30 inches of finished interior, and the National Kitchen and Bath Association recommends at least 34 by 34 inches. Those are fine behind a door or curtain. With an open side, they are an invitation to splash.
Designers tend to follow a rough rule of thumb (it is a convention, not a code): the wider and deeper, the better, and a doorless shower usually wants to be at least 60 inches long, with the opening on the short end or on a long side with the showerhead well back. A shower measuring 36 by 60 inches with the opening at one end and the showerhead on the opposite wall puts roughly 5 feet between you and the doorway. That is why so many successful doorless layouts look like a long hallway of tile. Water has to travel a long way, and most of it never makes it.
Showerhead placement is the other half. Mount it on the wall farthest from the opening, or on a side wall so that the spray runs parallel to the entry rather than at it. Keep the controls (the valve and handle) near the entrance, so you can turn the water on and adjust the temperature without stepping into the stream. Few details do more for daily comfort. Nobody enjoys reaching into a cold blast at 6 a.m.
Water pressure and flow play a part too. Federal rules cap showerheads at 2.5 gallons per minute, and some states set lower limits: California and Colorado, for example, cap them at 1.8 gallons per minute. A lower-flow head produces a softer, less forceful spray, which in a doorless layout is a plus, since force carries droplets further. Stacking several body sprays or a rain head plus a handheld can push total flow well beyond what a standard head delivers. If you add several outlets, ask your plumber how the setup treats the flow limit in your state, and whether the valve and drain can handle it.
One compromise is worth knowing about. A single fixed glass panel, typically 24 to 36 inches wide, set at the end of the shower nearest the showerhead, keeps the look of a doorless design but blocks the worst splash. It is not a door, and it still has glass to clean, but it is far less work than a framed enclosure. When the choice is between a panel and a daily puddle, the panel usually wins.
What happens in the rest of the bathroom
A doorless shower leaks more than water. Steam leaves the shower and fills the room, and the air temperature drops faster because there is no enclosure to hold the heat. In a small bathroom that can mean a damp mirror, a fogged window, and paint that peels sooner than it should.
Ventilation is the fix, and it needs to be sized for the job. Building codes and the Home Ventilating Institute generally point to at least 1 cubic foot per minute (CFM) per square foot of floor area for bathrooms up to 100 square feet, with 50 CFM as a floor for intermittent fans. A 60-square-foot bathroom therefore needs a fan rated at roughly 60 CFM, and a larger shower with multiple sprays deserves a little extra. Look for a fan that vents outdoors rather than into the attic, and run it for 20 minutes or so after a shower. A fan on a humidity sensor or timer takes the habit out of it.
Warmth is a separate problem. Stepping out of a doorless shower into a cool room feels colder than stepping out from behind glass, because the air around you is moving and the floor is wet. Electric radiant floor mats installed under the tile are a common answer, and some people add a heated towel bar. Neither is required, but both are a more satisfying use of money than another showerhead.
Then there is the floor just outside the shower. Tile there should be rated for wet use. The ANSI standard for tile slip resistance (A137.1) calls for a dynamic coefficient of friction of at least 0.42 for level interior surfaces that are expected to be walked on when wet, and a good tile supplier can tell you whether a product meets it. Polished porcelain often looks beautiful and feels like ice. A textured or matte finish costs about the same and keeps you on your feet. Set the bathroom floor to pitch very slightly back toward the shower, or at least not away from it, and keep towel hooks, a bath mat, and the vanity out of the first few feet beyond the opening.
Small items matter, too. Put a wall-mounted shelf or niche on the back wall, not near the entry. A bath mat will absorb drips, but it should be a quick-drying one you can toss in the wash. And think about a floor-level threshold strip: some people install a shallow recessed tray or a slightly lower floor outside the opening to catch strays.
Waterproofing and the walls behind the tile
Here is where doorless showers ask more of the builder. With no door, the entire shower floor and walls, and sometimes the adjacent bathroom floor, can see water. Tile and grout are not waterproof. The waterproofing lives behind them, in a bonded sheet membrane or a liquid-applied coating, and it has to be continuous across the floor, up the walls, and around the drain flange and any niches or benches. Gaps at corners and seams are where leaks begin, and they rarely announce themselves until the subfloor is soft.
Many installers flood test the pan before tiling, plugging the drain and filling the floor with water for 24 hours to make sure the level does not drop. Some local codes require a shorter test and an inspection. It costs a day and a few gallons, and it is far cheaper than opening a finished floor later. If a contractor wants to skip it, that is a red flag.
Grout choice helps as well. Epoxy grout resists staining and does not need sealing, while cement grout is cheaper and easier to work with but needs periodic sealing, especially in a high-splash area. Either way, the grout in the wettest zones is the first thing to check once a year for hairline cracks.
The same logic applies if you are updating an existing shower and are tempted to skip demolition. Putting new tile over old on walls is sometimes workable in dry areas, and Tiling Over Old Tile: When It Works on a Wall walks through when that holds up. A shower that now has no door and a lot more exposure is a different animal, and it is worth asking whether the existing substrate and waterproofing can handle it. For more on planning and repair decisions in this room, browse the Bathroom section.
One last practical nuance: the building inspector or plumber in your area may have preferences that differ from the general guidance above. Some jurisdictions require a curb or a minimum threshold height on certain shower types, and others treat curbless designs as routine. A five-minute call to the local building department before the tile is ordered costs nothing and can save you from re-doing the floor.
Sources : bobvila.com