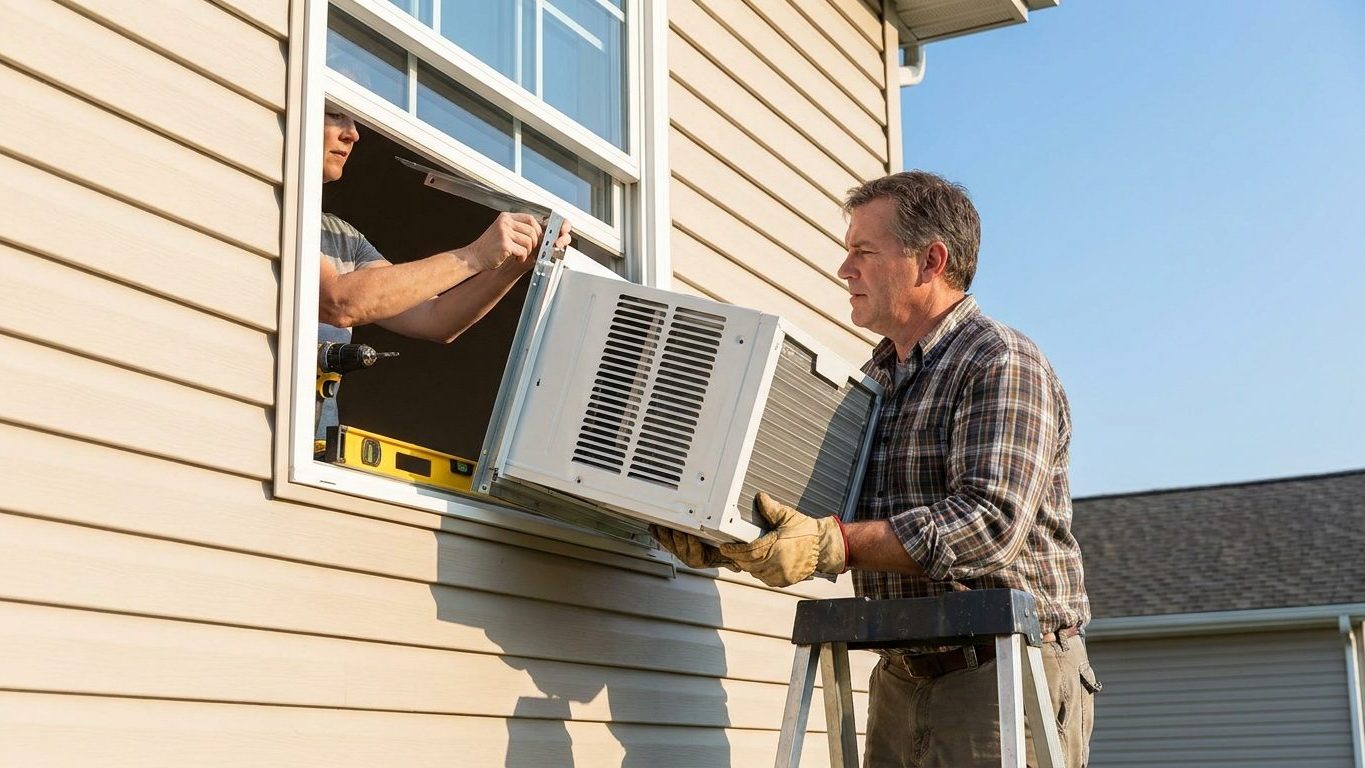

A Window Air Conditioner goes in by resting on the sill, anchored to the frame with its own mounting bracket, tilted slightly toward the outside, and sealed at the sash gap and side panels. Done right, the whole job takes under an hour with two people. What actually decides whether the unit stays put and cools the room isn’t the lifting part. It’s three things done in the right order: supporting the weight before the sash comes down, tilting the case correctly so water drains outside, and closing the gaps the accordion panels were never meant to seal on their own.
Before you lift anything
Say it plainly once: these units are heavy, they get installed at an open window, and the job of holding the weight can never share a hand with the job of keeping your own balance. That’s why every manufacturer instruction sheet for a window unit says the same thing in different words: two people, always. One person supports the unit from outside or holds it steady on the sill while the other works the sash and the mounting hardware from inside. Trying to do both jobs solo, leaning out a second-story window with sixty or eighty pounds balanced on a sill, is the single most common way this goes wrong.
Before the unit even comes out of its packaging, walk through a short set of checks. None of them take long, and skipping any one of them is how installations end up crooked, unstable, or torn out and redone a week later.
- The window opens the way the unit expects. Most window units are built for a double-hung window that slides up, with the lower sash coming down to close onto the top of the case. If the window cranks outward, slides sideways, or is a fixed pane, the standard bracket kit won’t work and you’ll need a different mounting approach or a different window entirely.
- The sill is sound. Press on it. Old wood that flexes, feels soft, or shows rot at the corners is not going to carry a running compressor for a season. A sill that needs repair should get that repair before anything sits on it.
- The space below the window is clear. Bushes, a walkway, a parked car, an AC condenser, whatever’s directly beneath the opening should have nothing valuable or occupied in that path while you work, and ideally nothing there permanently once the unit is in.
- The unit’s own hardware is all in the box. Support bracket, side panels, foam seals, screws. A Window Air Conditioner is designed as a system with the frame it ships with. Substituting parts, or leaving pieces out because they seem optional, is where the next section’s problems start.
Supporting the weight
The window sash is not a bracket. It closes down against the top of the unit and holds it snug against the frame, but it isn’t designed to bear the unit’s weight, and it was never meant to. That distinction gets missed constantly, and it’s the reason units work loose over a season of vibration and temperature swings even when everything looked secure on install day.
The part that actually carries the load is the support bracket that ships with the unit, sometimes called an angle bracket or an accordion frame kit, which mounts to the sill and to the outside of the window frame. Its job is to take the weight off the glass and off the sash entirely and transfer it down into the sill and the exterior wall structure. Many units also call for an outside leg or leg kit, a simple metal support that extends from the bottom of the case down to the exterior wall or foundation, giving the unit a second point of contact besides the sill itself. Skipping the leg kit because the sill “feels fine” removes a safety margin the manufacturer built in on purpose.
For any of this to matter, the sill has to be able to carry the load in the first place. That means solid wood or masonry without rot, cracking, or previous water damage, wide enough to fully support the unit’s base rather than just the front edge, and free of any soft spot that would let the front of the case sag forward over time. A sagging front edge is usually the first visible sign that a sill was marginal from the start.
The failure mode is not complicated to describe: an unsupported or partially supported unit works loose, tips forward, and falls from the height of the window onto whatever is below. That’s the whole reason the bracket and leg kit exist, and it’s the one point in this entire process worth double-checking before you walk away from the job.
Tilt, seal and the side panels
Two details, easy to skip, decide whether the installation actually performs the way it should once the compressor kicks on.
- Set the tilt. Most manufacturers call for the outside edge of the unit to sit slightly lower than the inside edge, roughly a quarter-inch of drop, so that condensate collecting in the drain pan runs outward and drips harmlessly outside rather than pooling back toward the room and finding its way onto the sill or the wall below the window. Some manufacturers build their own drain routing differently and specifically call for a level installation instead, so this is one place where the instruction sheet overrides the general rule. Check it before assuming.
- Lower the sash onto the top of the case until it meets the unit snugly, then extend the accordion side panels out to meet the window frame on each side. Those panels close the horizontal gaps, but they’re a placeholder, not a weathertight seal, and most of them still leave narrow gaps at the screw holes and where they meet the frame’s edge.
- Seal the gap above the lower sash and any remaining gap around the side panels with the foam strip that ships with the unit, or a comparable weatherstripping foam if the original piece is missing. This is the gap most installers glance over, and it’s exactly the kind of opening that lets warm, humid outside air leak back into the room the unit is working to cool.
- Check the seal from both sides once everything is in place: no daylight visible around the case from outside, no draft felt by hand around the sash and panels from inside.
An unsealed installation doesn’t just waste energy in the abstract. It means the compressor runs longer and more often to fight infiltration that a few dollars of foam tape would have stopped, and it’s one of the more common, least visible reasons a correctly sized unit still seems to struggle on the hottest days.
Security, and the first run
A window held shut by an air conditioner instead of its own lock is a window that can’t be locked at all, and that detail gets discovered later, usually by whoever does a security check before a storm or before leaving for a trip. The fix is simple: a sash lock or a mounting bracket kit that includes a locking screw through the sash track, sold specifically for this purpose, restores the ability to secure the window with the unit installed. It takes a few minutes and it’s worth doing at the same time as the main installation rather than as an afterthought.
If the unit spent any time lying on its side, in transit or in storage, let it stand upright for a few hours before switching it on. That gives the compressor oil time to settle back where it belongs instead of running while it’s still displaced, which is a common cause of an early failure that had nothing to do with the installation itself.
On the first run, check the drain path outside for a few minutes to confirm condensate is actually leaving the unit rather than backing up, and listen for any buzz or rattle where the case meets the window frame. That kind of vibration usually means a gap in the seal or a mounting screw that needs another quarter-turn, and it’s far easier to fix in the first ten minutes than after a season of running.
One more point worth stating plainly: a window unit should plug directly into a wall outlet, not into an extension cord. Extension cords aren’t rated for the sustained draw a compressor puts on a circuit over hours of continuous run time, and that mismatch is a known cause of overheated cords and outlets. If the outlet near the window isn’t convenient or doesn’t seem adequate for the unit, that’s a question for a licensed electrician, not a workaround with a cord from the garage.
Common questions
Do I need a special bracket if my window is already narrow?
Most window units come with adjustable side panels that extend to fit a range of window widths, but there’s a minimum width below which the case itself won’t fit or the panels can’t extend far enough to seal properly. Check the unit’s listed window width range before purchase rather than after it’s sitting on your porch.
Can I install a window unit without the support bracket if the sill looks strong?
No. The bracket and leg kit are there because a sill that looks solid isn’t the same as one engineered to carry a running compressor’s weight and vibration for months. The hardware exists specifically to remove that guesswork.
Does the unit need to be perfectly level side to side?
Side to side, yes, it should be level. The tilt that matters is front to back, outside edge slightly lower than inside, so condensate drains outward, unless the manufacturer’s instructions specifically call for a level install instead.
How long should I wait before turning it on after installing it?
If the unit was kept upright during transport and storage, there’s no required wait. If it was ever laid on its side, give it a few hours standing upright first so the compressor oil can settle before the first run.