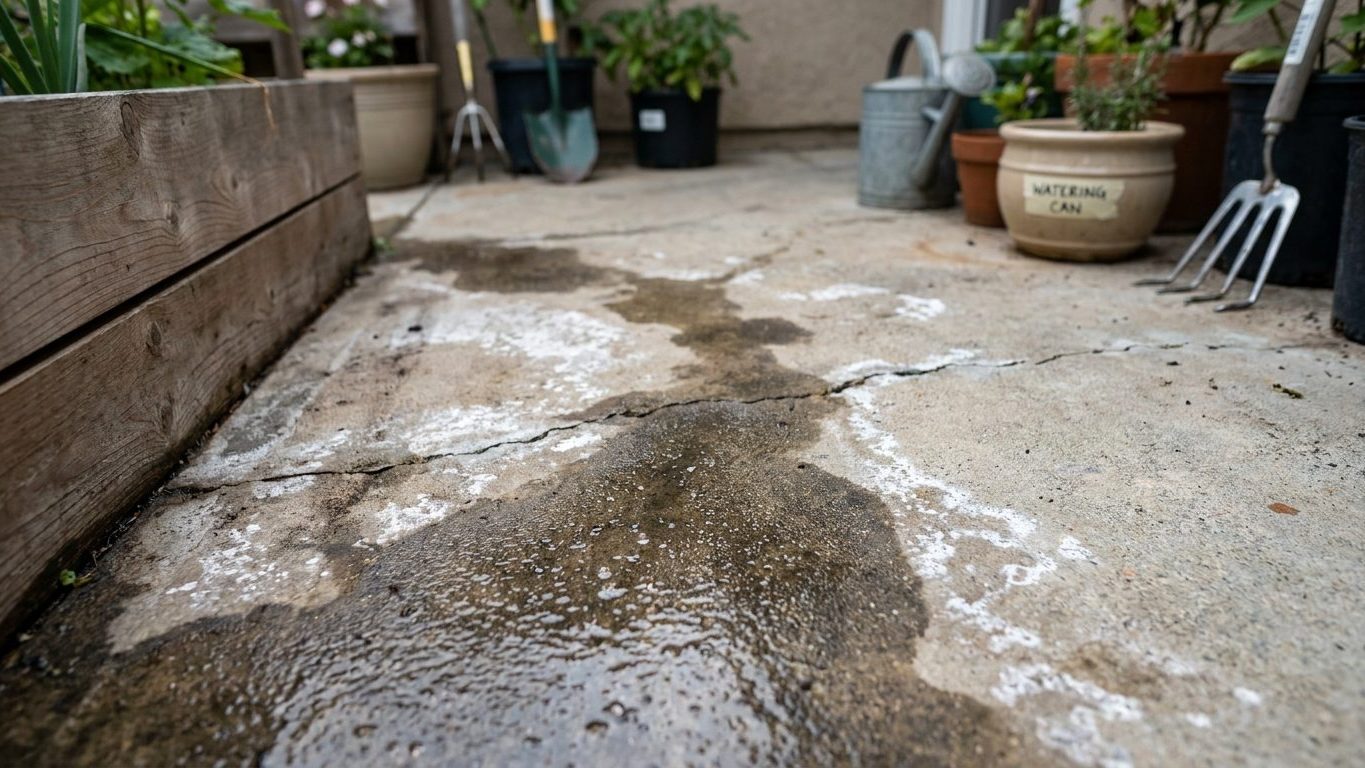

Water rising through a concrete slab is almost never a crack. It’s vapor moving up through the concrete itself, from damp soil underneath, at a rate no coating can fully stop on its own. Tape a square of clear plastic sheeting to the bare floor and leave it a full day before you do anything else, because that one test tells you more than a new floor finish ever will.
What is actually going on

Concrete looks solid, but it is a porous material full of interconnected capillaries. The core mechanism here is vapor transmission: water vapor in the soil beneath a slab moves upward through those capillaries continuously, driven by the fact that the ground under a house almost always holds more moisture than the air above the floor. Concrete does not stop that movement. It only slows it. Whatever gets put on top of the slab, whether it’s paint, adhesive, carpet pad, or a floating floor, either lets that vapor pass through and evaporate into the room, or it traps the vapor at the interface, where it has nowhere to go but sideways, lifting flooring and growing mold under it.
Vapor transmission, not leaks
A true leak, where liquid water is pooling or running, usually comes from a specific source: a cracked pipe, a grade problem sending roof runoff toward the foundation, or a high water table pushing against the slab under hydrostatic pressure. Vapor transmission has no single source to find. It is simply what an uncovered or under-protected slab does over the ground it sits on, and it happens whether or not the house has ever had a visible leak. This distinction matters because it changes what a repair can actually accomplish. A coating applied to the top of the slab manages the symptom for a while. It does not change the moisture content of the soil below, and water moving under pressure from outside the foundation will find its way around an interior coating eventually, through the next crack, the next cold joint, or the slab-to-wall seam. Interior work only makes sense after the exterior water problem has been addressed, a sequence covered in more depth on the foundations and basements pages.
Radon uses the same pathway
The same cracks, joints, and porous concrete that let moisture vapor up also let soil gas up, and that includes radon. The EPA and the U.S. Surgeon General recommend testing every home for radon, regardless of foundation type, region, or the age of the house. The EPA’s action level is 4 picocuries per liter (pCi/L), and it recommends homeowners consider action even between 2 and 4 pCi/L. Radon concentrations are typically highest in the lowest occupied level of a house, which on a slab-on-grade home is exactly the floor you’re troubleshooting. No level of radon is known to be safe, and there is no way to infer a level from soil type, a neighbor’s test, or how old the slab is. Testing is the only way to know, and if a test comes back elevated, mitigation is a job for a certified radon professional, not a DIY fix.
What to look at, and in what order
Work from the least invasive check to the most involved, and treat each result as something that rules things in or out, not as a final answer on its own.
The order to check
- Plastic sheet test. Tape an 18-inch square of clear plastic to the slab, sealed on all four edges, and leave it 24 hours. Condensation under the plastic points to vapor transmission from below. A dry underside with dampness only on top points instead to condensation from humid room air, which rules out a soil moisture problem and points toward ventilation or dehumidification instead.
- Check the grade and gutters outside. Soil that slopes toward the foundation, or downspouts dumping close to the wall, will keep the soil under and beside the slab saturated. Fixing this rules out the most common driver of chronic vapor before anything more is spent indoors.
- Look at what’s already on the floor. Peeling paint, a white powdery residue called efflorescence, or lifting vinyl tile all confirm moisture has been moving through the slab for some time. None of these tell you the volume of water involved, only that the pathway exists.
- Ask whether there’s a vapor barrier under the slab. Slabs poured with a polyethylene sheet beneath them, between the concrete and the gravel base, transmit far less moisture than older slabs poured directly on soil or gravel. There’s no way to add this after the fact without replacing the slab, so its absence shifts the whole strategy toward flooring materials and interior humidity control rather than trying to seal the concrete itself.
- Consider what flooring is going down next. Solid hardwood and some laminates fail quickly over a damp slab. Tile, sealed concrete, and flooring rated for below-grade or on-grade moisture exposure tolerate it far better. This decision belongs at the finishing stage, which is covered in what to settle before finishing a basement.
A radon test belongs in this same sequence, not as an afterthought. Because radon moves through the identical cracks and joints as moisture vapor, the point at which you’re already checking the slab for pathways is the point to place a test kit, ideally in the lowest occupied area, following EPA testing protocol.
Watch it, or get someone in
Some of this is reasonable for a homeowner to track over time. Some of it is not, and knowing the difference saves both money and risk.
What you can monitor yourself
A homeowner can reasonably track seasonal changes in dampness, note whether the plastic-sheet test result changes between a dry month and a wet one, and watch whether staining or efflorescence is spreading or staying put. A hygrometer left in the room for a few weeks gives a useful baseline of indoor humidity, separate from the slab test, and helps tell you whether the air itself is the problem rather than the floor.
Who to call, and for what
A crack that is widening, a slab that has visibly heaved or dropped at one section, or doors and windows that have started sticking call for a structural engineer, not a repair company. An engineer’s job is to assess the foundation and tell you whether there’s a structural problem at all. They don’t sell waterproofing or drainage work, which is exactly why their opinion is worth paying for separately from any repair estimate. If the diagnosis points to water pooling against the foundation or a high water table, the next call is a drainage contractor, whose job is managing water outside the foundation before it ever reaches the slab. A company that shows up, skips any discussion of grading or drainage, and goes straight to selling an interior sealant or coating is selling you the second step without the first, and it won’t hold against water moving under pressure from outside. Ground movement around the foundation, including seasonal lifting, is its own separate topic covered in frost heave: when the ground lifts. If a radon test comes back at or above the action level, that call is to a certified radon mitigation professional, a different trade again from either of the above.
What has to happen first
The single most expensive mistake in this subject is doing things out of order. Drainage outside comes before any treatment inside, every time, because interior work applied before the outside water problem is solved just delays the same failure. Gutters that dump close to the foundation and a sump pump that isn’t keeping pace with groundwater are both worth checking before spending anything on the slab itself, and those systems are covered in the site’s roofing and plumbing guides.
Diagnosis before repair
Get the plastic-sheet test and a radon test done before choosing a flooring material or a coating product. Both tests are cheap and slow, and both change the answer to what should go down next. A slab with a working vapor barrier underneath it, dry drainage outside, and a clean plastic-sheet test result can carry almost any flooring. A slab without a vapor barrier, in a house with poor exterior drainage, needs the drainage fixed first, and then a flooring choice that tolerates residual vapor, not the reverse. Basement wall insulation decisions run into the same sequencing problem, covered in the site’s insulation guides, and the general order of operations across an entire foundation, from grading to interior finish, is laid out on the foundations and basements hub page.
Common questions
Is it normal for a slab to feel a little damp in summer?
Some seasonal variation is common because soil moisture and humidity both rise in warmer months, but a slab that consistently feels damp, stains flooring, or fails the plastic-sheet test isn’t something to write off as normal. Run the test and see.
Can I just put a vapor barrier under new flooring and skip fixing the outside drainage?
A vapor barrier under flooring can reduce moisture reaching the new material, but it does nothing about water pooling against the foundation outside. If drainage is the actual source, that water will keep finding a path, often at the slab edge or a nearby crack, regardless of what’s layered on top of the floor.
Does running a dehumidifier fix rising moisture?
A dehumidifier lowers indoor humidity and can stop condensation on cool surfaces, but it doesn’t reduce the amount of vapor entering through the slab. If the plastic-sheet test shows condensation under the plastic rather than just on top, the moisture is coming from the ground, and a dehumidifier is managing the symptom in the room, not the source.
How long should I leave the plastic sheet down before checking it?
A full 24 hours is the minimum for a reliable read, and some contractors leave it longer in slower-drying conditions. Check all four sealed edges before you conclude anything, since a gap in the tape lets room humidity in and produces a false positive.