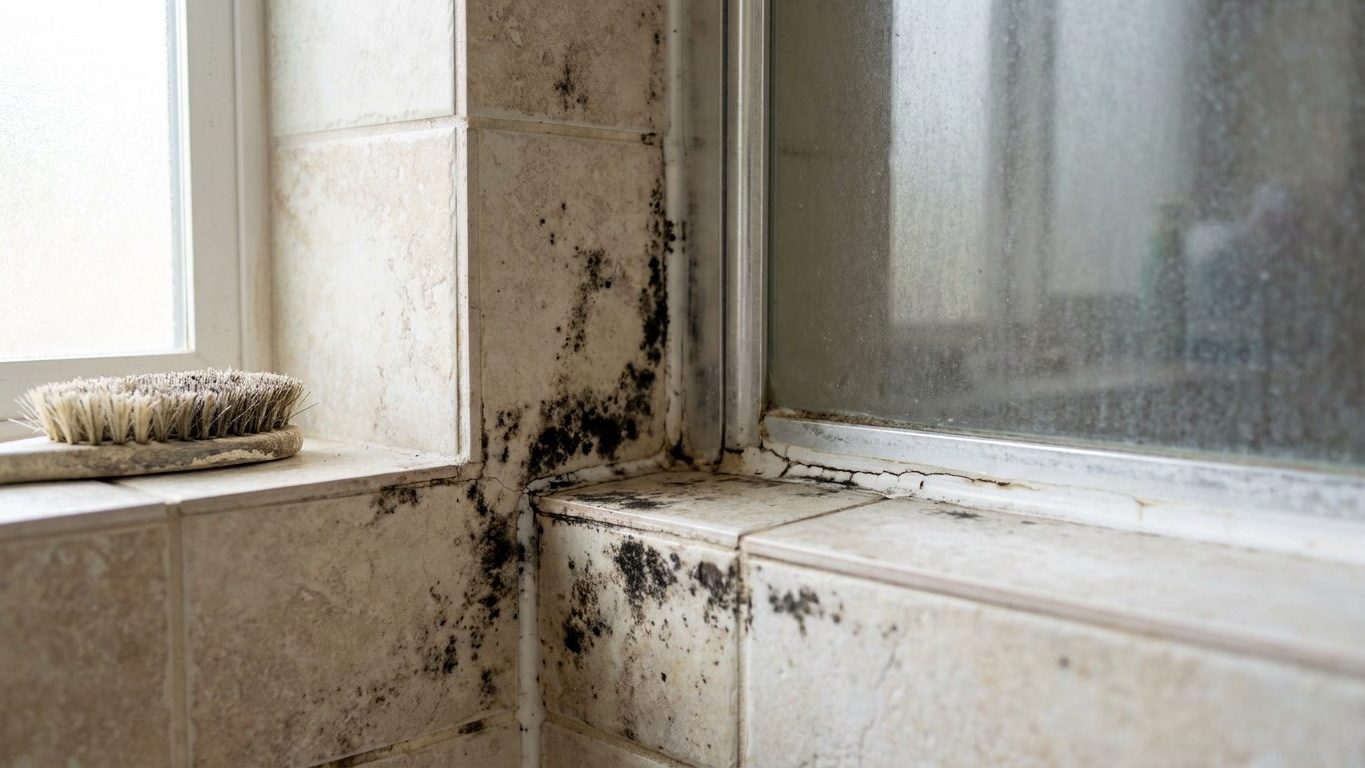

That black line running along your shower’s caulk joint might wipe off in five minutes, or it might be caulk that has rotted from the inside out, and only one of those responds to a scrub brush and bleach. Press a fingernail into the bead: if the color lifts and the caulk underneath is still white or clear, clean it. If the gray-black runs all the way through and the caulk feels soft or spongy, cut that section out and replace it, because no cleaner reaches mold that has colonized the material itself.
What actually decides it

Shower caulk is porous at a microscopic level, and a mold spore that lands on it does not always stay on the surface. When the caulk is intact, well-adhered, and dries out fully between uses, spores sit on top of the bead where a cleaner can reach every one of them. That is surface staining, and it is genuinely cosmetic: unpleasant to look at, not a sign that the caulk itself has failed.
The problem changes once there is a gap for spores to get into: a hairline split where the bead meets the tile, a spot where the caulk pulled away from the tub, or caulk that was laid down over a substrate that was still damp when it went in. Once mold gets past the surface and into the body of the caulk or the joint behind it, it has a moisture reservoir that a wipe-down never touches. The color you see on top is only the visible edge of a colony that is feeding from inside the bead, and bleach kills what it touches on the surface while leaving the rest to work its way back to the top within days.
The quick test
Two checks tell you which case you have. First, flex the bead gently with a fingertip: caulk that is still firm and springs back is intact, caulk that dents and stays dented, or that separates from the tile as you press, has already failed as a seal. Second, look at the edges of the discoloration rather than the middle. Surface mold has a fairly even, filmy look across the whole bead. Mold that has gotten in through a specific gap tends to radiate outward from one point, darkest right at the crack and fading a little as it spreads, because that crack is the entry point and the rest is the colony working outward from it.
If you are not sure, treat it as the deeper case. Recaulking a joint that turns out to have been fine is a wasted afternoon. Cleaning a joint that turns out to be rotted from the inside just delays the tear-out by a few weeks and lets the gap behind the tile stay wet in the meantime.
In practice
Once you know which case you are dealing with, the order of operations matters as much as the individual steps. Skipping the drying step, or recaulking without fully removing the old bead, is how a fixed shower ends up back in the same state within a season.
| Step | What to do | What goes wrong if you skip it |
|---|---|---|
| Test surface vs. deep | Press and flex the bead, check whether discoloration runs through it | You bleach a joint that will look the same again within days because the reservoir is inside it |
| Remove the old bead completely | Score both edges with a utility knife and pull the whole strip out, not just the visible black part | Leftover fragments hold trapped moisture and mold spores under the new caulk, so it fails again from underneath |
| Dry the joint fully | Leave the gap open to air, run the bathroom fan, until the substrate feels dry rather than just the surface | New caulk goes down over a damp joint and traps that moisture behind it, which is close to the original failure |
| Recaulk in one pass | Lay a continuous bead and tool it smooth immediately, without stopping partway | Gaps or ridges from stopping and restarting become the next entry point for spores |
| Change the habit that caused it | Run the fan during and after showers, wipe or squeegee the walls and joint afterward | The new caulk sits in the same damp conditions as the old and stains again on a similar timeline |
The removal step is the one people shortcut most often, because scraping out an entire bead is slower than it looks and tempting to half-do. Get all of it out, including the thin film that often sits underneath the visible bead against the tile and the tub or shower pan. If black shows up in the grout lines next to the caulk rather than just in the caulk itself, that is a related but separate repair, covered in our guide to regrouting a shower and when it fixes it or hides it.
Drying time is the second most-skipped step, mostly because people underestimate how long a joint behind a caulk bead can stay damp even after the visible surface looks dry. Leave the gap open longer than feels necessary, and if you have a fan, let it run.
Where this goes wrong
The single most common mistake is caulking directly over caulk that already has mold in it. It looks like a fix for a week or two, the new bead is clean and white, and then the black bleeds back through as the colony underneath keeps growing and working its way to the new surface. At that point you are tearing out two layers of caulk instead of one, and often finding that the substrate behind both layers has been wet the whole time.
The second is recaulking a joint that still has moisture in it, usually because the reader is in a hurry to get the shower back in use. New caulk skins over on the outside within a day, which looks like it has cured, but the material underneath that skin is still sealing in whatever dampness was trapped when it went down. Within a few weeks the same discoloration reappears, often starting from the middle of the bead rather than the edges this time, because the moisture source is now sealed inside rather than coming from outside.
The third is treating bleach as an ongoing maintenance plan rather than a one-time fix for surface staining. Scrubbing the same bead with bleach every few weeks controls the look of the problem without addressing why it keeps coming back, and repeated bleach exposure can actually degrade the caulk’s surface over time, making it more porous and more likely to let the next round of spores in deeper than the last. A bead that needs bleaching on a regular schedule has already told you it is not sealing properly, and the fix is ventilation and drying habits, not a stronger cleaner.
Small bathrooms make all three mistakes worse simply because there is less air volume and often more grout and caulk joint length relative to floor space, which is one of the tradeoffs covered in our guide to tile choices for a small bathroom. A joint that would dry out in a larger, better-ventilated room stays damp longer in a tight one, and the same recaulking mistakes show up again on a shorter timeline.
The rule underneath it
There is no single number that governs how a shower joint should be caulked. What does apply, in most jurisdictions, is a general requirement that bathrooms have some form of ventilation, whether a window or a mechanical exhaust fan, to remove the moisture that causes exactly this kind of recurring mold in the first place. That requirement exists because a bathroom that never dries out will keep failing new caulk at the same rate it failed the old, no matter how carefully the recaulking job itself is done. Building codes are model documents, and they only take legal effect where a city or county has adopted them, sometimes with local amendments, so the specifics for your address come from your local building department rather than from the code itself.
A professional walking into this job checks the ventilation before touching the caulk, because recaulking a joint that has no way to dry between showers is a repair with an expiration date already built in. They will also check whether the wall behind the tile has stayed dry or has taken on moisture damage over time, since caulk failure is sometimes a symptom of a leak rather than the cause of one. For the full picture on how ventilation sizing and layout affects a bathroom, see our guide to bathroom ventilation and moisture control.
Common questions
Can I just paint over moldy caulk instead of replacing it?
No. Paint does not stop mold that has grown into the caulk itself, and sealing it under a coat of paint just hides the problem while it keeps growing underneath, out of sight.
Is black mold in shower caulk actually dangerous to breathe?
Any mold growth means there is excess moisture that needs fixing, but identifying a specific species or assessing health risk from a photo is not something a cleaning guide can responsibly do. If you have health concerns about mold exposure, that is a question for a doctor or an environmental testing professional, not a judgment call from a description of color and texture.
How long does caulk usually last before mold gets into it?
It depends heavily on ventilation, how often the shower is used, and whether the joint gets a chance to dry out between uses, so there is no single figure that applies everywhere. A bathroom with good airflow and a habit of squeegeeing the walls can go a long time between recaulking jobs, while a poorly ventilated one can show mold again within a season of a fresh bead.
Do I need to replace the caulk on every joint or just the moldy one?
Just the affected section, as long as the rest of the caulk is still firm, well-adhered, and free of discoloration when you check it with the press-and-flex test. Replacing an entire tub surround when only one joint has failed is more work than the problem requires, though it is worth checking the other joints while you have the tools out.
Sources : tomsguide.com | sashco.com