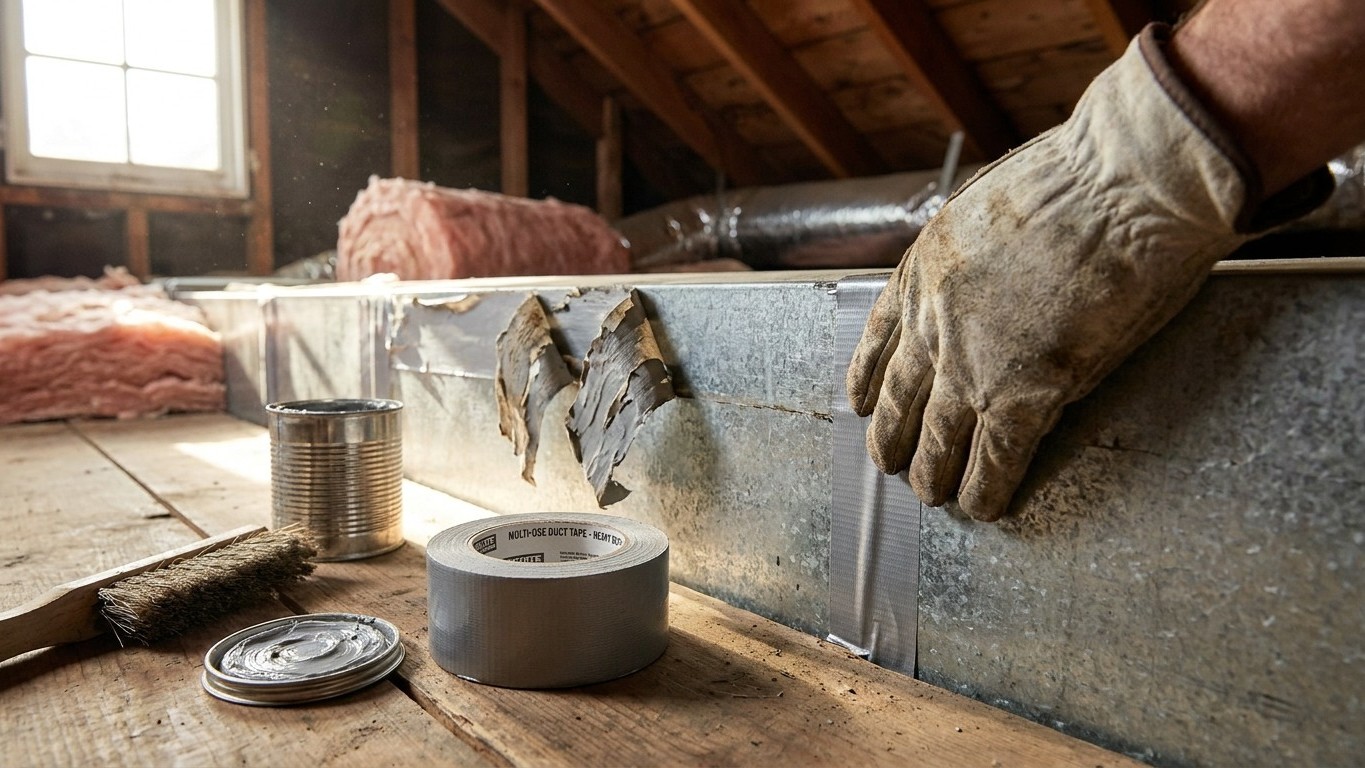

Sealing your own ducts works best with a brush-applied mastic or a foil tape carrying a tested rating mark, applied to the joints closest to your furnace or air handler first, then working outward through the unconditioned space where a run passes through an attic, crawlspace, or garage. This applies to forced-air systems only. If your home heats and cools with a radiator, hot-water baseboard, or a mini-split, there’s no ductwork to seal in the first place.
Why the tape named after ducts fails on ducts

Here’s the irony nobody warns you about at the hardware store: the product called “duct tape” is the wrong material for ducts. That cloth-backed, silver-gray roll was built for quick patches, tarps, and temporary fixes, not for a joint that sits fifteen feet from a furnace cabinet running hot air for six months straight. The rubber-based adhesive under that cloth backing dries out with heat and age. It lets go, sometimes within a single heating season, and when it does, the tape often stays stuck to the duct while the seal underneath has already failed. You’ll see the tape hanging there, looking intact, and assume the joint is fine. It isn’t.
That’s the trap. A failed cloth-tape seal doesn’t announce itself. There’s no gap you can see from across the attic, no obvious tear. The adhesive just stops gripping the metal at a molecular level while the fabric backing keeps its shape, so a visual check tells you nothing useful. Meanwhile air keeps escaping through that joint every time the blower runs, which is exactly the kind of loss ENERGY STAR is describing when it notes that “in a typical house, however, about 20 to 30 percent of the air that moves through the duct system is lost due to leaks, holes, and poorly connected ducts.”
What actually holds up is a brush-applied duct mastic, a thick, paste-like sealant that you work into the joint with a stiff brush and that cures into a flexible, rubbery skin bonded to the metal. For a gap wider than about a quarter inch, mastic alone won’t bridge it reliably, so a strip of fiberglass mesh gets embedded in the mastic first. The other legitimate option is a foil tape, but only a foil tape rated for the job. That rating shows up as a printed mark on the tape itself, evidence it passed testing for exactly this application: high-temperature exposure, aging, and adhesion to sheet metal over time. Foil tape without that mark is just aluminum-faced packing tape wearing a costume. If a roll doesn’t show a rating mark printed on it, don’t use it on a duct joint. It’s the single easiest mistake to avoid and the one that undoes the most work later.
What to seal, in order of return
The order matters more than the technique. Seal the wrong joints first and you’ll spend an afternoon on connections that barely mattered while the ones bleeding the most air stay untouched. Work down this list:
- The joints closest to the equipment, at the furnace or air handler cabinet, where static pressure is at its highest point in the whole system.
- The connections at the plenum, the large box-shaped duct trunk that the equipment feeds directly.
- The seams of every accessible run in unconditioned space, meaning ducts crossing an attic, crawlspace, basement, or garage.
- The boots, where a duct drops down or turns to meet a floor, wall, or ceiling register.
- Only then, the smaller joints further along the branch runs feeding individual rooms.
The physics behind that order is simple, and it’s the reason you can extend the logic to runs not listed here. A hole of a given size leaks air in proportion to the pressure pushing through it. Air pressure inside the duct system is highest right at the blower and drops as air travels further from the equipment and splits across more branches. The same quarter-inch gap that leaks a trickle of air forty feet down a branch line can leak several times that volume at the plenum connection, simply because the pressure behind it is that much greater. That’s why a return duct joint two feet from the air handler is worth more of your afternoon than a supply joint feeding a bedroom register on the far end of the house, even if both look equally gapped.
It also explains why boots earn a spot on this list even though they’re technically “smaller” connections. A boot sits at a transition point, sheet metal meeting a stamped or flexible connector meeting a framed opening in a floor or wall, and those transitions accumulate gaps from three directions at once. They’re rarely airtight from the factory, and they’re usually easy to reach from a crawlspace or basement below. If you’re deciding where to spend a second afternoon, look at the joints you can actually see and touch without opening a wall. Anything hidden in a finished ceiling or wall cavity isn’t on this list because it isn’t accessible, and that’s covered later.
Doing the work
Sealing a joint is mechanical work with a short list of steps that matter more than any tool you buy for it. Follow this sequence:
- Turn the system off at the Thermostat, and if you’re working near the equipment, kill power at the switch so the blower can’t start while your hands are on the ductwork.
- Clean the surface around the joint with a rag, removing dust, grease, and loose insulation fragments, so the mastic or tape has bare metal to bond to rather than a layer of debris.
- Work the mastic into the joint with the brush, pressing it so it fills the gap rather than simply bridging over the top of it. A skin of mastic sitting on the surface without penetrating the seam will crack and separate once the duct flexes with heat.
- For any gap wider than a small crack, embed a strip of fiberglass mesh in a first coat of mastic, then cover it with a second coat, so the mesh reinforces the span the way rebar reinforces concrete.
- Let it cure fully, typically overnight, before restoring power and running the system. Mastic that hasn’t set is still soft enough to tear loose the first time warm air pushes through the joint.
Two mistakes undo this work more often than any product choice. The first is sealing over a joint that was never mechanically fastened in the first place, screws or crimped connections holding the metal together. Mastic and tape seal a joint; they don’t hold one together. If a duct section wobbles or shifts when you touch it, that’s a fastening problem, and no amount of sealant fixes a connection that isn’t physically secured. Seal it anyway and you’ve just glued a loose joint that will eventually work itself apart under the seal.
The second mistake is sealing a return duct so thoroughly, in a house that already has too little return air capacity, that the system starts to starve. Every forced-air system needs a certain volume of air coming back to the equipment to match what it’s pushing out through the supply side. If the return side was marginal to begin with, sealing every gap on it can tip the balance the wrong way. You’ll notice it as a change in sound: the blower motor working harder, a low hum or whistle at return grilles that wasn’t there before, and airflow at the supply registers actually dropping instead of improving even though you sealed leaks. If that happens after a sealing project, it’s worth backing off or having the return capacity checked rather than assuming more sealing will fix it.
What is not a homeowner job
Some duct work has a clear line, and it’s worth stating without hedging. Sealing from the inside of a duct, using aerosolized sealant particles sprayed through the system to find and plug leaks from within, is a professional service that requires pressurizing equipment and testing tools a homeowner doesn’t have. Ducts buried inside insulation, whether in a finished attic floor or an insulated chase, aren’t accessible without disturbing insulation you likely can’t replace correctly on your own. Anything routed inside a wall cavity is off the table entirely; reaching it means opening finished drywall, which turns a sealing project into a construction project.
Any duct that carries combustion products, meaning a flue or vent connected to a furnace, water heater, or other combustion appliance, is not something to seal, patch, or modify yourself. Combustion venting has to maintain a specific path and draft to carry exhaust gases safely outside, and sealing tape or mastic has no place on that kind of ductwork.
There’s a related reason to be careful even on ordinary supply and return ducts if your home has a combustion appliance somewhere in the mechanical room. A house with a furnace, boiler, or water heater that burns fuel maintains a pressure balance between that equipment and the rest of the house, one that depends partly on how much air the duct system pulls or pushes through different spaces. A thorough sealing job, especially on return ducts, can shift that balance enough to affect how well a combustion appliance vents. It’s a good reason to have the work checked by someone who can test for backdrafting after a sealing project, rather than assuming tighter ducts are automatically a win with no downside.
Common questions
Can I use silicone caulk instead of mastic?
Silicone isn’t designed to bond and flex the way duct mastic does under repeated heat cycling, and it isn’t rated for this application, so it tends to separate from sheet metal over time.
How do I know if a tape is rated for ducts?
Look for a printed mark directly on the tape or its packaging showing it passed testing for duct sealing. Plain foil tape without that mark, and any cloth-backed tape, don’t qualify.
Do I need to seal ducts in a conditioned basement?
Sealing still reduces air loss and improves delivery to rooms, but the return on unconditioned spaces like attics and crawlspaces is higher, since leaked air there is lost outside the living space entirely.
Will sealing ducts lower my utility bill right away?
It reduces the share of conditioned air escaping before it reaches a room, which can show up as better comfort and somewhat lower run times, though the size of that change depends on how leaky the system was to start.