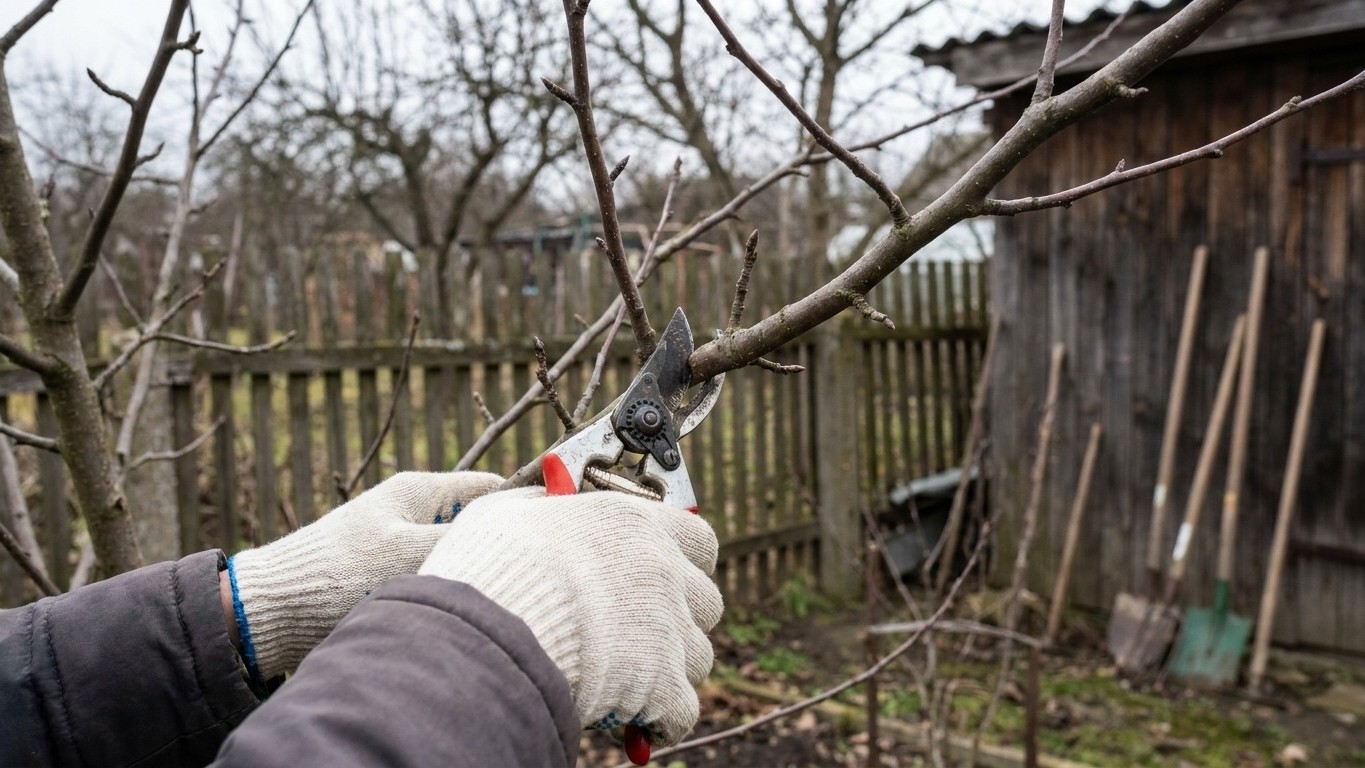

Where do you actually cut this winter? Back to the trunk or a main limb, never just the tips, and only while the tree stands bare and fully dormant. Before you make that first cut, walk over to the trunk, find the nursery tag or your planting record, and confirm the rootstock — it tells you the tree’s mature height, and that height decides how many scaffold limbs you’re pruning toward. Everything else follows from that one detail.
Why it matters
Pruning during dormancy, after leaf drop and before the buds begin to swell, lets you see the whole branch structure without a single leaf in the way. That’s when a crossed limb, a broken stub, or a crowded fork is easiest to spot and cheapest to fix. Cut now, before the tree wakes up, and the wound has the whole dormant season to start sealing before sap starts moving again.
The size the tree will reach at maturity sets the whole pruning plan, and that size comes from the rootstock, not the variety grafted onto it. USU Extension’s guide to apple production for the home garden gives these mature heights:
- M.9: 8-12 feet
- M.26 and G.11: 12-15 feet
- G.30 and M.7: 18-20 feet
- M.106: 25-30 feet
- MM.111: 30-35 feet
- Seedling rootstock: 35-40 feet
A tree that will only ever reach 10 feet needs three or four scaffold limbs low on the trunk. A tree bound for 35 feet can carry a taller central leader and more tiers of scaffolds above it.
Skip winter pruning altogether and the canopy thickens every year: more shaded interior wood, less flowering, more disease pressure from stagnant air. This is also the point where winter work and summer pruning diverge. Winter cuts, made on a dormant tree, push the remaining buds into stronger vegetative growth come spring. Summer cuts, made on a leafed-out tree, do the opposite: they slow growth and let light into the fruiting wood without triggering a flush of new shoots. If you’ve only ever pruned in summer, expect a different response from a winter cut on the same tree.
When to do it
Prune while the tree is fully dormant: no leaves, no active growth, buds still tight and dark rather than swelling or showing green. That window opens once the leaves have dropped for the season and closes at green tip, the stage where the bud scales pull back and the first sliver of green leaf shows at the tip. Once buds reach that point, the tree has started drawing on stored carbohydrate to push new growth, and a cut removes tissue the tree has already invested in.
Two things move that window from one year to the next. A stretch of unusually mild weather late in winter can pull buds toward green tip earlier than usual, while a hard, prolonged cold snap holds them back. Prune before a very hard freeze is forecast if you can help it. A fresh cut is a fresh wound, and wood that hasn’t had time to start callusing is more exposed to cold injury at the cut edge than wood healed over weeks earlier.
Work through the dormant season in order of urgency rather than all at once if you’re new to it. Remove dead, damaged, and diseased wood first, on whichever calm, dry day you get. Save the shaping cuts, the ones that decide the tree’s structure for the next several years, for later in dormancy when you can see the whole tree against a settled winter sky and you’re not still deciding what’s worth keeping.
Don’t confuse dormant pruning with anything done at pink, bloom, or petal fall. Those later stages call for thinning flower clusters or fruit, not structural cuts.
How to do it

Work from the ground up and the inside out. Stand back from the tree first and look at its overall shape before you cut anything. You want an open center or a central leader with well-spaced scaffold limbs, not a dense ball of twigs.
Remove the dead, damaged, and diseased wood first
Cut out any limb that’s dead, broken, or shows the sunken, discolored bark of disease, regardless of where it sits on the tree. These cuts cost nothing structurally, since the wood was already lost to the tree. Cut back into healthy wood, just outside the branch collar, the slightly swollen ring where the branch joins its parent limb. Cutting flush against the trunk removes that collar and leaves a wound the tree heals over far more slowly.
Take out crossing and inward-growing wood
Look for any two branches that rub or cross, and any branch heading back toward the trunk instead of out toward open space. Choose the stronger, better-placed branch of the pair and remove the other one entirely, with a cut flush to its point of origin rather than a stub. Stubs left behind rarely regrow cleanly. They usually die back and become the next season’s dead wood.
Cut back to a scaffold, not to a random point on a branch
A heading cut, one that shortens a branch partway along its length, tells the tree to push a cluster of new shoots right at the cut. A thinning cut, one that removes a branch back to where it joins a larger limb, removes the branch without triggering that response. For structural work on an established tree, thinning cuts should do most of the work. Save heading cuts for young trees where you’re deliberately building scaffold branches at a chosen height.
For a large limb, more than an inch or two thick, use three cuts instead of one: an undercut a foot or so out from the trunk, a second cut just above it from the top down to meet the undercut and drop the limb’s weight, then a final cut close to the collar to remove the remaining stub cleanly. Trying to remove a heavy limb in a single cut tends to tear bark down the trunk as the limb’s weight snaps free before the cut finishes.
Finish by stepping back again. If you’ve kept scaffold limbs spaced around the trunk rather than stacked one above another, and the center of the tree lets light reach the ground under it at midday, you’ve done the job the tree needed.
What goes wrong
The most common mistake is cutting too much in one season. A tree pushed hard by heavy pruning responds with a flush of upright, pencil-thin shoots called water sprouts, often a dense cluster of them rising straight up from the cut ends by midsummer. They add nothing but shade and crowding, and most of them need removing again the following winter, which starts the cycle over.
Topping, cutting a central leader or main scaffold off flat partway up rather than back to a side branch, is another one that shows up the wrong way for years. Instead of a clean healed cut, the tree throws several competing shoots from just below the cut, none of them as strong as the single leader it had before. Once a leader is topped it rarely regains a single dominant shoot without another round of corrective pruning.
Flush cuts, ones made tight against the trunk with no branch collar left, heal far slower than a cut just outside the collar, and the exposed wood underneath stays open to rot and canker for longer. You’ll see the difference the following winter: a properly placed cut shows a ring of new callus tissue closing in from the edges, while a flush cut often shows a dark, sunken center that hasn’t started to close at all.
Pruning tools carry disease from one cut to the next if you don’t clean them between trees, particularly on wood that showed any sign of canker or fire blight. A wipe with rubbing alcohol or a diluted household disinfectant between trees is enough to break that chain, though for confirmed fire blight your state extension service will have specific guidance on tool sanitation and how far back into healthy wood to cut.
Removing too much older, spur-bearing wood in the name of tidiness costs a crop rather than a tree. Spurs, the short, stubby side shoots that thicken and roughen with age, are where most apple varieties set the bulk of their flowers. Strip them out along with everything else and the tree looks better in February but flowers less in April.
What changes where you are
Dormancy itself is a stage, not a date, so the calendar window for winter pruning shifts with your climate even though the biology behind it doesn’t. A tree in a cold-winter climate stays safely dormant for months, giving you a long stretch to work through the job. A tree in a mild-winter climate can start swelling buds much earlier, which shortens the safe window and makes it easier to prune later than you should without noticing.
Rootstock choice interacts with climate too. A grower on a small city lot who wants a tree that stays inside 8 to 12 feet on M.9 rootstock, per USU Extension, is pruning a fundamentally different structure than a grower training a seedling-rootstock tree toward 35 to 40 feet. The dwarf tree needs less structural pruning overall and reaches full bearing size sooner, but it also has a shallower root system and less wood in reserve, so an overly hard winter cut sets it back further in proportion to its size.
If you’re growing in a container rather than in the ground, the timing logic is the same but the goal is different. You’re pruning to keep the tree small permanently rather than to shape it toward the rootstock’s natural mature size, and the specifics of that job are covered separately in growing an apple tree in a container.
For the actual dates your dormant season opens and closes, and for your local last-freeze risk after a hard pruning cut, check with your state’s cooperative extension service rather than a national source. Frost timing, chill accumulation, and bud swell all run on local numbers that don’t hold from one region to the next, even though the stages themselves, dormancy through green tip, describe the same tree everywhere. If you haven’t settled on a rootstock and variety yet, that decision belongs earlier in the process, covered in Growing Apples.
Common questions
Can I prune an apple tree if it already has small green leaves showing?
Light structural work is still possible, but you’re past the ideal dormant window once leaves are out. The tree has already spent stored energy pushing that growth, and cuts made now cost more of that reserve than the same cuts made in true dormancy. Hold off on major cuts and wait for next winter if you’re past green tip.
How much of the tree can I cut in one winter?
There’s no single figure that applies to every tree, and it depends heavily on age, vigor, and rootstock, so treat any flat percentage you see online with caution. A young tree still being trained can take a fair amount of shaping. An older, established tree recovers better from a lighter pass repeated over two or three winters than from one aggressive season.
Do I need to seal or paint pruning cuts?
Not usually. A clean cut made just outside the branch collar calluses over on its own, and many growers skip sealant entirely. If you’re dealing with a known disease like fire blight in your area, ask your state extension service whether they recommend anything different for that specific situation.
What if I missed the dormant window and the tree is already blooming?
Wait until next winter for structural work. Pruning during bloom removes flowers and the fruiting wood behind them, cutting directly into this year’s crop. If a branch is broken or clearly diseased, remove just that one, but leave the shaping cuts for the next dormant season.