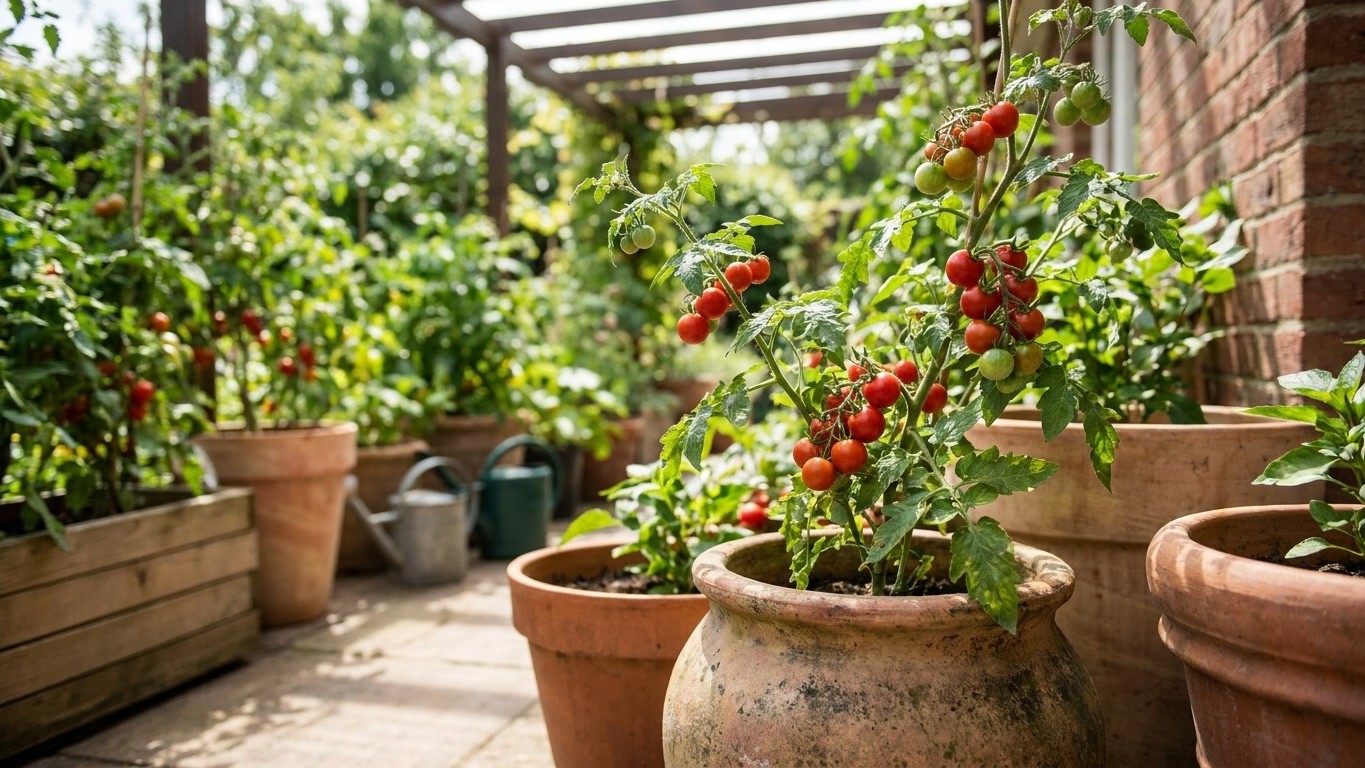

Container tomatoes need three things matched to each other: a pot with enough volume for the variety’s root system, a loose potting mix that drains but still holds moisture, and a watering rhythm that never lets the root ball dry out completely between soakings. Get the pot size wrong and nothing else you do fixes it. Start by checking the mature size on your seed packet or tag and choosing the container before you buy compost, not after.
Why this matters
A tomato root system fills the space it is given, and a pot that is too small runs out of room within weeks of transplanting. Once roots hit the container wall and start circling, the plant redirects energy into surviving rather than fruiting. You will see it as stunted growth, pale lower leaves and a plant that flowers but sets almost nothing. The pot is not a minor detail here. It is the ceiling on how much plant you can grow, full stop.
Compost quality matters just as much, because garden soil in a container compacts, drains poorly and often carries soil-borne disease into a space with no natural drainage below it. A good container mix stays open at the roots even after weeks of watering. Watering rhythm ties both together: uneven moisture is the single biggest cause of blossom end rot and split fruit in container tomatoes, because the plant can only draw calcium through water it is actively taking up. Skip a day in hot weather and the pot dries faster than a raised bed or open ground ever would, since there is far less soil mass to buffer the swing.
When to do it
Pot size is a decision you make once, at transplanting, and it is worth getting right the first time rather than potting up repeatedly. If you started seedlings indoors, the move from seed tray to final container is really two steps, and skipping the intermediate pot is one reason plants come out leggy, a problem covered in Growing Tomato Seedlings Indoors: Getting Stocky Plants Instead of Leggy Ones. Once the plant is in its final pot, it should not need repotting again that season.
Watering rhythm, by contrast, is not a one-time decision. It changes as the plant grows. A young transplant with a small root system needs less water, less often, than the same plant once it is a meter tall and setting fruit. The first flowers are the signal to start watching moisture more closely, because this is when the plant’s demand for consistent water jumps and when blossom end rot first shows up if you get it wrong. Once fruit is sizing up, check the pot daily in warm weather rather than on a fixed schedule. The plant, not the calendar, tells you when it needs water: a slight droop in the morning before the sun hits it means you are already behind.
How to do it

Start with the container. Determinate and dwarf varieties bred for pots, such as those staying under a couple of feet, get by in a smaller container than a sprawling indeterminate vine that will keep growing all season. As a rough guide, small determinate types want a pot in the 5 to 7 gallon range, mid-size determinates do better at 10 gallons, and indeterminate varieties need 15 to 25 gallons to support the root mass a full-size plant develops. Bigger is close to always better here, since a larger volume of compost buffers temperature and moisture swings far better than a small one.
| Plant type | Minimum pot size | Watering frequency in warm weather |
|---|---|---|
| Dwarf/patio (e.g. ‘Tumbling Tom’, ‘Patio Choice’) | 3 to 5 gallons | Daily, sometimes twice |
| Determinate (e.g. ‘Celebrity‘, ‘Roma’) | 7 to 10 gallons | Daily |
| Indeterminate (e.g. ‘Sungold’, ‘Brandywine‘) | 15 to 25 gallons | Daily, check twice in peak heat |
Drainage and compost
Every container needs holes at the base, and if you are reusing a pot that does not have them, drill several rather than one. Line the bottom with nothing at all: a layer of gravel or broken crockery, once standard advice, actually raises the water table inside the pot and works against drainage rather than helping it. Fill with a peat-free or peat-light multipurpose potting mix blended with roughly 20 to 30 percent perlite or coarse grit by volume, which keeps the mix open even after it has been watered daily for months. Avoid straight garden soil and avoid pure compost on its own, both of which compact hard in a container.
Watering
Water slowly at the base until it runs from the drainage holes, which tells you the whole root ball has been wetted rather than just the top inch. A watering can with a narrow spout gives you more control than a hose on full pressure. Push a finger two inches into the compost before watering again: if it comes out with soil clinging to it, wait. Once fruit is forming, aim for a rhythm that keeps the compost evenly moist rather than swinging between soaked and bone dry, and consider a two-inch mulch of straw or bark on the surface to slow evaporation. A drip line or self-watering reservoir removes a lot of the daily guesswork if you are away often, and pots left unattended for stretches are also where pest pressure builds fastest, so it is worth knowing what to check for, covered in Tomato Pests: How to Identify Them and Stop the Ones That Do Real Damage.
What goes wrong

The most common failure is simply a pot that is too small for the variety, and it is largely invisible until the plant is already stressed. By the time you see wilting in cool morning air or fruit that stays small no matter how much you feed it, the root system has usually been fighting the container for weeks. There is no good fix mid-season beyond potting up into something larger, which sets the plant back further.
The mistake that looks like extra care but is not is watering little and often. A daily splash that only wets the top inch trains roots to stay shallow, right where the compost dries out fastest, instead of growing down into the moisture reserve lower in the pot. A deep, thorough soak that reaches the drainage holes, given less frequently, builds a far more resilient plant than a light sprinkle every evening.
Standing water is the other quiet killer. A saucer that collects runoff and is never emptied turns a well-drained pot into a waterlogged one within days, and the symptoms, wilting and yellowing leaves, look exactly like underwatering. Check the saucer, not just the compost surface, before you assume the plant is thirsty. Feeding is a related trap: container compost runs out of nutrients faster than garden soil because there is less of it and watering washes feed through quickly, so a plant that looks starved by midsummer usually needs a liquid feed on a regular schedule rather than a bigger pot.
Doing it differently
Grow bags are a lighter, cheaper alternative to rigid pots and drain more freely because water can escape through the fabric sides as well as the base, which suits gardeners in wetter climates or those prone to overwatering. They dry out faster too, so the watering rhythm needs to be tighter than with a plastic pot of the same volume. Self-watering containers, with a reservoir beneath a false floor, smooth out the daily swings that cause blossom end rot and suit anyone who cannot check pots every single day, though they need the reservoir topped up rather than the surface watered directly.
Variety choice changes the whole equation. A dwarf or patio type bred specifically for containers, kept to a couple of feet tall, is a genuinely better match for a small balcony than trying to cram an indeterminate vine into a pot it will outgrow by midsummer. If you want to push the harvest later into autumn, containers have one real advantage over ground-grown plants: they can be moved, wheeled under cover or against a warm wall when nights turn cold, a tactic covered in more detail in moving pots to stretch the tomato season at both ends. That mobility is worth factoring in when you choose pot material too, since a lightweight plastic or fabric container is far easier to shift than a large glazed ceramic one, and the broader tactics for getting extra weeks at either end of the season are laid out in Extending the Tomato Season: Getting Weeks More at Both Ends. For everything upstream of this task, from choosing a variety to getting seedlings established, the main guide to How to Grow Tomatoes covers the steps this page assumes are already done.
Common questions
Can I use a 5-gallon bucket for a tomato plant?
Yes, for a dwarf or small determinate variety, but a 5-gallon bucket is undersized for most indeterminate types once they reach full height. Drill drainage holes in the base if the bucket does not have them, since food-grade buckets rarely come pre-drilled.
Why do my container tomatoes wilt even when the soil looks wet?
Check the drainage holes and any saucer underneath before assuming the plant needs water. Waterlogged roots and dry roots produce almost identical wilting, and adding more water to a pot that is already sitting in a full saucer makes the problem worse, not better.
Do I need to repot a tomato partway through the season?
Not if you chose the right pot size at transplanting. Potting up mid-season disturbs the root ball and sets the plant back, so it is worth sizing the container generously from the start rather than starting small and moving up.
How often should I feed container tomatoes compared to ones in the ground?
More often, since frequent watering flushes nutrients out of a container far faster than it leaches through garden soil. A regular liquid feed once flowering starts is standard practice for container plants in a way it usually is not for ground-grown ones.