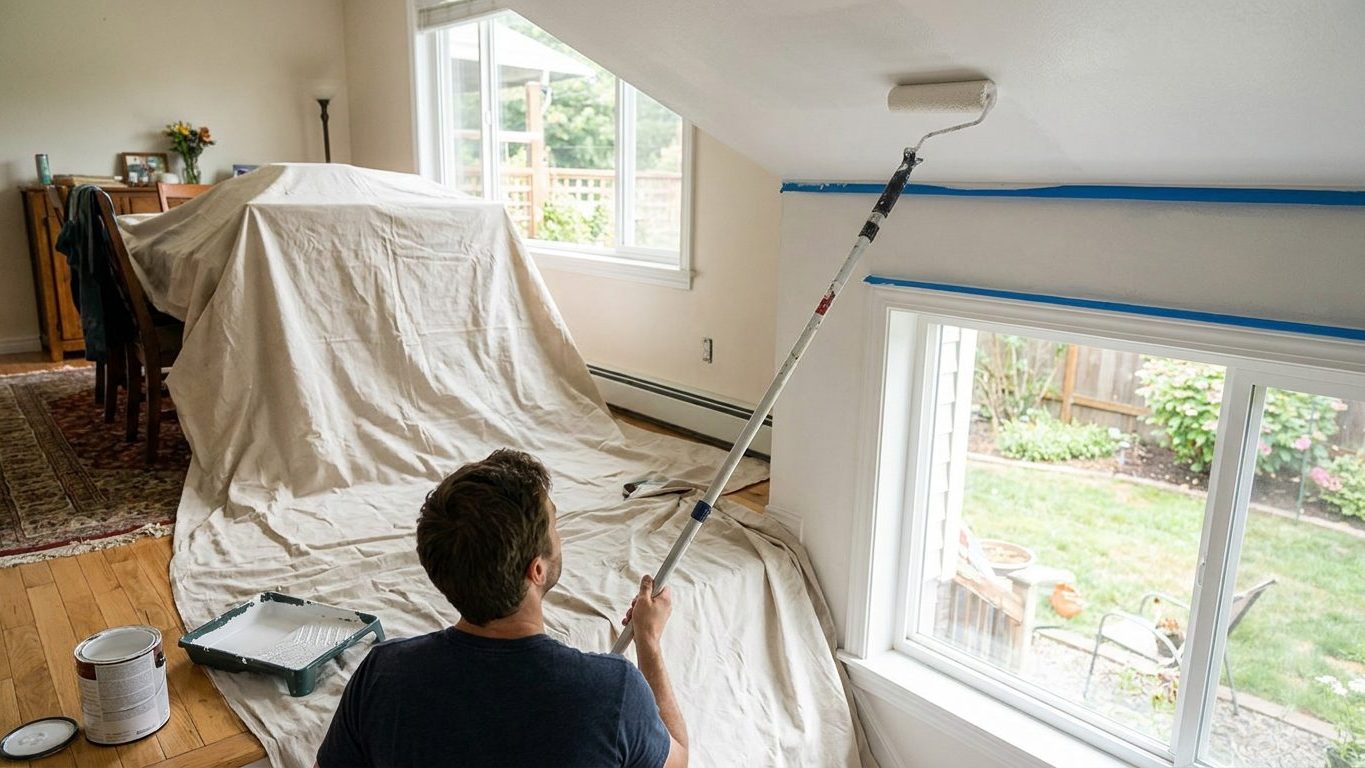

Lap marks striping a finished ceiling almost always trace back to the same mistake: someone paints under the room’s overhead fixture, breaks for lunch mid-section, and the dried edge shows up the moment afternoon sun crosses the room at an angle. The fix is to light the ceiling from the side while you work, finish each wet section before stopping, and roll toward the main window so the laps run with the light instead of across it. Set up a low, angled lamp before you open the tin.
What is actually going on

A ceiling is lit at a shallower angle than any wall in the house. Daylight from a window, or light bounced off a lamp shade, grazes across the surface instead of hitting it square on. That grazing light, called raking light, turns every ridge of paint, every overlapping roller pass and every thin patch into a visible shadow the moment the sun or a bulb sits low enough to catch it. A wall gets looked at head-on and forgives a lot. A ceiling gets looked at from underneath and on the slant, and it forgives almost nothing.
Raking light exposes everything
This is why a ceiling that looked flawless under the room’s main fixture can suddenly show a patchwork of lighter and darker bands once you turn off that light and check it with a lamp held close to the surface and angled sideways. The roller itself is part of the problem. A thick nap holds more paint and lays it down in a stippled texture, and if one pass goes on wetter than the next, the dried film reflects light differently strip by strip. The paint has to go on in a consistent, wet-edge sequence, or the raking light will find the seams. This matters more on a ceiling than on any wall in the room, which is one reason a huge share of a ceiling job is prep done before the roller ever gets loaded, the same groundwork covered in Interior Painting: Preparation Is Most of the Work.
Ventilation and posture, not just paint
Working overhead in a closed room concentrates fumes right where your face is, since you’re standing directly under wet paint for hours rather than beside it. Ventilation is not optional on a ceiling job. Open windows on two sides of the room if you can, run a fan pulling air out rather than just stirring it, and take breaks outside the room if your eyes or throat start to complain. The other cost people underestimate is physical: reaching overhead with your neck tipped back for an entire ceiling will leave you stiff for days. A roller on an extension pole, used from the floor rather than a ladder held overhead, keeps your neck in something closer to a neutral position and covers the surface faster, which also helps you keep that wet edge moving before it starts to set up.
Doing it
The order of work on a ceiling is not a matter of preference. Skip a step or do it out of sequence and the raking light will show it later, even if the room looks fine with the lights off.
The order that avoids lap marks
- Clear and mask the room first. Move furniture to the center and cover it, and run tape or paper along the tops of the walls. Skip this and you’ll spend the next job scraping ceiling paint off a lampshade or a windowsill, and drips down the wall will need their own patch and repaint.
- Set up side lighting before you load the roller. A work lamp on the floor, angled across the ceiling rather than straight up at it, shows ridges and thin spots while the paint is still wet enough to fix. Wait until the paint has dried to check under this light and any flaw is now a repair job instead of a five-second fix.
- Cut in the edges where ceiling meets wall, and around any fixture, before rolling the field. A brushed edge dries with a different texture than a rolled one, and if you roll first and cut in after, that seam sits inside the field where the raking light will catch it as a hard line.
- Work in bands the width of the roller, starting at the corner farthest from the main window and working toward it. Finish one full band, edge to edge, before starting the next. Stopping mid-band to answer the door means that section dries at a different rate than the rest, and the join shows as a stripe once the room gets its normal daylight back.
- Keep a wet edge by overlapping into the previous band while it’s still workable. If the previous band has already begun to set, the new pass drags rather than blends, and you get a visible lap line that no amount of touch-up entirely erases, because the two coats have different textures where they meet.
- Recoat only when the surface tells you it’s ready, not on a fixed clock. How long that takes depends on the paint, the room’s temperature and how much moisture is in the air that day, and the only reliable figure is the one printed on the tin you’re using. Recoating too soon lifts the first coat instead of adding to it.
Watch it while it’s wet
Check your work with that side lamp after every band, not at the end of the job. A thin spot or a roller skip is a thirty-second fix while the edge around it is still wet. Once the whole ceiling has dried, that same thin spot needs its own patch, and patches on a ceiling are exactly the kind of localized repair that raking light was built to expose.
What it looks like when it goes wrong
Some ceiling faults are a five-minute correction. Others mean stripping back to bare surface and starting over, and it pays to know which is which before you decide how urgently to fix it.
Corrections you can make
- Roller stipple showing as a texture under raking light, but no visible lines between passes: usually correctable with a light, even final coat once the current one has fully cured.
- A thin or “holiday” patch where the roller skipped: correctable by feathering in a fresh pass while nearby paint is still workable, or as a small touch-up once dry, though a touch-up on a flat ceiling finish sometimes reads as a slightly different sheen from certain angles.
- Drips or spatter that have landed on a wall or window trim: correctable if caught while wet with a damp cloth, and if a window sash picks up paint along its edge and is closed before it fully dries, you can end up with the same stuck-shut problem covered in Painted Doors and Windows That Stick Shut.
Mistakes that mean starting over
A hard lap line, where two bands of paint dried at different rates and now show as a visible stripe under any raking light, cannot be blended away with more paint applied on top. The stripe is a difference in film texture, not color, and another full coat over the whole ceiling is usually the only fix, because a partial recoat just adds a new edge next to the old one. Sagging or running paint, from a coat applied too thick or in a room too humid for it to level out, has to be sanded back once it’s fully hardened and recoated. Trying to fix a sag while it’s still wet almost always drags a wider smear across the surface instead of removing it. And peeling that lifts down to the old ceiling surface, rather than just the new coat, points to a preparation failure underneath, which means going back to bare, sound material before any new paint goes on.
What to settle before you open the tin
A few things decided before the roller comes out of the tray save you from redoing the whole job, and they’re the same questions worth asking whatever room you’re working in, from a spare bedroom to a bathroom ceiling where moisture changes the picture again, a subject its own on Painting a Bathroom: What the Moisture Changes.
Surface and building age
Check the ceiling surface itself before anything else: is it sound, or is it flaking, chalky, or bubbled anywhere? Painting over a failing surface just hides the failure for a while and guarantees a repeat job sooner than you’d like. If the ceiling is in an older building and you’ll be sanding, scraping or otherwise disturbing existing paint at any point, stop and check for lead paint before you do anything else. That’s a separate risk from anything covered here, and it needs its own precautions rather than a general painting tip.
Light and airflow before you start
Set up your side lamp and test where it needs to sit before the paint is open, not after the first band is already drying. Confirm you have a real cross-breeze, two windows or a window and a fan pulling air through the room, because a single cracked window in an otherwise closed space does very little for fume levels overhead. And decide on your pole and roller setup, checked against the room’s actual ceiling height, before you’re standing under wet paint discovering the handle is six inches too short.
Common questions
Do I need to prime a ceiling that’s already painted?
Not always, if the existing paint is sound, the same general type of finish, and a similar color. A stain, a patch repair, or a big color change from dark to light are the situations where skipping primer usually shows through the new coat.
Why does my ceiling look fine at night and terrible during the day?
That’s raking light again. Daytime sun crosses the room at a low angle at certain times of day and grazes the ceiling surface, while a light fixture mounted flush to the ceiling doesn’t rake across it the same way. Check your work under a side-angled lamp while you’re painting rather than relying on the room’s normal light.
Can I use a regular wall roller on a ceiling?
You can, but a pole extension matters more on a ceiling than the roller itself, since reaching overhead without one is what wrecks your neck and shoulders over a full room. Nap thickness should match the texture of your ceiling surface the same way it would on a wall.
How do I stop paint splatter from getting on the walls below?
Mask the top few inches of every wall before you start, and keep the roller from spinning too fast by loading it evenly rather than overloading one side. A roller screen or tray edge used to knock off excess paint before each pass cuts down on spatter more than any brand of roller does.