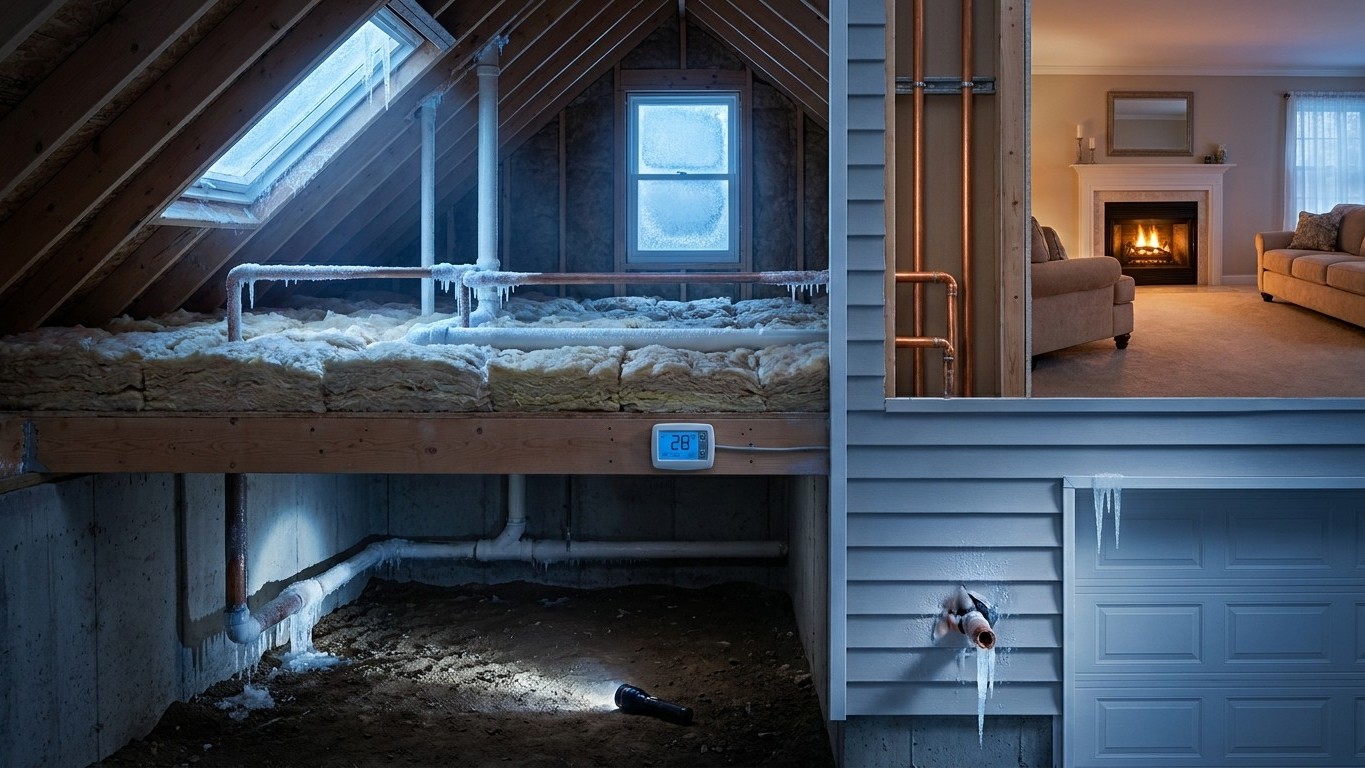

Frozen pipes rarely burst while frozen. They split during the thaw, when the ice gives way and water starts moving again through a line that’s already cracked. Prevention means keeping water moving, or keeping pipes warm, in the specific spots where cold actually reaches them: exterior walls, crawl spaces, attics, unheated basements. If a pipe has already frozen, the response is methodical: find it, shut off the water if you suspect a split, apply gentle heat from the faucet end toward the blockage, and skip anything with an open flame. Catching it before the thaw does the damage is what saves the repair bill.
What is actually happening

Water doesn’t need to reach some extreme temperature to freeze inside a pipe. It just needs a stretch of pipe that stays below 32°F longer than the water inside it keeps moving. That’s the whole mechanism, and it explains almost everything about why some pipes freeze and others in the same house never do.
The pipes that freeze are the ones running through spaces you don’t heat: a supply line stapled to the outside wall of a garage, a run tucked into an unconditioned crawl space, a section snaking through an attic above the insulation instead of below it. The pipes in your living room, behind a warm interior wall, almost never freeze, because the framing bay around them sits close to room temperature all winter. Cold doesn’t hunt for pipes. It just settles into whatever cavity has no heat source, and any pipe in that cavity is exposed by default.
Once ice starts forming, it usually starts at the coldest point of that run, often a spot near an exterior wall penetration or a hose bib connection, and it grows toward the middle of the pipe as a solid plug. Here’s the part that matters for what happens next: the water trapped between that ice plug and a closed faucet has nowhere to go. As freezing continues, pressure builds on both sides of the blockage. That pressure is what finds a weak seam, a soldered joint, a spot where the pipe was already nicked during installation, and it’s usually the joint that gives way first, not the middle of a straight run.
The blockage itself doesn’t leak. Ice is solid; it seals the crack shut as effectively as it caused it. The leak shows up only once the ice starts to melt and liquid water can reach that weakened point again. That’s the thaw everyone dreads, and it’s also why a pipe can freeze solid overnight with no visible damage, then flood a basement three days later once the weather warms and nobody’s watching.
Understanding that sequence changes how you act. It means the goal during a cold snap isn’t just “don’t let it freeze,” it’s “if it does freeze, control how it thaws.” Slow, even warming from the open end lets any trapped pressure release gradually through the faucet instead of through a crack. Fast, uneven heat, or ignoring it and letting an unattended house warm up on its own, is what turns a frozen pipe into a flooded one.
What to check, in order
Work from the cheapest, fastest checks to the ones that take more time. Each step tells you something specific about where the problem sits.
- Turn on every faucet in the house, hot and cold. No flow, or just a trickle, at one fixture but normal flow everywhere else tells you the frozen section is isolated to the line feeding that fixture. No flow anywhere suggests the freeze is closer to the main line, which is a bigger problem.
- Trace the suspect line by hand. Follow the pipe run from the affected faucet back toward an exterior wall, a crawl space access, or an attic hatch. Run your hand along any exposed section. A spot that feels noticeably colder than the rest of the pipe, or one with a faint ring of frost on the outside, is very likely the blockage.
- Check for drafts and insulation gaps near that section. A gap around a pipe penetration, a missing panel of foam board, a vent blowing directly on the area, any of these explain why that specific spot got cold enough to freeze while the rest of the line didn’t.
- Check outdoor hose bibs and any line that feeds them. Hose bibs are one of the most common freeze points because they sit on an exterior wall by design. A bib that won’t run water, even with the indoor shutoff open, often points to ice right at that connection.
- Look for dampness, staining, or a bulge in the pipe or the surrounding wall. This is the check that tells you whether a split has already happened. If you see any wet insulation, a stain spreading across drywall, or a section of pipe that looks swollen, treat it as active damage, not just a freeze.
- Check the water heater area, especially if it’s gas-fired. Note anything unusual here, but don’t touch gas connections or attempt repairs yourself. That’s covered below.
What it costs to leave it
A frozen pipe that thaws quietly, without anyone noticing the crack, doesn’t stay small. It becomes exactly the kind of hidden leak that water utilities have spent years trying to get homeowners to find. The scale of that problem nationally is well documented: “Household leaks can waste nearly 1 trillion gallons of water annually nationwide,” according to the U.S. EPA’s WaterSense program. That figure covers every kind of leak in every kind of home, not just freeze damage, but it shows how much water disappears through cracks nobody’s watching.
Per household, the EPA puts it this way: “The average household’s leaks can account for more than 9,300 gallons of water wasted every year,” and “nine percent of homes have leaks that waste 50 gallons or more per day.” A split pipe behind a wall, running slowly into insulation or a subfloor, can easily sit in that higher-loss category, because unlike a dripping faucet it isn’t limited to a small orifice. It’s a supply line under full house pressure, leaking into a cavity where nobody sees it until the ceiling below sags or the flooring starts to warp.
For comparison, the EPA notes that “a leaky faucet that drips at the rate of one drip per second can waste more than 3,000 gallons per year,” and “a showerhead leaking at 10 drips per minute wastes more than 500 gallons per year.” Even “an old or worn flapper can cause your toilet to flush on its own or silently leak thousands of gallons a year.” Those are small, contained leaks. A cracked supply line from a frozen pipe operates at a different scale entirely, and it runs whether or not you’re home to hear it.
These figures are national averages from a conservation campaign, not a prediction for any single house. They’re useful for scale, not for estimating what a specific frozen-pipe leak is costing you. The only number that tells you that is your own water meter, and this site’s page on finding a hidden water leak walks through how to read it before and after a period with no water use. The EPA does note one number worth remembering either way: “Fixing easily corrected household water leaks can save homeowners about 10 percent on their water bills.”
When to stop and call a plumber
Some of this you can handle yourself. A frozen hose bib, a cold spot on an accessible pipe under a sink, a run you can reach and warm gradually with a hair dryer or space heater held at a safe distance, these are reasonable DIY territory. The boundary comes fast once the pipe in question isn’t one you can see or reach.
Anything behind a finished wall or ceiling is past the point of a confident DIY fix. You can’t verify whether it’s actually thawing evenly, and you can’t see a crack forming until water is already coming through the drywall. Anything on the main supply line, the pipe that brings water into the house before it splits off to individual fixtures, carries the same warning: a failure there floods faster and affects the whole house, not one fixture.
A gas water heater deserves its own line here. If a frozen or damaged pipe is anywhere near the gas connections, the venting, or the heater itself, that’s not a DIY situation under any circumstances. Gas lines and combustion Appliances are exactly where a well-meaning repair attempt turns a plumbing problem into something far more dangerous.
And if you’ve already found wet insulation, a stained ceiling, warped flooring, or standing water, the leak isn’t hypothetical anymore. Structure is wet, which means mold risk starts on a clock you can’t see. At that point the priority isn’t thawing the pipe, it’s stopping the water and getting a licensed plumber in to assess the damage.
The single most useful thing to know before any of this happens is where your main shut-off valve is and how to close it. This site’s page on locating and using your main shut-off valve covers exactly that. Water damage moves fast and quietly, but it can’t do much once the supply is cut. That’s the one step worth knowing cold, before you ever need it.
Common questions
How long does it take for a pipe to freeze?
It depends entirely on how exposed the pipe is and how cold the surrounding air gets, not just the outdoor temperature. A pipe in a drafty crawl space with no insulation can freeze within a matter of hours during a hard cold snap, while a pipe in a slightly better-protected cavity might take a full day or more of sustained cold to reach the same point.
Can I use a hair dryer to thaw a frozen pipe?
Yes, on accessible sections, held at a safe distance and moved continuously rather than aimed at one spot. Start at the faucet end and work toward the blockage so any pressure that builds up as the ice melts has somewhere to escape. Never use a torch or any open flame near a pipe, and never leave a heat source unattended on it.
Does dripping a faucet really help prevent freezing?
It helps because moving water is harder to freeze than still water, and a slow drip also relieves the pressure that would otherwise build between a forming ice blockage and a closed faucet. It’s most useful on fixtures you already suspect sit on an exposed line, not something you need to do at every faucet in the house.
Is it safe to use space heaters in a crawl space to prevent freezing?
Only with a heater rated and designed for that kind of unattended, low-clearance use, and never left running without some way to monitor it. Many frozen-pipe prevention strategies rely on sealing drafts and adding insulation around the pipe itself, which reduces the ongoing risk without needing a heat source running all winter.