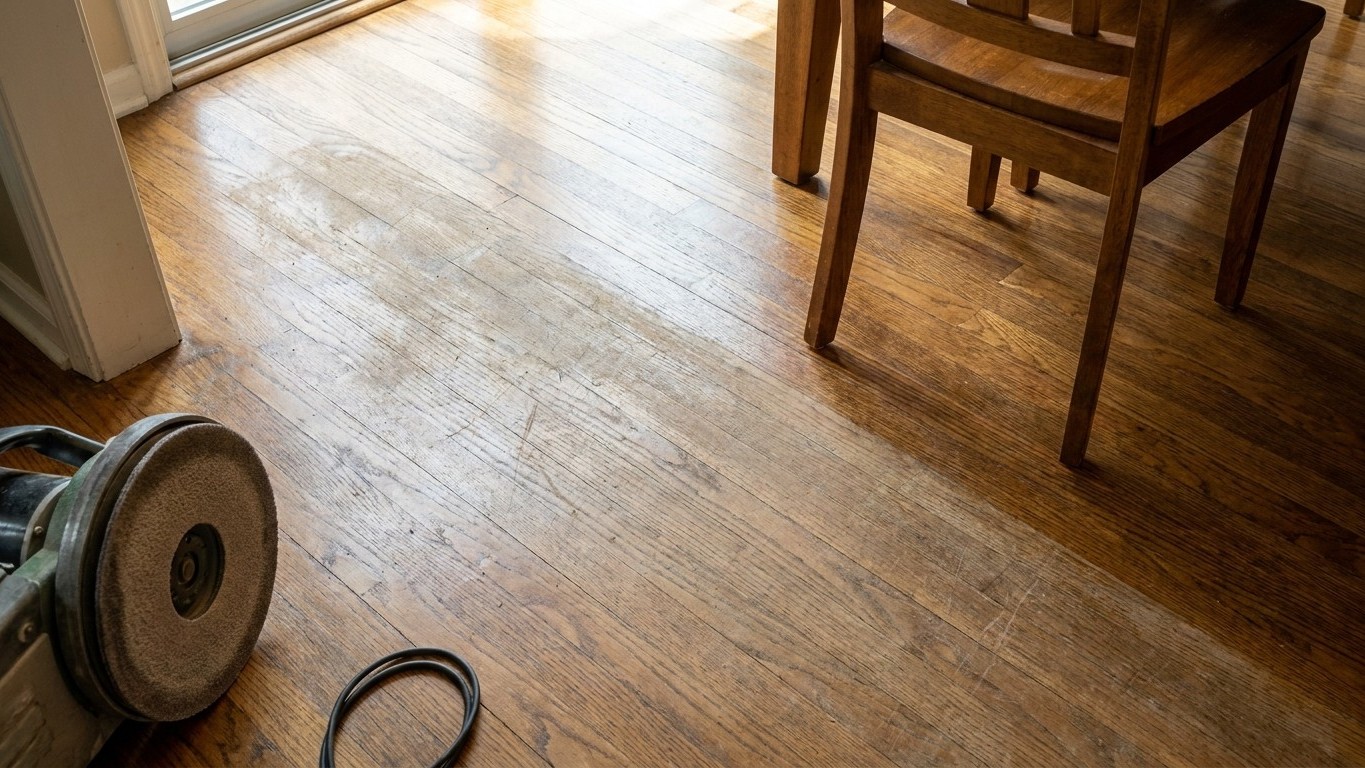

A screen and recoat scuffs up the existing finish and lays down a fresh topcoat, no sanding to bare wood involved. It works when the wood itself is sound and only the finish has dulled, scratched, or worn thin in traffic lanes. It does not work when the wood is gouged through, stained dark, or cupping. Knowing which situation you’re in is the actual job here.
What is actually happening

The thing to understand here is that a recoat abrades the finish and adds a new one without touching the wood underneath. A floor finish is a thin plastic-like shell sitting on top of the wood fibers. Foot traffic, grit, and cleaning chemicals wear that shell down in a predictable pattern: dull first in the doorway and the path from the kitchen to the table, glossy and untouched under the couch or the dining chairs that rarely move. That uneven wear is what a screen fixes. A machine fitted with an abrasive pad (finer than sandpaper, coarser than a buffing cloth) scuffs the entire surface to a uniform texture the new coat can grip. Nothing about that process removes wood. It removes and roughens finish, full stop.
This matters because sanding and recoating solve two different problems that happen to look similar from across the room. Sanding removes wood, along with whatever is embedded in it: deep scratches, pet stains that soaked in, gouges from a dropped dumbbell. A screen can’t touch any of that because it barely disturbs the surface. If you screen and recoat a floor with a stain that penetrated the wood, the stain is still there under the new finish, just as visible as before, maybe more so under fresh gloss.
There’s also a structural reason this option exists at all. Solid hardwood floors have a wear layer, the depth of wood above the tongue-and-groove joint that can be sanded away before the floor is too thin to sand again. Every full sand removes some of that layer permanently. A floor that’s been sanded three or four times over its life has less margin left, and a fifth sand might expose nail heads or the groove itself. Recoating uses none of that margin. It’s the maintenance move that keeps a floor looking fresh without spending down the one resource (wood above the joint) that can’t be replaced.
Before any of that, though, a legitimate recoat depends on one thing nobody can see by looking at the surface: whether the wood underneath is dry and stable. That’s not a finish question. That’s a moisture question, and it’s handled separately, with a meter, by whoever is doing the work. The test exists to confirm the wood is at a stable, safe level before a new finish traps moisture underneath it. A recoat applied over wood that’s still absorbing water from a slow leak or a damp crawlspace won’t peel because the finish is bad. It’ll fail because what’s under the finish is still telling a different story.
The covering, or what is under it
The floor you’re looking at is a covering. What holds it up, and what might be feeding a problem into it, is the subfloor, the joists, and sometimes water that has nothing to do with the finish at all. A screen and recoat only ever addresses the covering. If the real issue lives one layer down, a new topcoat just hides it for a few more months.
The clearest way to sort this is case by case: what you actually see, and which layer it points to.
| What you observe | What it usually means | Which layer it belongs to |
|---|---|---|
| Even dulling in traffic paths, some scratches, finish looks thin but flat | Normal wear on the topcoat only | Covering (finish), recoat candidate |
| Deep gouges, white scratches that show raw wood, dark stains that don’t wipe off | Damage has gone through the finish into the wood itself | Covering (wood), needs sanding, not recoating |
| Boards cupped upward at the edges, finish otherwise intact | Wood is absorbing moisture unevenly from below | Subfloor/moisture, must be resolved before any finish work |
| Soft or springy feel underfoot, finish looks fine on top | Subfloor deterioration or a joist issue beneath | Structure, outside the scope of a flooring job |
| Finish peeling in sheets, especially near an exterior wall or a bathroom | New coat applied over wood that wasn’t dry, or ongoing moisture intrusion | Subfloor/moisture, recoat will fail again if repeated |
Cupping is the case that trips up the most people, because the finish itself often looks perfectly fine on a cupped floor. The wood is simply not flat anymore. Boards absorb moisture from underneath faster than the top can release it, and the edges rise while the centers stay put. A screen and recoat on a cupped floor doesn’t fix the cupping. It seals a fresh coat onto boards that are still moving, and the finish will crack along those same lines within a season because the wood keeps shifting under it.
This is exactly why the moisture check belongs before the cosmetic decision, not after. A flooring professional running a moisture meter on the wood and, often, a separate reading on the concrete or subfloor beneath it, isn’t checking whether the floor looks good. They’re checking whether the wood has settled into a stable range where a new finish will actually bond and stay put, instead of trapping moisture that’s still working its way out. That test is the dividing line between “this floor needs cosmetic attention” and “this floor has a source of water somewhere that needs to be found first.”
What to check, in order
None of the following requires lifting a board or opening a wall. They’re ordered from least invasive to the point where a professional needs to get involved.
- Look at the finish in raking light. Get low, let light skim across the floor from a lamp or a phone flashlight. Even, dull wear with no shine variation rules out anything localized and points toward a straightforward recoat. Shiny patches next to dull ones, or a visible line where old finish meets bare wood, suggest a prior repair or refinish that didn’t fully cure, which changes how the new coat will bond.
- Run a fingernail or a coin over a scratch. If the nail catches on raw wood, the damage went through the finish. That rules out a simple recoat for that board, because the new coat would sit on exposed wood right next to sealed wood, curing and looking different in that one spot. If the nail glides over a dull-but-intact surface, the finish is just worn, not breached.
- Sight down the boards from one end of the room. Get eye level with the floor and look for edges that catch light differently from their centers. This is how cupping shows up before it’s obvious standing upright. Flat boards with dull finish confirm a recoat is reasonable. Any visible rise at the edges rules a recoat out until the moisture source is addressed.
- Press on the floor in a few spots, especially near exterior walls, bathrooms, and the kitchen. A firm, consistent feel underfoot rules out subfloor deterioration in that area. Any softness, give, or a hollow sound rules out a simple finish job entirely, no matter how the top looks, and points toward the subfloor or what’s under it.
- Bring in a flooring professional for a moisture reading before any sanding or recoating begins. This is the point where the check stops being something a homeowner does alone. A meter reading on the wood, and sometimes on the subfloor or slab beneath it, confirms the wood has settled into a stable range. Everything before this step is visual and tactile; this step is instrumented, and it’s the one that actually clears a floor for finish work.
When this stops being a flooring job
Three things end this page and hand the problem to someone else: anything structural, any active water, and anything under a floor that’s been wet long enough to smell. None of these get fixed by a screen, a recoat, or even a full sand.
Structural issues, meaning joists, beams, or support posts that have sagged, rotted, or been undersized to begin with, are a job for a structural engineer or a contractor who can open up the subfloor and look at framing directly. A flooring fitter can tell you the surface feels soft. They generally aren’t licensed or equipped to evaluate whether a joist is failing, and a floor that flexes underfoot after a fresh recoat will flex the exact same way, because the finish never touched the actual problem.
Active water, meaning a leak that’s currently happening rather than a stain from something that happened months ago, is a plumbing call. A finish, no matter how many coats, does nothing against water pushing up from below or dripping down from a supply line inside a wall. Water intrusion coming from a roof, a flashing failure, or siding is a different trade again, and worth checking against roofing-specific guidance before assuming the floor is where the problem started. Cupping near an exterior wall in a rainy season, for example, sometimes traces back to a roof or gutter issue rather than anything happening at floor level at all.
Then there’s the smell test, which is blunt but reliable: wood that’s been wet long enough to develop a musty odor has usually been wet long enough to start supporting mold, whether or not it’s visible yet. That’s a moisture remediation call, sometimes alongside a plumber if there’s an active source, before any flooring decision gets made. Recoating over that situation seals a new finish on top of a problem that’s actively growing underneath it, out of sight, until the finish starts failing again for reasons that have nothing to do with foot traffic.
A flooring fitter, a plumber, and a structural engineer are three different calls for three different failures, and the split matters because paying one of them to fix what’s actually another’s problem gets you a floor that looks fine for a few months and then fails again in the same spot.