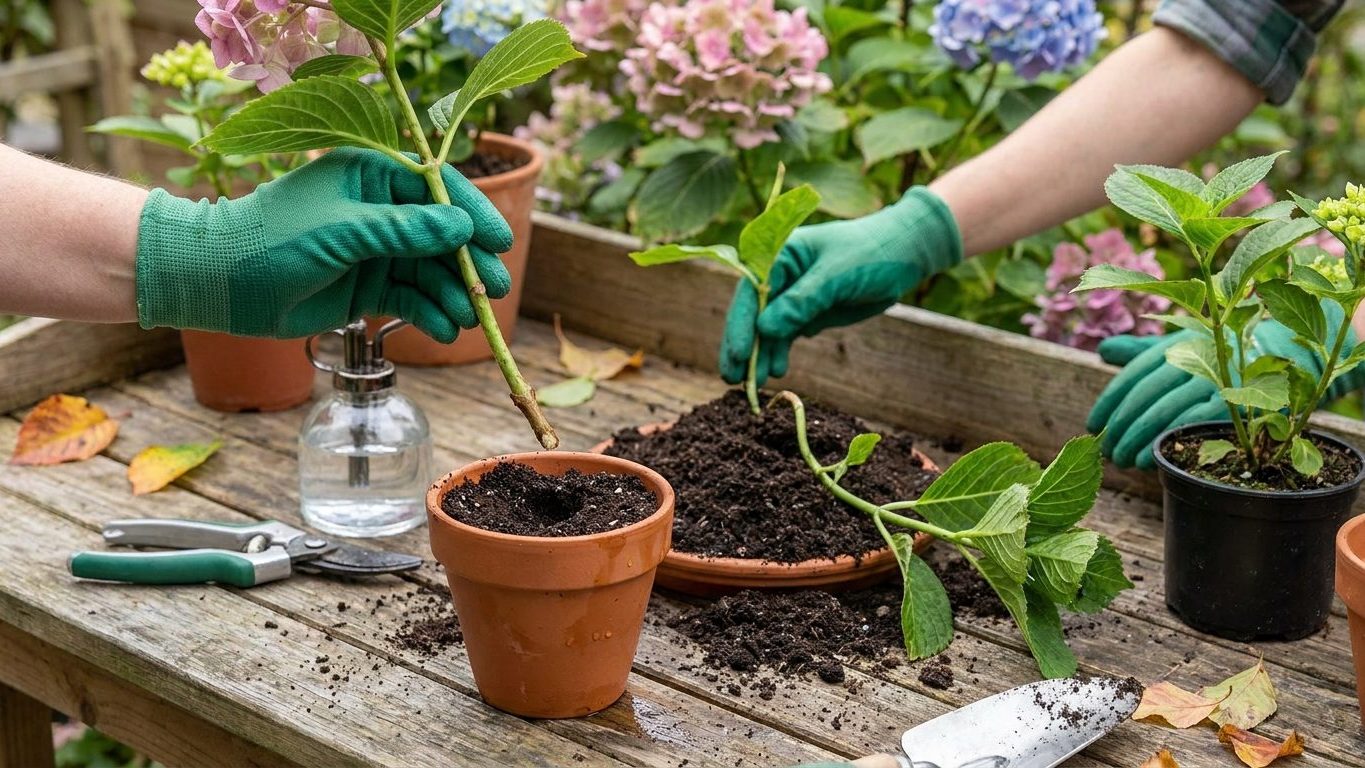

Both stem cuttings and layering turn a single hydrangea into several, using the plant’s own tissue rather than seed. The choice between the two has less to do with hydrangea type and more to do with patience: cuttings root faster in a pot, layering asks almost nothing of you but takes a growing season or more while the stem stays attached to the parent plant.
Why this matters
Propagating from a cutting or a layered stem gives you a plant that is genetically identical to the parent. That matters more than it sounds: for bigleaf and mountain hydrangeas, flower color is controlled by soil pH, not by genetics, so a rooted piece of a blue-flowering plant can still turn pink if you plant it in alkaline soil. What you’re really copying is the size, the bloom shape, the leaf form and the growth habit, not a guaranteed color.
Skip the process, or rush it, and the failure shows up fast. A cutting taken from the wrong kind of wood simply won’t root, no matter how much attention you give it afterward. A layered stem pulled free before it has grown real roots at the buried node will wilt within days once it’s cut off from the parent’s water supply. Neither mistake is reversible once the stem is separated, which is why the timing and the technique matter more here than with most garden tasks.
When to do it
Forget the calendar and look at the stem itself. For cuttings, you want growth that has firmed up enough to hold its shape when you bend it, but hasn’t gone fully woody and brown. Green, floppy new growth wilts before it can root; old, hard wood from a prior season roots poorly or not at all. This middle stage, sometimes called semi-ripe wood, is what you’re after regardless of whether the plant is a bigleaf, an oakleaf, or a panicle type.
One distinction does matter here: old-wood bloomers (bigleaf, mountain, oakleaf, climbing hydrangea) set next year’s flower buds on the stems you’d otherwise be cutting from, so choose a non-flowering side shoot rather than the stem carrying this season’s blooms. New-wood types (panicle, smooth/Annabelle) flower on growth made the same year, so there’s more flexibility in which stem you take.
For layering, timing is less about the calendar stage and more about flexibility. The stem needs to bend to the ground without cracking at the point where you’ll bury it. Once it’s pinned down, the signal that it’s working isn’t a date, it’s new growth appearing at the tip and a slight resistance when you tug gently on the buried section, which tells you roots have started to hold.
How to do it
Taking stem cuttings
Choose a healthy, non-flowering side shoot roughly the length of your hand, four to six inches, and cut just below a leaf node with a clean, sharp knife or bypass pruners. A dull blade crushes the stem tissue and invites rot right at the cut, so sharpen or replace your blade before you start.
Strip the lower leaves, leaving just two or three pairs at the top. If you’re working with a bigleaf hydrangea, whose leaves are large, cut each remaining leaf in half across its width. This isn’t cosmetic; it cuts down how much moisture the cutting loses through its leaves before it has any roots to replace that water.
Insert the stem into a small pot filled with a well-draining mix, something like perlite blended with potting soil rather than heavy garden soil, which stays too wet around a stem with no roots yet. Water it in, then cover the pot with a clear plastic bag or a cut-off plastic bottle to trap humidity around the leaves. Set it somewhere bright but out of direct sun, which would cook the cutting inside its own greenhouse. Keep the mix consistently moist, never soggy, and check every so often by tugging lightly on the stem; resistance means roots have taken hold. Once that happens, move the cutting into its own pot and let it build a stronger root system before it goes into the garden.
Layering
Pick a low, flexible stem that reaches the ground without strain. At the point where it will touch soil, scrape away a small strip of bark on the underside, or bend the stem sharply enough to crack the outer layer slightly. This wound is what triggers the stem to grow roots at that spot instead of just sitting on top of the soil doing nothing.
Bury that wounded section a few inches deep, leaving the growing tip exposed above ground, and pin it in place with a stake, a rock, or a piece of bent wire so it doesn’t spring back up. Both bigleaf and panicle hydrangeas are shallow-rooted, so a layer near the surface behaves much like the parent plant’s own root system, and a layer of mulch over the buried section helps keep moisture steady. Water that spot regularly through the growing season. Rooting can take a full year or more, which is the tradeoff for a method that requires almost no daily attention. Once you see new growth pushing from the tip and feel resistance when you tug, sever the stem from the parent, dig up the rooted section, and transplant it.
What goes wrong
Rot is the most common failure with cuttings, and it usually comes dressed as extra care. Misting a cutting several times a day, or keeping the plastic cover sealed with no airflow at all, keeps humidity so high that fungal rot sets in at the base of the stem before roots ever form. A better habit is to lift the cover briefly every few days to let air exchange happen, then reseal it.
Taking cuttings from the wrong wood is the second big failure. Too woody, and the stem has lost the ability to generate new roots easily. Too soft and green, and it wilts within a day or two, well before any root system develops. If you leave flower buds or blooms on the cutting, the stem spends its limited energy trying to support that flower instead of growing roots, so strip any flower buds you find before potting it up.
With layering, the failure is almost always skipping the wound. An unwounded stem laid on the soil can sit there for a season without producing a single root, because there’s no injury site prompting the plant to respond. The other common mistake is pulling a layer free too early, guessing at readiness instead of checking for actual resistance and new tip growth first.
Doing it differently
Cuttings taken indoors in a covered propagation box, or inside a cold frame, give you tighter control over humidity and temperature than a pot on a windowsill, which is worth the extra setup if you’re propagating bigleaf hydrangeas that are particularly prone to wilting before rooting. A greenhouse extends the window during which semi-ripe wood is available, since conditions stay milder and more consistent than outdoors.
Climbing hydrangea is the one type where layering happens almost on its own. It clings and roots along its stems using aerial rootlets as it grows, so a stem that touches soil or mulch will often start rooting with little help from you, no wounding required.
Panicle hydrangea is also propagated from seed, which is worth knowing but rarely worth doing for a named variety, since seedlings don’t reliably reproduce the parent’s exact flower form or size. Cuttings and layering stay the better route whenever you want a predictable match to the plant you already have. For oakleaf and mountain hydrangeas, both old-wood bloomers, stick to non-flowering side shoots for cuttings just as you would with bigleaf, since the flowering stems are doing double duty carrying next year’s buds.
Common questions
Can every hydrangea type be propagated this way?
Yes. Stem cutting and layering work across the genus, and panicle hydrangea can also be grown from seed, though seed-grown plants won’t match a specific cultivar reliably.
Will a cutting or layer flower the same color as the parent plant?
For bigleaf and mountain hydrangeas, color follows soil pH wherever the plant ends up growing, not genetics, so a rooted cutting planted in different soil can bloom a different color than its parent. Panicle, smooth, oakleaf, and climbing hydrangeas don’t shift color with pH at all; they move through white, cream, pink or green as flowers age, regardless of soil.
How do I know when a cutting or a layered stem is actually ready to transplant?
Don’t go by a set number of weeks. Tug gently: real resistance means roots have formed. For cuttings, also look for new leaf growth at the top, a sign the plant is putting out energy beyond just surviving. For layers, wait for visible new growth at the tip before severing from the parent.
Are hydrangea cuttings safe to handle bare-handed?
Only bigleaf hydrangea is documented as toxic, and only if eaten in quantity, causing nausea, stomach pain, vomiting, and sweating, a risk for pets and horses too. The toxic compounds are in the bark, flowers, leaves, and stems. Handling cuttings briefly to prune and pot them isn’t a hazard, but it’s reasonable to wash your hands afterward, especially if pets or livestock have access to the clippings.