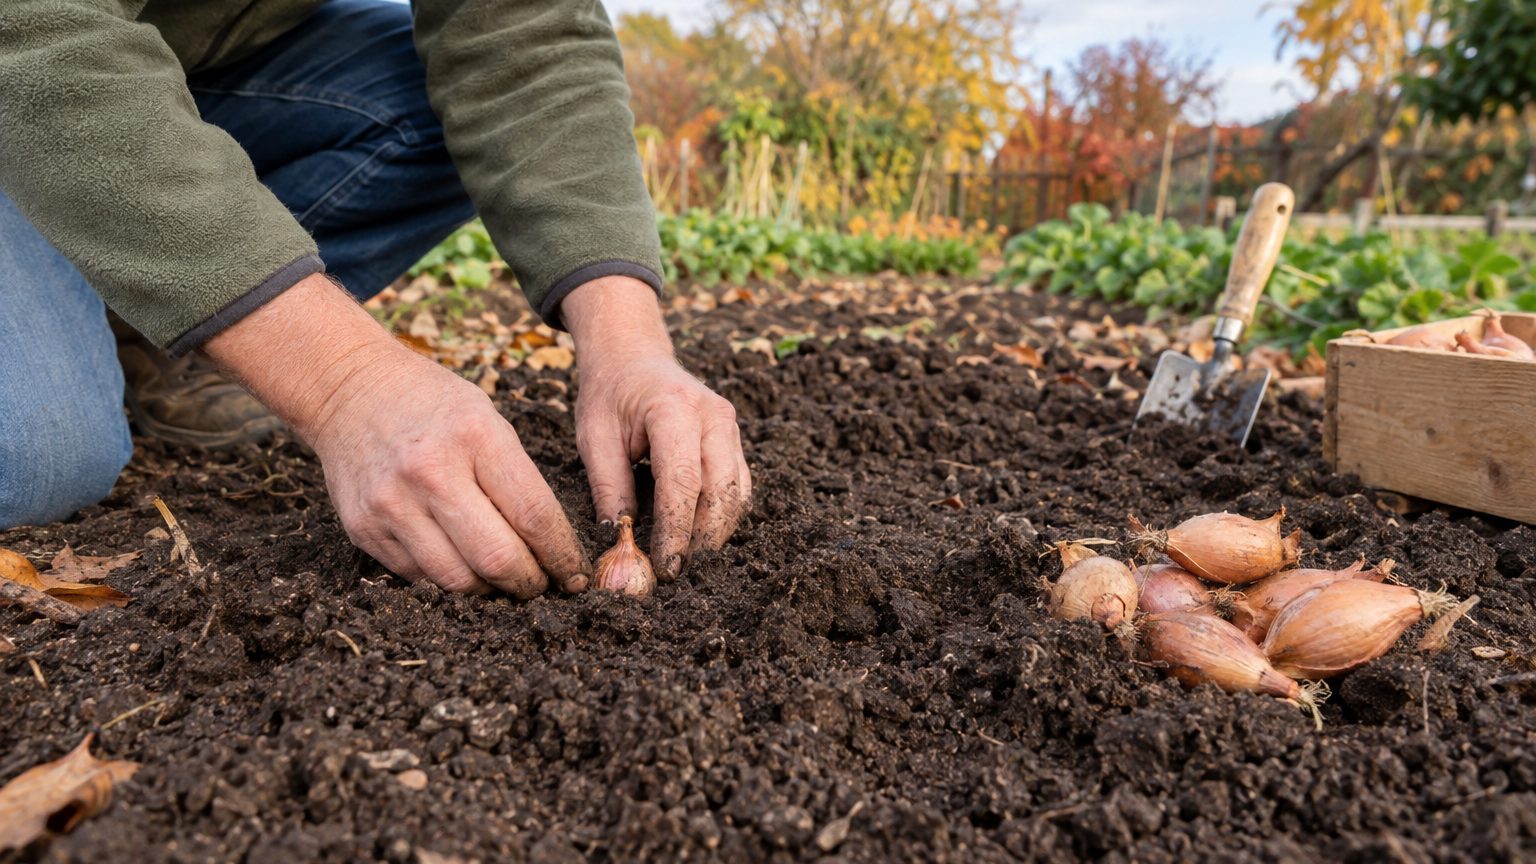

Set the bulb so its pointed tip sits level with the soil surface, or just barely poking through. That’s the whole rule for planting depth with shallots, and it’s shallower than most people expect. Roughly the bottom two-thirds to three-quarters of the set is in the ground, with the tip visible or under a thin dusting of soil. Go much deeper and you invite trouble. Go much shallower and the birds will pull your work out of the ground by morning.
The rest of this guide covers how to adjust that rule for your soil, your climate, and the season you’re planting in, plus how to tell if you’ve gotten it wrong. For the bigger picture on the crop, the pillar page on Growing Shallots: One Bulb In, a Handful Out covers the full cycle.
Why shallots want to be shallow
A shallot isn’t built like a carrot or a potato. It’s a cluster-forming onion relative, and each set you plant sends up several new bulbs that swell around the original base. Those daughter bulbs need room to expand, and they do that most easily near the surface, where the soil is loosest, warmest, and best drained.
Bury a set four inches deep and the picture changes. The shoots have to push through a long column of soil, which spends energy and slows early growth. The new bulbs form deeper, in cooler, wetter ground, and they tend to come out with long, thick necks instead of plump, rounded bodies. A thick neck is the enemy of storage. It holds moisture, cures slowly, and is where rot usually gets in during winter.
Plant shallow and the opposite happens. The bulbs swell into the loose top layer, the necks stay slim, and the tops dry down cleanly in summer. Experienced growers often describe a healthy shallot clump as looking like it’s sitting on the soil rather than in it. That’s the goal.
The right depth for your situation
“Tip at the surface” is the baseline. Real gardens aren’t baseline, so here’s how to shift it.
By soil type
In loose, well-drained loam or sandy soil, plant so the tip is level with the surface or covered by no more than half an inch of soil. Sandy ground dries out fast, so a light mulch of shredded leaves or straw does the job that extra depth would otherwise be asked to do.
Heavy clay is the opposite problem. It holds water, and a set buried in a cold, soggy pocket can rot before it roots. In clay, leave more of the bulb exposed, with the top third showing, and plant on a slight ridge or in a raised bed if you can. A few inches of added height makes a bigger difference to drainage than you’d think. Mixing in compost helps the top few inches break up, though it won’t fix a clay subsoil that holds water.
By season and climate
Spring planting is simple. Get sets into the ground as soon as the soil can be worked, typically several weeks before your last frost date, and keep them with the tips at or just above the surface. Shallots tolerate cold well, so there’s little reason to wait for warm weather. Early planting gives them a long stretch of cool growth before the days lengthen and the bulbs start sizing up.
Fall planting is where depth gets more interesting, and with today being early October, it’s timely. In milder regions (think the Mid-Atlantic, the South, the Pacific Northwest, and much of California), you can plant in October or November so roots establish over winter. A set planted with the tip just under the surface and covered with a couple of inches of mulch will do well there.
In colder states such as Minnesota, Wisconsin, Vermont, and Maine, fall planting is a gamble that pays off only with protection. Freeze-thaw cycles can heave shallow sets right out of the ground, leaving them lying on top of the soil with roots snapped. If you plant in fall in a cold climate, push the set in so the tip sits about an inch below the surface, then add a thick layer of straw or chopped leaves, around 3 to 4 inches, once the ground begins to freeze. Come spring, pull the mulch back as shoots emerge and let the bulbs sit nearer the surface as they grow.
By set size
Sets vary a lot. A set the size of a large marble and one the size of a golf ball shouldn’t be treated identically. For bigger sets, the same tip-level rule holds, but you’ll end up with a bit more bulb above the soil line if you’re in clay. Small sets are more vulnerable to drying and to being tugged out by birds, so tucking them with the tip just under the surface makes sense. Smaller sets also tend to produce fewer offsets, which matters if you’re counting on a big cluster. How far apart to put them is a separate question, and Spacing Shallots for the Cluster to Come works through it.
Signs you planted too deep or too shallow
You usually find out within a few weeks. Here’s what to watch for.
- Too deep: shoots emerge late and look thin or pale, and the stand is patchy. Later, bulbs come out elongated with thick, tough necks.
- Too shallow: sets sit loose on the surface, roots are exposed, or the whole set has tipped over. Birds and squirrels are a common cause.
- Waterlogged: yellowing tips and soft, mushy bases. This is usually a drainage problem more than a depth problem, though depth makes it worse.
If a set has heaved or been pulled up, simply press it back in. Shallots are forgiving. The roots regrow quickly, and a set that has been out of the ground for a day or two will usually recover as long as it hasn’t dried out completely. If you’re dealing with persistent pulling by birds, a piece of floating row cover or even loosely laid netting over the bed for the first couple of weeks settles the matter, because the problem fades once roots anchor the set.
A set that was buried too deep and has already sprouted can often be rescued. Carefully brush away a bit of the soil around the neck, or lift the clump and replant it at the proper level. Don’t wait until midseason, though. Once the bulbs are swelling, digging around them damages roots and sets the crop back.
Planting step by step
Start by loosening the bed to about 8 inches and breaking up clods. Shallots have shallow roots, but loose soil underneath helps drainage. Rake the surface level, then mark your rows.
Check each set before it goes in. Sound sets feel firm and heavy for their size, with dry papery skins and a clearly pointed top. Discard anything soft, moldy, or hollow. Set the bulb root-end down, pointed end up, and press it into the soil with your thumb until the tip is level with the surface. Don’t screw or twist it in. That can scuff the basal plate, where roots form.
Firm the soil gently around each bulb so it doesn’t wobble, then water it in. After that, a thin mulch of straw or shredded leaves keeps moisture even and cuts down on weeds. Keep mulch away from covering the tips in spring, since a smothered tip is slow to emerge.
One habit worth skipping: hilling. Gardeners used to hilling potatoes or leeks sometimes pile soil around shallots as they grow. Don’t. Shallot bulbs swell outward and upward, and burying them under growing soil leads right back to the thick-necked, slow-curing result you were trying to avoid. As the clump expands and the bulbs rise, let them. By late spring, you’ll often see the tops of the bulbs sitting proud of the soil, which is exactly right. If you used mulch, pull it back from the bulbs once they begin to size up so the skins can dry and color.
Watering and what happens next
Because the bulbs sit shallow, so do the roots. Soil that dries out a few inches down can stress the plants quickly. An inch of water a week, from rain or irrigation, is a reasonable target during active growth, and a little more during dry stretches. Ease off as the tops begin to yellow and fall over in early to midsummer. That’s the signal the bulbs are maturing, and continued heavy watering at that stage slows curing and encourages rot.
Harvest once most of the tops have flopped and turned brown, then cure the clusters in a dry, airy, shaded spot for a couple of weeks before trimming. If you plan to replant next season, the best bulbs to hold back are firm, medium-sized ones with tight necks, which is covered in Keeping Back Sets for Next Year. Interestingly, those saved sets tend to carry on the habits of the crop that produced them, so a clump that cured cleanly this year gives you a head start on the same next year.
One last practical detail: depth matters most in the first two weeks. After roots take hold, a shallot is surprisingly self-correcting, and a bulb that started a touch too low or too high will usually find its level as the cluster grows and pushes itself upward.