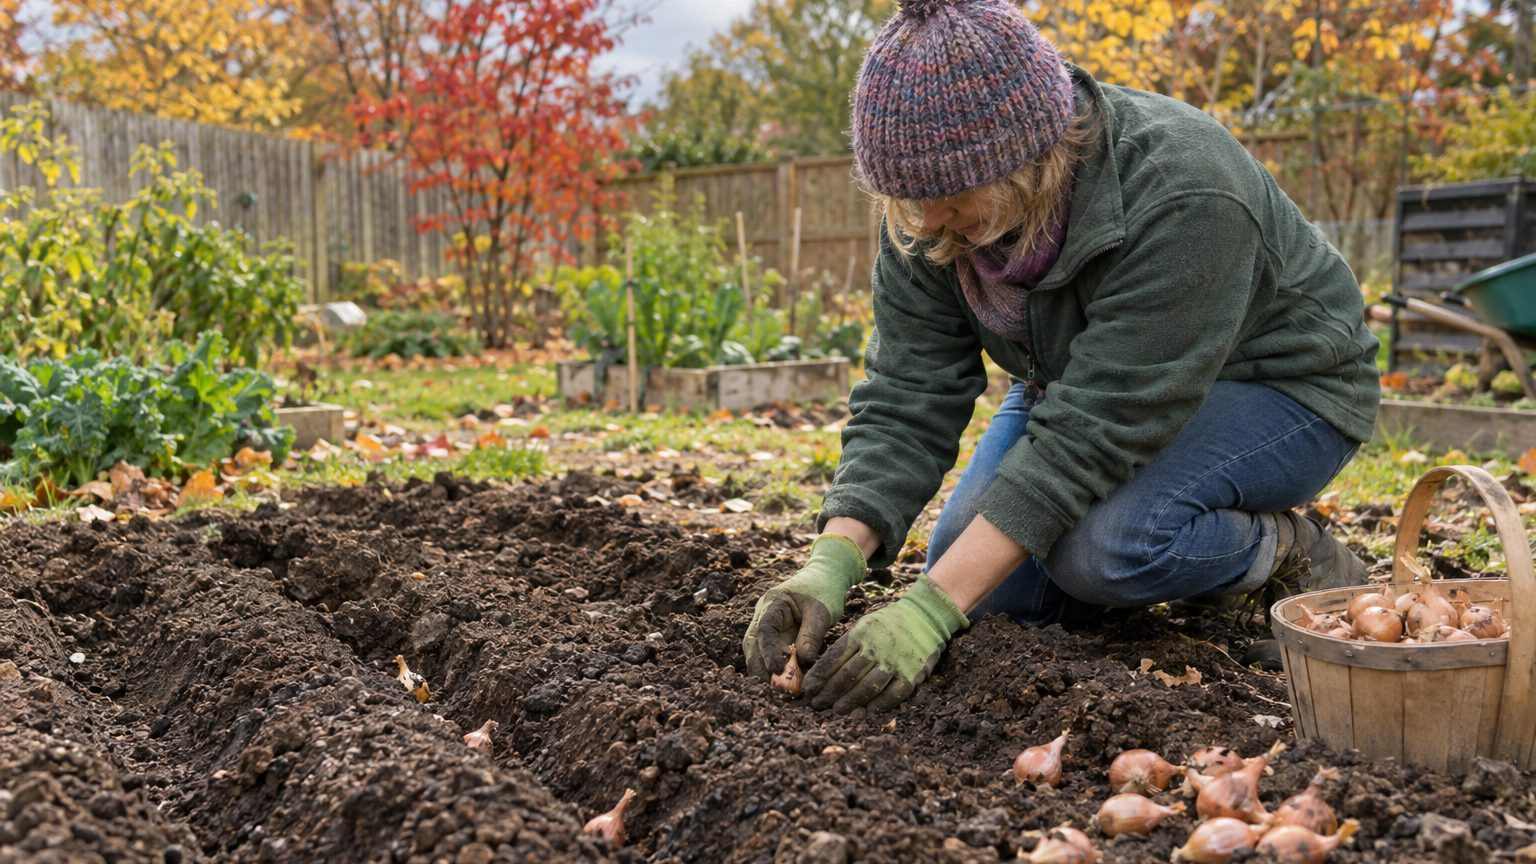

Yes, you can plant shallots in spring, and in much of the northern half of the country it’s the better schedule. The rule is simple: get sets into the ground as soon as the soil can be worked, usually 4 to 6 weeks before the last spring frost, and they’ll have time to bulb up by midsummer. Gardeners in USDA zones 3 through 6 often plant in spring because fall-planted bulbs can heave out of frozen ground or rot in a wet winter. The tradeoff is a shorter season and, in many cases, somewhat smaller bulbs than a fall planting would give. This page covers the timing, the planting details that differ from the fall routine, and what to expect at harvest. For the full picture of the crop, start with Growing Shallots: One Bulb In, a Handful Out.
When spring planting makes more sense than fall
Shallots are hardy. Dormant bulbs in the ground tolerate hard freezes, and green shoots shrug off a light frost. What they dislike is a winter that swings between thaw and freeze. In places like Minnesota, Wisconsin, Michigan, upstate New York, Vermont and Maine, a fall planting can be pushed upward by repeated freezing and thawing, leaving bulbs lying on the surface with their roots exposed. Heavy clay that sits wet through March adds rot to the list.
The general guideline: if your winters regularly dip well below 0°F and you don’t get dependable snow cover, spring is the safer bet. In zones 7 and warmer, such as much of Tennessee, North Carolina, Texas and the Pacific Northwest lowlands, October or November planting usually wins because the bulbs establish roots over winter and take off in March. Gardeners in the gray zone around 6 can go either way. Some plant half in fall and half in spring and keep notes, which is a cheap way to learn what your own yard prefers.
Spring has one real advantage beyond winter survival: you can order and plant in the same season. Sets that arrive in March or April go straight into the ground without a winter of guesswork. And since it’s early October as I write this, northern gardeners who want a spring crop have time to place orders now, when selection is best. Specialty varieties tend to sell out by winter.
Reading the soil instead of the calendar
Dates are a rough guide. The better signal is the ground itself. Grab a handful and squeeze it. If it crumbles when you poke it, it’s ready. If it stays in a sodden ball, wait a few days, because working wet soil compacts it and shallow-rooted shallots hate compaction. A soil thermometer helps too. Roots start growing when the soil reaches about 40°F, and plants make steady progress as it warms into the 50s.
In practice, that translates to late March or April in zone 6, and mid-April to early May in zones 3 and 4. Some years the window is two weeks long. A late, cold spring can squeeze it further, which is why gardeners in the northern tier often prepare the bed the previous fall so it’s ready the day the frost lets go.
Planting spring shallots step by step
Pick a spot with at least six hours of direct sun, though eight is better. Shallots need well-drained soil with a pH between 6.0 and 7.0. If you haven’t tested lately, a county extension office can run a soil test for a modest fee, and in most states the land-grant university will interpret the results for you. Work in an inch or two of finished compost, and loosen the top 8 inches so those shallow roots can spread.
Skip heavy doses of fresh manure. It can bring excess nitrogen and weed seeds, and it encourages leafy growth at the expense of bulbs. A balanced fertilizer worked in at planting is plenty for most gardens. Alliums are shallow feeders, so what you put in the top few inches matters more than what’s deeper down.
Spacing runs 6 to 8 inches apart in rows 12 to 18 inches apart. That sounds generous for a bulb the size of a walnut, but each set will split into a cluster, often anywhere from three to a dozen new bulbs depending on variety and conditions. Crowd them and you get a tangle of small, hard-to-clean bulbs.
Depth is where spring differs from fall. In fall you cover the set with a couple of inches of soil and mulch to protect against winter. In spring, you don’t need that insulation. Press each set in root end down so the tip sits at or just below the surface. Planting too deep delays emergence and can lead to thick necks that cure poorly. The details, including how soil type changes the answer, are in How Deep to Plant a Shallot Set.
Two quick tips that save headaches. First, firm the soil around each set, because loose sets can be tugged out by birds or squirrels. Within about two weeks, new roots anchor them. Second, if crows or robins keep pulling sets out, lay floating row cover over the bed for the first two to three weeks and the problem usually goes away.
Sets versus seed
Most home gardeners plant sets, which are small bulbs sold for exactly this purpose. They’re fast, reliable and give you a head start. A second route is true shallot seed, which you start indoors like onions, usually in January or February, then transplant in April. Seed-grown shallots produce a single bulb per plant rather than a cluster, and they’re less likely to carry over viruses that can build up when growers replant their own bulbs for years. Seed costs less per plant, but you’re trading money for time and a heated seed-starting setup. For a first spring planting, sets are the easier choice.
One storage detail matters if you bought sets in fall and are holding them until spring. Prolonged exposure to temperatures around 40 to 50°F can trick the bulb into thinking winter has passed and set it up to bolt, sending up a flower stalk instead of fattening. Keep sets in a dry, airy, moderately cool spot such as a closet or a mesh bag in an unheated-but-frost-free room, and avoid the refrigerator. The same principles that apply to finished bulbs are laid out in Storing Shallots Through the Winter.
Caring for a short-season crop
Spring shallots race against the calendar. Bulbing is triggered mainly by lengthening days and warming temperatures, so the plant has maybe eight to ten weeks of leaf growth before it starts swelling underground. Everything you do in that window should favor big, healthy tops. More green leaf now means a bigger bulb later, since each leaf is tied to a layer of the bulb.
Water is the first lever. Aim for about 1 inch per week, from rain or the hose, and keep the top few inches evenly moist during leaf growth. Because the roots are shallow, a dry spell hits shallots fast. A thin layer of straw or shredded leaves, 1 to 2 inches, conserves moisture and keeps weeds down. Keep the mulch pulled back from the base of the plants so the necks stay dry.
Weeds deserve more attention than they usually get. Shallot foliage is narrow and upright, so it shades very little ground, and weeds that start early can cut yields noticeably. Shallow hand weeding or a small hoe worked carefully (not deeper than an inch or so) keeps competition down without damaging roots.
Feeding is a front-loaded job. If growth looks pale, a light side-dressing of nitrogen in late spring helps, and many growers stop feeding around the end of June or when bulbs begin to swell. Late nitrogen produces soft, thick-necked bulbs that store poorly. If you’ve ever wondered why store-bought shallots seem to keep for months while some homegrown ones sprout by January, overfeeding and under-curing are the usual suspects.
Pests and diseases tend to be mild in a cool spring but can build as summer arrives. Onion maggots and thrips are the main insects. Row cover applied at planting excludes the adult flies that lay maggot eggs, and rotating alliums to a new bed each year (a three- to four-year gap is the usual advice) cuts disease pressure from things like white rot and downy mildew. Don’t plant shallots where onions, garlic or leeks grew in the past couple of seasons.
Watch for bolting. If a flower stalk shoots up, snap it off at the base. That bulb won’t store as well, so pull it and use it first. A few bolters in a spring bed are normal. A whole row of them points to a cold snap after planting or sets that sat at the wrong temperature.
Harvest timing and what to expect
Spring plantings generally mature from early to mid-July in warmer parts of the northern states, or into August in cooler or later-planted beds, about 90 to 120 days from planting depending on variety and weather. The sign is unmistakable: tops turn yellow, flop over, and begin to dry. When roughly half to two thirds of the foliage has fallen, stop watering and let the bulbs finish drying in the ground for a week or so if the weather cooperates.
Lift the clusters with a garden fork rather than yanking by the tops, which can tear stems. Brush off loose soil without washing, and cure the bulbs in a warm, shaded, well-ventilated spot for two to three weeks, until the necks are fully dry and the outer skins rustle. Skip curing and you’ll lose the bulbs in storage, which is a bitter way to learn the lesson after months of work.
Yields vary. A spring set commonly multiplies into several bulbs, though the average is typically a bit lower than a fall planting of the same variety in a climate where fall planting works. Spring-grown bulbs may be a little smaller, and that’s fine for kitchen use, since shallots are prized for fine texture and mild flavor rather than size. Set aside the largest, firmest, best-cured bulbs for replanting. Choosing your own seed stock from healthy plants year after year builds a strain that suits your soil, although a fresh purchase every few years refreshes the line and guards against accumulated disease.
Keep records, even rough ones: planting date, variety, spacing, harvest date, and how many bulbs came out of each set. After two seasons those notes tell you more about your garden than any chart can, including whether spring or fall is actually the better window at your address.