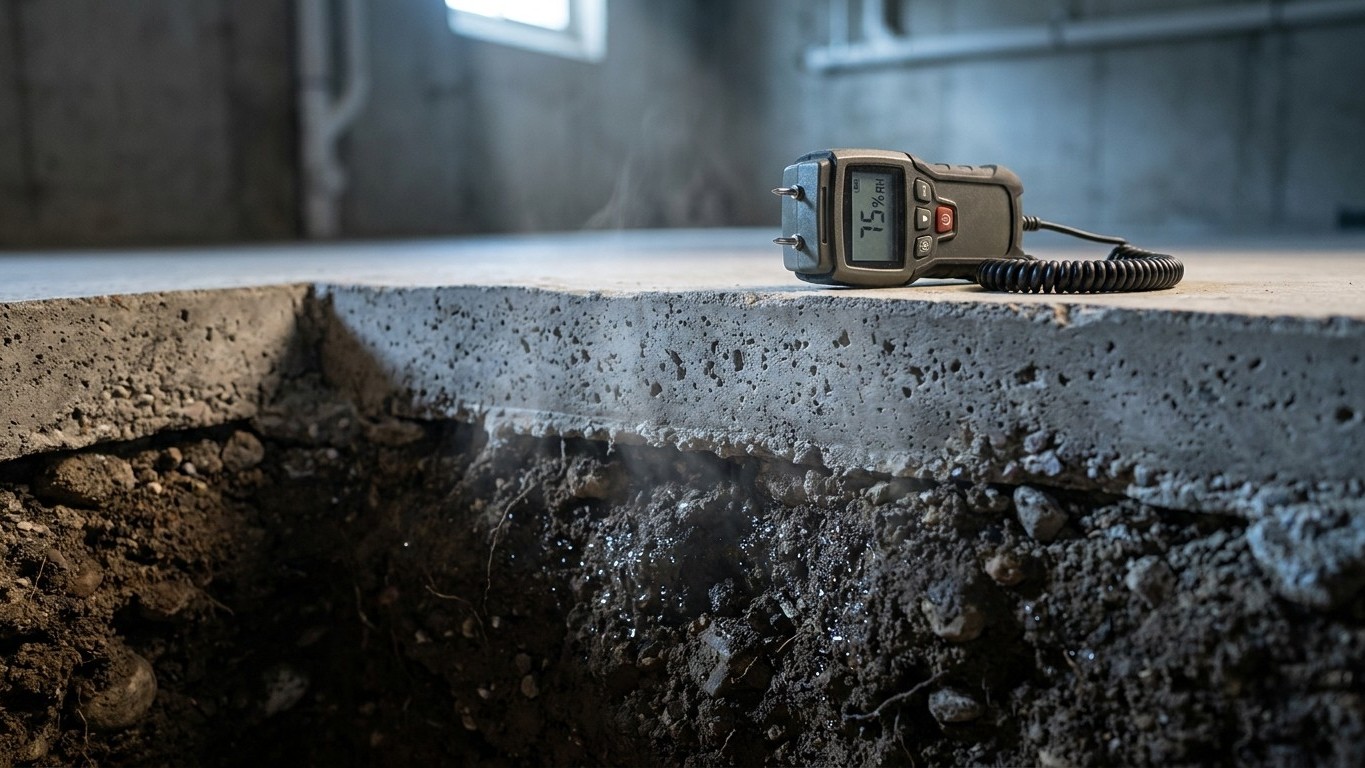

The right basement floor isn’t chosen from a showroom, it’s chosen from what’s underneath the slab. Below-grade concrete sits against soil and releases moisture on a schedule nobody controls. A covering that can’t tolerate that will fail no matter how well it’s installed. The floor that works is the one matched to the slab’s actual condition, tested first, decided second.
What is actually happening

A basement floor is a slab on the ground, and everything follows from that one fact. Above grade, a slab usually sits over a crawl space or open air. Below grade, it sits directly against soil, sometimes soil that’s been damp for decades. That soil pushes moisture through the concrete in a slow, steady process called vapor drive: water vapor moves from the wetter side (the ground) toward the drier side (your living room), the same way heat moves toward cold.
Concrete looks solid but it’s porous at a scale you can’t see. Capillaries in the mix pull moisture upward the way a paper towel pulls water from a spill. This doesn’t stop because the basement got finished, painted, or carpeted. It doesn’t stop in a dry summer either, because the moisture driving it comes from groundwater and soil dampness, not from rain hitting the surface that day. A slab can feel bone-dry to the touch and still be pushing vapor through it right now.
This is why the question of how much moisture is in the slab comes up before any conversation about which product to install. Professionals run tests for exactly this reason, not to produce a number for its own sake, but to decide whether a given covering and adhesive system will hold up over time. A common first pass involves taping a square of plastic sheeting to the slab and checking it a day or two later for condensation or darkening underneath, a simple way to see vapor drive in action without equipment. More rigorous versions use a small dome sealed to the concrete or a probe inserted into a drilled hole, run by a flooring contractor or a dedicated moisture-testing service before certain products go down. What that reading measures isn’t the point here. What matters is that the test exists to answer one question: is this slab dry enough, right now, for the specific covering and adhesive being considered.
The other piece of the mechanism is hydrostatic pressure, which people often confuse with vapor drive but which behaves differently. Vapor drive is slow and constant. Hydrostatic pressure shows up when groundwater physically pushes against or through the foundation, usually after heavy rain or snowmelt raises the water table near the house. That’s not a flooring condition. That’s a foundation and drainage condition, and no floor covering, however well matched to vapor, is built to sit under standing or pooling water.
The covering, or what is under it
Some floor coverings breathe with the slab’s moisture. Others seal it in, and when they do, the trapped moisture has to go somewhere: sideways into seams, or upward into the material itself. This split decides most basement flooring failures, and it’s rarely the visible surface that failed first.
| Covering | What you’ll observe | Which layer is actually talking |
|---|---|---|
| Solid hardwood | Boards cup, gap at the ends, or crown along their length | The wood is reacting; the moisture is coming from the slab or subfloor below it, not from a flaw in the boards themselves |
| Engineered wood or laminate over underlayment | Swelling at seams, a spongy feel underfoot, edges lifting or delaminating | Usually the moisture barrier under the underlayment failed or was never rated for below-grade use. The plank is just reacting to what reached it |
| Sheet vinyl or vinyl plank | Bubbling, a soft or tacky patch, discoloration in a pattern that doesn’t match foot traffic | The vinyl itself is usually intact. The adhesive or the slab beneath it is holding moisture the sheet can’t release |
| Ceramic or porcelain tile | A white, chalky residue at grout lines (efflorescence), tiles that sound hollow when tapped | The tile and grout are fine. The residue is moisture carrying salts up through the slab and evaporating at the surface, and the hollow sound means the bond coat failed underneath |
| Carpet with a pad | A musty smell, a pad that stays damp days after any spill, dark spotting at the backing | The fibers rarely hold moisture on their own. The pad and the slab under it trap it against a surface with nowhere to dry |
The pattern holds across all of them. Sanding, refinishing, or replacing the visible surface without addressing what’s underneath produces the same result within a season or two. A cupped board that gets sanded flat will cup again if the slab beneath it is still pushing vapor. A sheet of vinyl that gets re-glued in the same spot will bubble again if the moisture that lifted it in the first place never left. Treating the symptom on the surface, without checking what’s happening at the subfloor or the slab itself, just delays the same conversation to next year.
This is also why the choice of covering matters less than people assume once a basement has an active moisture problem. A vapor-tolerant covering installed over a slab that’s still pushing significant moisture will outlast a vapor-sensitive one, but neither solves the underlying condition. The covering only decides how long the symptoms take to reappear, not whether they will.
What to check, in order
These checks run from cheapest and least invasive to the point where the floor itself has to be disturbed. Each one rules something in or out before moving to the next.
- Look at the pattern, not just the spot. Walk the room and note where staining, cupping, or odor shows up: along one exterior wall, near a window well, under a specific pipe run, or spread evenly across the whole slab. A problem confined to one wall usually points to a localized source (a gutter, a grade slope, a crack). A problem spread evenly points to general vapor drive from the slab itself. This step rules in or out whether the whole foundation is involved or just one weak point.
- Check outside before anything indoor. Look at where downspouts empty, whether soil slopes away from the foundation, and whether window wells drain properly. This costs nothing and rules out the most common cause of localized basement dampness: water pooling against the foundation because of grading or gutters, rather than moisture migrating up through the slab.
- Tape a plastic sheet to any bare slab. If there’s exposed concrete anywhere, a utility area, a corner without covering, tape an 18-inch square of plastic sheeting down on all four sides and leave it a day or two. Condensation or darkening underneath confirms vapor is moving through that spot. A dry, clear sheet doesn’t rule out vapor drive elsewhere, but it’s a useful first read in the location tested.
- Bring in a calcium chloride or in-situ RH test before any covering goes down. This is the step a flooring contractor typically takes before installing something moisture-sensitive over an existing slab. It’s more precise than the plastic-sheet method and it’s what manufacturers reference when setting conditions for their adhesives and underlayments. It still doesn’t require lifting an existing floor if the slab is bare or about to be exposed anyway.
- Only then, lift a small section of an existing floor. Pulling up an inconspicuous piece, in a closet or under furniture, shows what’s happening at the interface between covering and slab: standing moisture, a failed adhesive, mold growth, or nothing at all. This is the first check that disturbs an installed floor, and it’s the point where someone not planning a full replacement should stop and call a flooring professional rather than keep pulling up more material.
When this stops being a flooring job
Three things end this page and start another. The first is anything structural: joists that flex or feel soft underfoot, a beam with visible sag, a support post that’s rusted, tilted, or sitting in standing water. Flooring decisions don’t fix structural problems, and no covering, adhesive, or moisture barrier changes how a joist carries a load. That call goes to a structural engineer, not a flooring installer, before any decision about what goes on top.
The second is active water: water currently coming in, not water that soaked a floor last spring and has since evaporated. A puddle after rain, a damp patch that reappears on a schedule, water visibly seeping through a crack under pressure. That’s a foundation, drainage, or plumbing issue, and it has to stop before any covering decision means anything. Installing a moisture-tolerant floor over active water buys a little time and nothing else. The water is still finding its way somewhere.
The third is anything that’s been wet long enough to smell. A musty odor that persists after a floor dries out usually means mold has already established itself in the subfloor, the sill plate, or the framing, not just on the surface anyone can see. At that point, sanding or replacing the visible covering does nothing about what’s growing underneath it, and disturbing it without containment can spread spores through the rest of the house. That’s a job for a mold remediation contractor, and possibly a structural engineer if the framing has been compromised, before a flooring crew is ever involved.
Figuring out which of these applies, or whether it’s still a straightforward flooring decision, depends on where the water is actually coming from. If it’s tracking down from a leaking pipe, a water heater, or a fixture upstairs, that’s a plumbing question, not a basement flooring question. If it’s coming from a roof leak that traveled down through the walls, that’s a roofing question that happens to surface two floors away from its source. Guides on this site covering plumbing leaks and roof damage address those upstream causes directly, since a basement floor is often just the last place the evidence shows up, not the first.