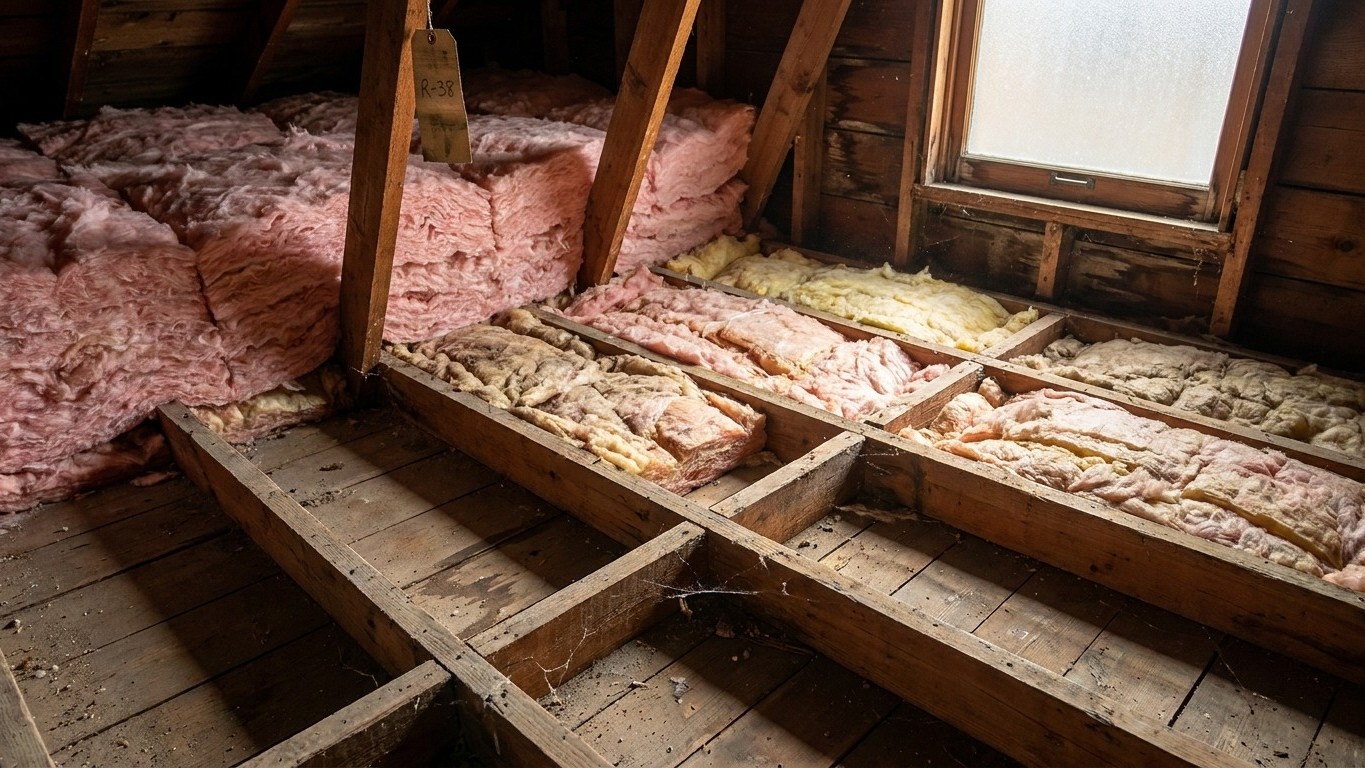

The retrofit target for your attic comes from one published U.S. ENERGY STAR table, built on the 2021 International Energy Conservation Code, and it splits by two variables: which of eight climate zones your house sits in, and whether your attic already carries a few inches of Insulation or none at all. For a Zone 1 home the retrofit level starts at R30. For Zones 7 and 8 it climbs to R60. Below is the table exactly as published, with the floor value it’s often confused with.
The table, as published

This is a retrofit table, meaning it’s meant for adding insulation to existing wood-framed buildings, not for a new home under construction. ENERGY STAR built it from the 2021 IECC, Table R402.1.3, and organized it by climate zone. Each zone row carries three numbers, and this is where a lot of people misread it: two of those numbers are attic values, and the third is a floor value. The table’s header is merged, so it’s easy to assume you’re looking at three attic recommendations stacked together. You’re not.
The first attic column applies if your attic currently has no insulation at all. The second attic column applies if you’ve already got roughly 3 to 4 inches up there and you’re topping it off. The third column has nothing to do with your attic. It’s the recommended R-value for a floor over an unheated space, like a floor above a vented crawl space.
| Zone | Attic if uninsulated | Attic if already 3-4 inches | Floor |
|---|---|---|---|
| Zone 1 | R30 | R25 | R13 |
| Zone 2 | R49 | R38 | R13 |
| Zone 3 | R49 | R38 | R19 |
| Zones 4A and 4B | R60 | R49 | R19 |
| Zones 6, 5 and 4C | R60 | R49 | R30 |
| Zones 7 and 8 | R60 | R49 | R38 |
Reproduce these numbers exactly. There’s no in-between value for a zone that isn’t listed, and no averaging across two zones because your county sits near a boundary line. The table doesn’t offer a conversion from R-value to a depth in inches, either, because that conversion depends entirely on which material you’re using. Loose-fill fiberglass, blown cellulose, and rigid board all deliver a different R-value per inch, so a contractor or a bag label, not this table, is where that math happens.
Finding your zone, which this page will not guess
A climate zone groups counties by how much heating and cooling a typical building in that area needs over a year, based on long-term temperature data. That’s the two-sentence version, and it’s enough to understand why the map matters: it’s not drawn along state lines, and it’s not a stand-in for “cold states get more insulation, warm states get less.” Some states span two or three zones. A county at higher elevation or further inland can sit in a different zone than a county an hour away on the coast.
This page isn’t going to assign you a zone. Not for a state that seems obviously cold, not for one that seems obviously mild. ENERGY STAR publishes the zone boundaries as a map, and that map, not a guess based on a state name, is where the actual answer lives. You’re about to spend money on material sized to a number, and a confidently wrong zone means buying the wrong amount, or paying for R-values you didn’t need.
Locate your county on ENERGY STAR’s published climate zone map and note the zone number and letter it falls in, something like Zone 4A or Zone 6. Some zones in the table are grouped together (4A and 4B share a row, as do 6, 5, and 4C), so once you have your specific zone, match it to the correct row above. From there, the depth check in the next section tells you which of the two attic columns applies to your house.
One more thing worth flagging while you’re on the map: zone boundaries occasionally split a single county, particularly in mountainous or coastal areas where elevation changes fast. If your address sits near a boundary line, that’s a case where local guidance, from a building department or an insulation contractor familiar with your area, is worth more than an assumption either way.
What you already have
The table gives two different attic answers depending on what’s currently up there, so before any number means anything, you have to go look. This isn’t a guess you can make from the hallway below.
Safety first, and only once: walk on the joists, not on the material between them. Attic floors are not solid. Stepping between joists, where only insulation and ceiling drywall separate you from the room below, is how people fall through ceilings.
- Get into the attic safely, using a stable ladder and a flashlight or headlamp, and stay on the joists as you move.
- Measure the depth of the existing insulation in several spots, not just near the access hatch. Depth is often uneven across an attic.
- Note whether the insulation sits level with the top of the joists, or whether it’s mounded above them. That difference matters for how much more you can add and how it’s installed.
- Note what material it is: loose-fill (blown-in) fiberglass or cellulose, batts, or rigid board. If you see a pebble-like, gray-brown loose material that could be vermiculite, or any material you suspect could contain asbestos, don’t disturb it. Stop and have it evaluated before doing anything else.
What this check tells you isn’t an R-value. This brief carries no depth-to-R-value conversion, because that number depends on which material is up there, and different materials lose R-value per inch differently over time as they settle. What the depth check does tell you is which column of the table applies: roughly 3 to 4 inches of existing insulation puts you in the “already insulated” attic column, while bare joists or a scattering of degraded material puts you in the “uninsulated” column. That’s the decision this walk-through is for.
What the work is worth
ENERGY STAR’s own figure is specific, and it’s worth quoting exactly rather than rounding it into something vaguer: “EPA estimates that homeowners can save an average of 15% on heating and cooling costs (or an average of 11% on total energy costs) by air sealing their homes and adding insulation in attics, floors over crawl spaces, and accessible basement rim joists.”
Both numbers matter, and they’re not interchangeable. The 15% figure is a share of your heating and cooling costs specifically. The 11% figure is a share of your total energy bill, which includes things insulation doesn’t touch, like water heating and appliances. Quoting one without naming what it’s a percentage of turns an accurate number into a misleading one.
These are averages built from energy modeling of a “typical” existing U.S. home, not a promise for any specific house. A home with a leaky duct system, old single-pane windows, or an oversized furnace won’t necessarily see the same percentage, and the sentence itself names exactly where this savings estimate comes from: attics, floors over crawl spaces, and accessible basement rim joists. It doesn’t cover walls, windows, or doors, and stretching it to include those areas isn’t supported by the modeling behind it.
It’s also worth keeping this figure separate from two others that circulate around the same topic. ENERGY STAR’s own site elsewhere cites “up to a 10% savings on your annual energy bills” for similar work, a different, more general figure. And the Department of Energy’s often-cited 10% refers to a thermostat setback of 7 to 10 degrees Fahrenheit held for eight hours a day, which has nothing to do with insulation at all. None of these three numbers should get blended together in the same sentence.
One safety note that applies directly to this kind of work: if there’s a fuel-burning appliance, like a furnace or water heater, in a space you’re air sealing or Insulating, that space needs a combustion safety evaluation once the sealing is done. Tightening a house changes how air moves through it, and a combustion appliance that used to draft properly can behave differently afterward.
Common questions
What if my attic already has more than 4 inches of insulation?
The published table only distinguishes between “uninsulated” and “already has 3 to 4 inches.” It doesn’t publish a separate column for attics with significantly more than that. If your depth check turns up well beyond 4 inches, that’s a case for a contractor or your local building department to assess against the target for your specific zone, rather than assuming the table’s second column still applies as written.
Do these R-values apply to new construction, not just retrofits?
No. This table is specifically labeled for retrofitting existing wood-framed buildings. New construction is governed by different code requirements, and while both trace back to the IECC, they’re not the same numbers applied the same way. Don’t use this retrofit table to spec insulation for a new build.
Should I insulate my exterior walls while I’m at it?
Wall insulation guidance generally assumes the siding or wall covering is already coming off for other reasons, it’s not a reason to remove siding solely to add insulation. That’s a different scope of work with its own cost and disruption, and it’s outside what the attic retrofit table above addresses.
Do I need a vapor barrier when I add insulation?
There’s no single rule for which side a vapor barrier belongs on, because it depends on your climate and how the specific assembly is built. Getting the orientation wrong can trap moisture inside a wall or ceiling instead of keeping it out. This is a case where local, material-specific guidance from a qualified contractor is the right call, not a general rule applied blindly.