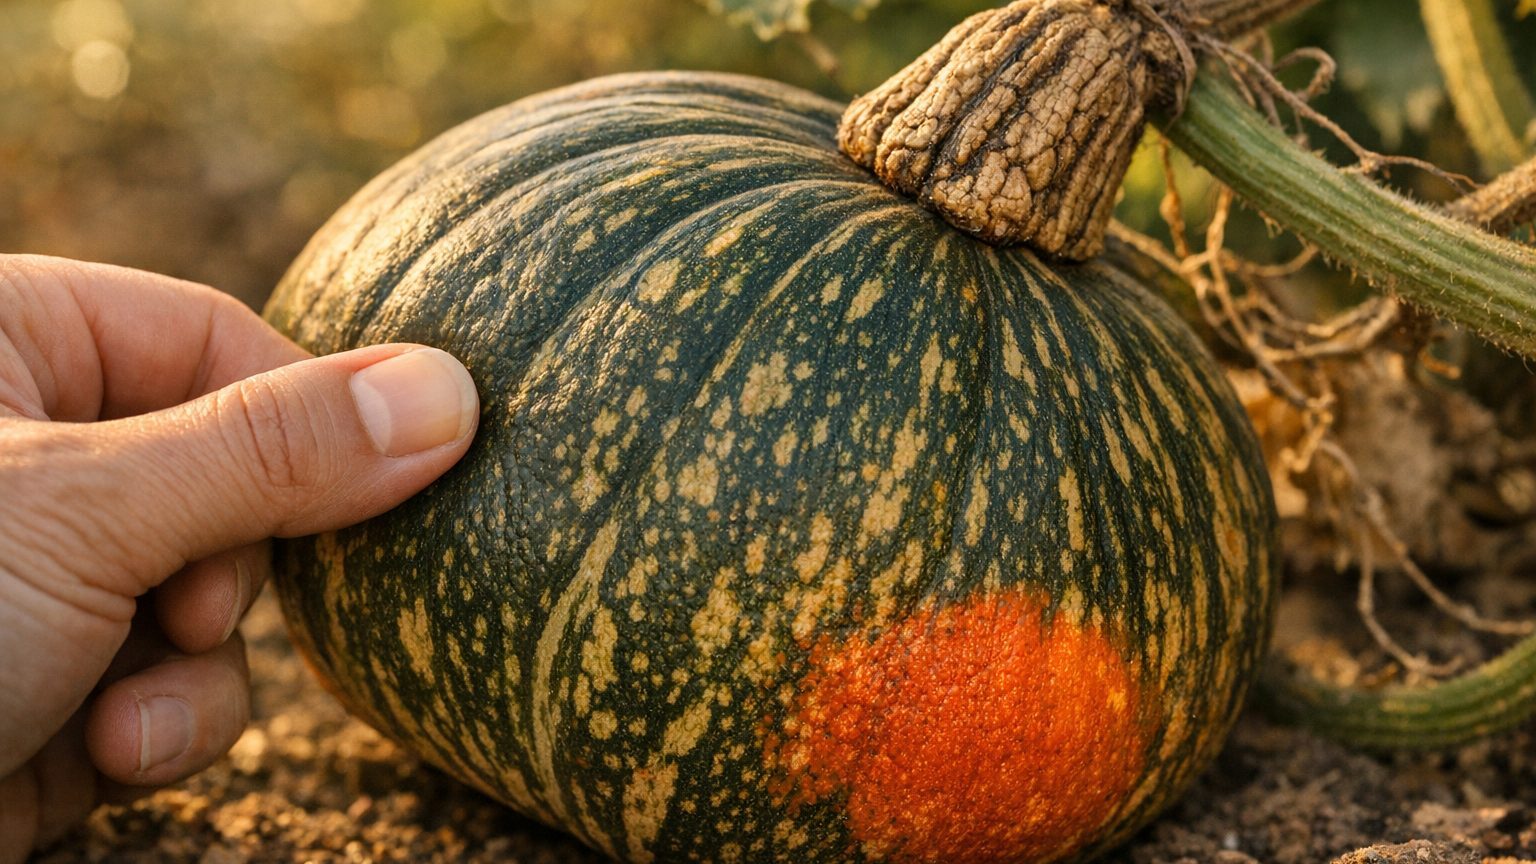

A winter squash is ready when the skin resists a thumbnail press, the ground spot has fully colored, and the stem has started to dry and crack like cork. All three should line up before you cut. Wait on any one signal alone and you risk a fruit that looks done but rots in storage within weeks, or one that’s still pulling sugar from the vine when frost cuts the season short.
What is actually going on
A winter squash spends its last few weeks on the vine doing something a summer squash never bothers with: building a rind tough enough to seal in moisture and sugars for months. That rind hardening is the whole story. Early in the fruit’s life, the skin is thin and easily dented, and the plant is still pumping water and starch into the flesh. As the fruit nears maturity, the vine redirects that effort into thickening the outer layer and converting starches to sugars, which is why a squash that tastes bland in August can taste noticeably richer by October, even off the same vine.
The skin test is the most direct way to see that process finishing. Press a thumbnail into the surface, ideally on the side away from the sun where the rind is often a bit thinner. If it dents or breaks the surface, the fruit needs more time. If it barely marks the skin, the hardening is essentially done. The color shift is the second half of the picture: the ground spot, where the fruit rests against the soil, moves from pale green or white to a deep, saturated tone specific to the type you’re growing, and the overall skin loses its glossy, wet-looking sheen for something duller and more matte.
The stem is the part gardeners misread most. As the fruit finishes maturing, the vine begins to withdraw from that stem, and it corks up, drying, browning, and sometimes cracking near where it meets the fruit. A stem that’s still green, thick, and pliable is telling you the plant hasn’t finished its job. This is also where Winter Squash and carving pumpkins part ways in how they’re read: a pumpkin is judged mostly on shell strength and color because it’s grown to be handled and displayed, while a winter squash is judged on flesh quality and keeping ability, which is a slower and less visual process. If you’re growing for jack-o’-lanterns specifically, the pumpkin harvest guides on this site cover that timing separately, and it’s worth reading those instead of trying to apply squash rules to a pumpkin patch.
None of this tells you whether a squash is safe to eat once it’s stored. A hard rind and good color at harvest are about maturity, not about what happens to the fruit over the following months. A soft spot, a patch that weeps or feels damp, or any mold at the stem end means that individual squash is done, regardless of how it looked going into the root cellar or the pantry shelf.
In the garden
Three signals matter, and they’re not equally trustworthy on their own. Used together, they cover for each other’s blind spots.
| Signal | How to check | What it means when it goes wrong |
|---|---|---|
| Skin hardness | Press a thumbnail into the rind, away from direct sun | A skin that dents easily but shows full color can fool you into an early cut; the flesh underneath is often watery and the fruit won’t cure well |
| Ground spot color | Check the underside where the fruit touches soil | Color can develop unevenly on fruit lying in shade under leaves, making a squash look less mature than it actually is |
| Stem condition | Look for drying, browning, and corking near the fruit | A stem that snaps green under light pressure usually means you’ve pulled the fruit too soon, and it won’t finish curing off the vine the way it would have on it |
Skin hardness is the most reliable single test because it reflects what’s actually happening structurally, but it’s also the one most affected by where on the fruit you press. Test in two or three spots before deciding. Ground spot color is useful as a second opinion, but it lags behind reality on fruit that’s been shaded most of the season, so don’t treat pale color alone as proof the fruit needs more time if the skin test already says otherwise.
The stem is where harvest technique matters as much as timing. When you cut, leave two to three inches of stem attached to the fruit rather than cutting flush against it. A squash harvested with no stem, or with the stem torn away by hand, has an open wound right where rot organisms get in first, and that single detail shortens how long the fruit holds up far more than a week’s difference in cutting date. If the stem breaks off accidentally during harvest, that fruit should move to the front of the line to be eaten rather than stored long-term.
Cut on a dry day if you can manage it. Squash harvested wet, or piled together while damp, are more likely to develop the soft, weeping spots that signal spoilage later. After cutting, most winter squash benefit from a curing period in a warm, airy spot out of direct sun before they go into longer-term storage, which lets small nicks in the rind seal over. During that curing time and afterward, check fruit periodically. A firm, dry-skinned squash with an intact stem is a good sign, but it’s an observation, not a guarantee, and any fruit that develops a soft patch, a damp-looking blemish, or mold at the stem should be used immediately or discarded rather than tested by eating.
What it depends on where you are
The mechanism, hard skin, full color, dried stem, is the same everywhere winter squash is grown. What changes by region is how much time the plant gets to reach that point and how much pressure it’s under while trying. Season length sets the outer boundary: a shorter growing season means less margin for a slow-maturing fruit, and a first frost that arrives early can force a harvest before the skin has fully hardened, whether the gardener is ready or not.
Summer heat and rainfall shape the pace inside that window. A hot, dry stretch late in the season tends to push fruit toward maturity faster, while a cool, wet summer can slow the whole process down, sometimes by weeks, on genetically identical plants. Humidity also affects how well cut fruit cures afterward: a humid climate makes it harder for small skin nicks to dry and seal, which is part of why storage advice varies so much from one region to another even when the harvest signals themselves don’t.
None of that can be pinned to a specific date or hardiness zone in a general guide like this one, because the same zone can behave differently two years running, and a single growing region can have real microclimate differences from one yard to the next. What’s consistent is that the three signals in the section above still apply regardless of where the garden sits; they’re just reached on a different calendar.
For anything more specific, region-by-region timing and the squash types that tend to perform well in a given area, the most reliable source is a state’s own cooperative extension service, which tests varieties under local conditions and publishes typical maturity windows for that state. This site’s own state-level guides are built to sit alongside that kind of local information rather than replace it, so it’s worth checking both if you want a number closer to your own backyard.
The mistake that costs the most
The costliest mistake isn’t harvesting a day or two late. It’s harvesting on the calendar instead of on the fruit, cutting a whole patch at once because a packet or a habit says the season “should” be over, rather than checking each fruit’s skin, color, and stem individually.
Winter squash on the same vine, even the same plant, don’t always mature in lockstep. A fruit that set early and got full sun all season can be ready weeks before one that set later or spent part of the summer partly shaded by leaves. Cutting the whole planting on one date almost guarantees some fruit comes off too early, with a rind that hasn’t hardened and a stem that’s still green, and that immature fruit is exactly the kind that develops soft spots in storage within a short time instead of holding through winter.
The fix costs nothing but a little more attention at harvest time: walk the patch and test each fruit on its own, using the thumbnail press, the ground spot color, and the stem condition together, and only cut the ones that pass all three. Leave the rest another week and check again. This matters more than getting an exact date right, because a fruit judged on its own signals will tell you the truth about its readiness in a way that a date on a calendar never can.
The one exception worth planning for is frost. If a hard frost is genuinely imminent and some fruit still isn’t fully mature, it’s better to harvest that immature fruit and accept it as a short-term kitchen squash rather than let a freeze damage it on the vine. But that’s a forced exception, not a routine, and it shouldn’t be the reason the whole patch gets cut on the same day every other year.