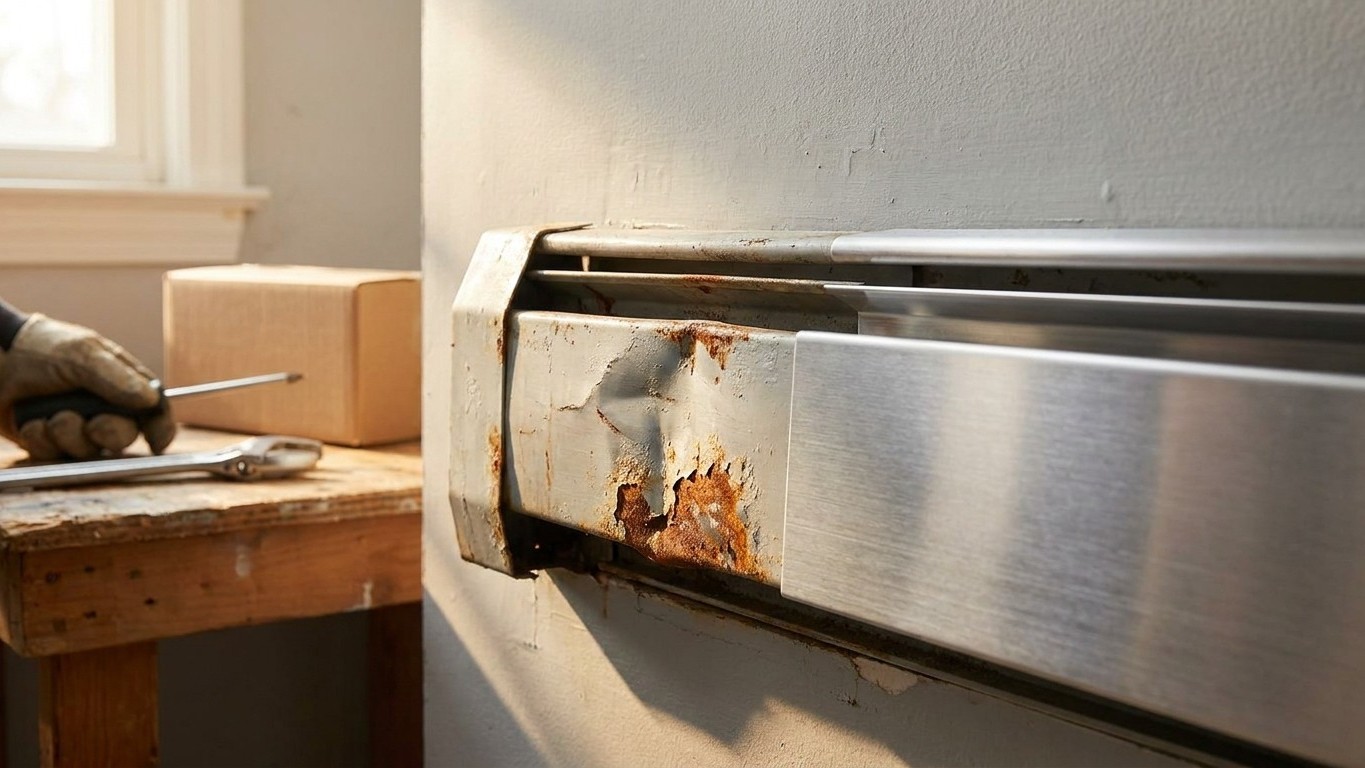

A dented or rusted baseboard heater cover almost never means the heater itself is shot. Covers are replaceable parts, sold separately from the heating element, and swapping one out is a straightforward job once you know which type of heater is behind it and take three measurements first. The tricky part isn’t the tools. It’s making sure the replacement actually lets the unit breathe the way it’s designed to.
The cover is part of the machine
Treat the cover like decoration and you’ll misjudge the whole job. It isn’t a shell hiding an ugly appliance. It’s the duct. Baseboard heaters, electric or hydronic, work by convection: cool air is pulled in through a low slot at the bottom, rises past a set of heated fins inside the enclosure, and exits through a slot or louvered opening near the top as warm air. The cover shapes that airflow. Take it off, crush it, or block one of those openings, and you haven’t just changed the look of the room. You’ve changed how the heater performs.
This is where it’s worth being clear about what’s actually inside that enclosure, because the two common types don’t behave the same way and don’t get worked on the same way. An electric baseboard heater is a resistance element sealed inside a metal enclosure, wired directly into your home’s electrical system at 120 or 240 volts and controlled by a line-voltage thermostat. A hydronic baseboard is different: it’s an emitter connected to a boiler loop, carrying hot water through a finned copper tube, with no direct electrical connection to speak of beyond a circulator pump elsewhere in the system. One of these is live wiring. The other is plumbing. Confusing the two before you touch anything is how people get hurt or waste money on the wrong part.
There’s a third wrinkle worth knowing before you go shopping: some units marketed as “hydronic baseboard heaters” are actually electric appliances filled with a heat-transfer fluid, sealed at the factory, with no boiler connection at all. The name is misleading. If you’re not sure which you have, check for a wall thermostat wired directly to the unit (electric) versus supply and return pipes running into it from a boiler (true hydronic). Getting this straight matters before you order a cover or touch a screw.
A cover with a bent panel or a rust hole doesn’t just look bad. If the crushed metal is pinching the bottom intake or the top outlet closed, the heater is running with restricted airflow, which means it’s working harder to push out less warm air, and heat is building up inside the enclosure instead of moving into the room. That’s the case for fixing it sooner rather than later, and it’s also why “I’ll just leave the cover off” is worse than it sounds. An open enclosure exposes the fins and, on an electric unit, the wiring behind them.
Repair, replace or re-cover
Once you’ve confirmed which type of heater you’re dealing with, the decision usually comes down to four realistic paths. None of them require replacing the heating element itself unless that element is actually damaged, which a bent or rusted cover rarely indicates on its own.
| Option | What it involves | What it needs to fit | What it doesn’t fix |
|---|---|---|---|
| Straighten the dent | Working the metal back into shape with a rubber mallet or by hand, from outside and inside the panel | Nothing extra; uses the existing cover | Rust, weakened metal, or gaps that let air leak out where it shouldn’t |
| Replace the front cover only | Removing the front panel (often clipped or slotted onto the back plate) and fitting a new one of matching profile | Same height, depth and mounting style as the original; back plate and end caps stay in place | Damage to the back plate, end caps, or the fins themselves |
| Replace the full enclosure | Removing back plate, end caps and front cover as a set and installing a new enclosure over the existing element or hydronic tube | Length, height and depth matched to the space and to the heating element or tube it will house | A damaged heating element or a leaking hydronic tube, which is a separate repair |
| Fit a purpose-made replacement cover | Buying a cover manufactured specifically to slide over an existing baseboard heater without disturbing the element or tubing | Exact height and depth of the original enclosure; length can usually be trimmed | Any underlying wiring, thermostat, or plumbing issue |
Covers are made to specific height and depth profiles, and they aren’t universal the way a light switch cover plate is. A cover that’s a half-inch too shallow won’t seat over the fins properly; one that’s too tall will crowd whatever furniture sits near it and may interfere with the damper. Before you order anything, measuring is the whole job: height from the floor, depth from the wall, and length of the run. Skip that step and you’ll be returning a part that looked right in a photo but doesn’t sit flush in your room.
For rust specifically, check whether it’s surface rust on the cover alone or whether moisture has reached the back plate or the fins. Surface rust on a cover is a cosmetic replacement. Rust on the fins or back plate, especially on a hydronic unit, can point to a slow leak that needs attention before a new cover goes anywhere near it.
Fitting it
Once the right replacement is in hand, matched to the type of heater and the measurements taken beforehand, the installation itself follows a short sequence. Skipping steps here is how a new cover ends up looking fine while quietly choking the airflow it’s supposed to channel.
- Cut power to the circuit at the breaker if it’s an electric baseboard heater, or let the unit cool down if it’s hydronic. Don’t work on a warm enclosure either way; the fins are sharp and the metal can still be hot enough to burn.
- Measure height, depth and length at both ends of the run and again at the middle. Baseboard runs aren’t always perfectly straight or level, and a cover that fits at one end can bind at the other.
- Note how the existing cover attaches, whether it clips onto tabs, slides into end caps, or is held with screws, so the replacement goes on the same way and stays secure.
- Once the new cover is in place, open the damper fully and confirm it swings clear without catching on the new metal. This is the step most people skip, and it matters more than any other part of the job.
- Check that nothing, including the cover itself, is pressing against the fins inside. Even light contact can create a rattle or, worse, a hot spot against the metal.
That damper check deserves its own emphasis. The damper is the flap that controls how much heat escapes through the top outlet, and if a new cover is even slightly misaligned, it can jam the damper partly or fully shut without anyone noticing until the room stops warming up the way it used to. A heater with a stuck damper isn’t broken. It’s just been quietly turned into a weaker version of itself, and the fix is usually nothing more than loosening the cover and reseating it a fraction of an inch.
The cabinet that people build over it
This is the part of the job that has nothing to do with the cover itself and everything to do with what goes around it afterward. It’s common to box a baseboard heater in with a wood surround, run a shelf directly above it, or push a sofa, bed frame or curtain right up against the front. Each of those choices interferes with the same mechanism described earlier: cool air in at the bottom, warm air out at the top.
Boxing in the bottom slot cuts off the intake, so the unit has less cool air to draw across the fins. Building a shelf or cabinet top over the unit blocks the outlet, so the warm air it does generate has nowhere to go except back down into the enclosure. Do both at once, which is exactly what a snug built-in cabinet does, and you’ve trapped heat against whatever material is doing the enclosing, whether that’s painted wood, drywall, or fabric from a nearby curtain or bedspread.
This brief won’t hand you a clearance number in inches, and that’s not an oversight. There’s no single distance that applies across every baseboard heater on the market, because output, enclosure design and airflow needs vary by model. The number that actually applies is printed on the appliance’s own label or spelled out in its installation manual, and that’s the one to follow. If you’ve lost the manual, the label riveted or stamped onto the end cap or back plate of the unit usually carries the same clearance information. Building furniture, shelving or curtains around a baseboard heater without checking that figure first is the single most common way people end up with a unit that runs constantly, heats unevenly, or leaves scorch marks on nearby wood.
Common questions
Can I use a cover from one baseboard heater brand on a heater made by a different manufacturer?
Sometimes, if the height, depth and mounting style match closely enough, but there’s no universal standard guaranteeing a fit. Measuring the original enclosure before ordering matters more than matching brand names.
Is a rusted cover on a hydronic baseboard heater a sign of a leak?
It can be. Surface rust confined to the outside of the cover is usually just moisture exposure, but rust that’s spread to the back plate or the fins is worth investigating, since a slow leak in the tubing can be the real cause.
Do I need an electrician to replace just the cover on an electric baseboard heater?
Not if the cover is a purely mechanical part that clips or screws onto the enclosure without touching wiring. If removing the cover exposes the thermostat wiring or the element itself needs handling, that’s a different job and calls for someone qualified to work on line-voltage circuits.
What happens if I just leave a damaged cover off entirely?
The heater will keep running, but the exposed fins become a burn and cut hazard, and on electric units the internal wiring is left uncovered. It also changes the airflow pattern the enclosure was designed to create, which can affect how evenly the room heats.