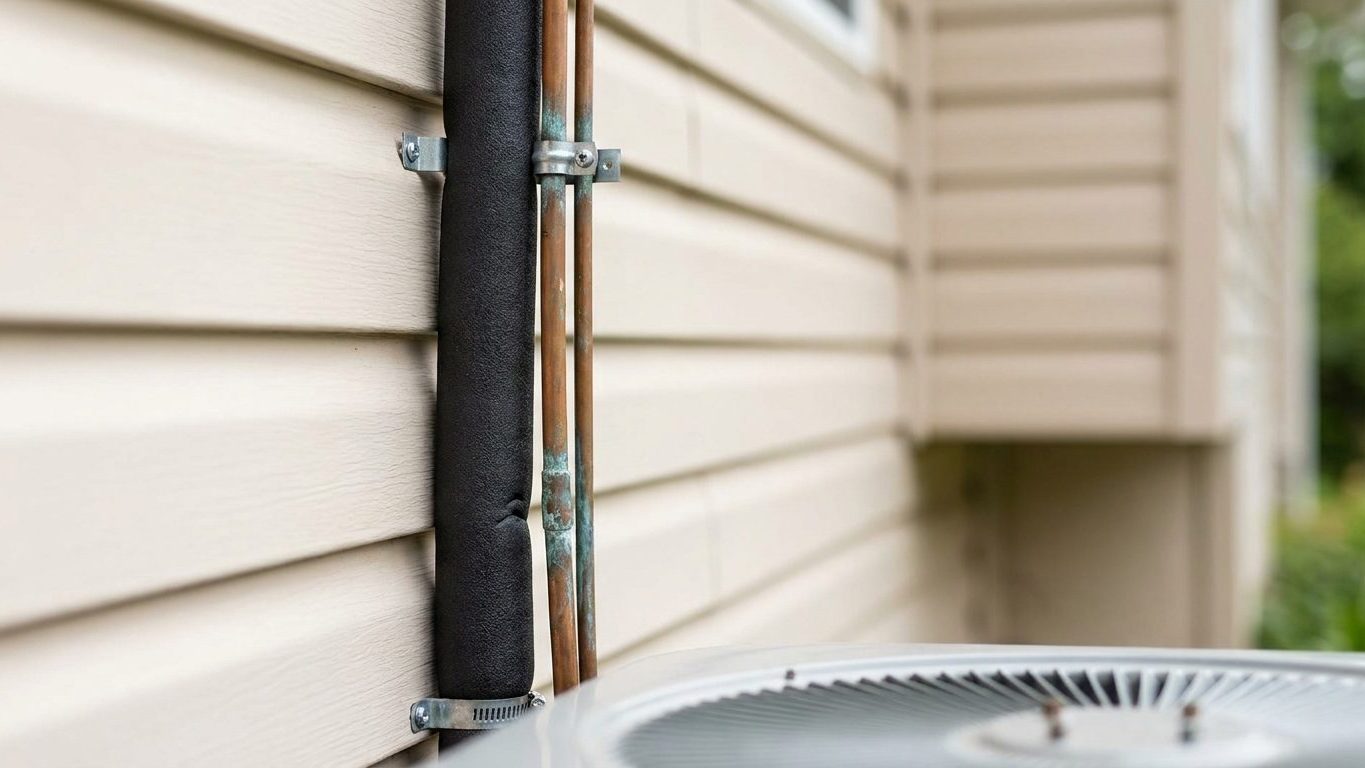

The larger of the two copper lines between the Outdoor Unit and the indoor coil wears a foam sleeve; the smaller one runs bare. That’s not an oversight. The insulated line carries cold gas back to the compressor and needs the wrapping to stay cold without sweating; the bare line carries warm liquid outward and doesn’t need it. If your line set looks like that, it’s working as designed.
Two lines, doing opposite jobs
Step outside and look at the pair of copper tubes running from the outdoor condenser to the indoor coil. One is noticeably fatter and wrapped in black or gray foam. The other is thinner and left completely bare, often just polished copper or slightly dulled with age. These two lines aren’t doing the same job, and that difference explains the insulation.
The larger, insulated line is the suction line. It carries cold refrigerant gas from the indoor coil back to the outdoor compressor. Because that gas is cold, and often colder than the surrounding air, the copper itself would chill down to match. Bare cold copper sitting in warm, humid air does exactly what a glass of ice water does on a summer porch: it sweats. Left uncovered, that line would drip condensation along its entire run, and the gas inside would pick up unwanted heat before it ever reached the compressor.
The smaller line is the liquid line. It carries warm, high-pressure liquid refrigerant out to the indoor coil, where it will do the actual work of cooling your air. Since it’s already close to ambient temperature, or warmer, there’s no sweating problem to solve. Wrapping it in foam would add nothing useful and would just be more material to degrade in the weather.
Why this matters for a quick visual check
Anyone can use this to sanity-check their own system in under a minute. Find the fatter line. It should be insulated along its visible length, from where it exits The Outdoor Unit to where it disappears into the wall. If that insulation is missing, torn, or slid down to expose bare copper, that’s the detail worth addressing, not the bare liquid line sitting right next to it. Confusing the two is the most common mistake homeowners make when they first start paying attention to their line set.
What the weather does to it
Foam lagging isn’t built to last forever outdoors, and most homeowners never think to check it. Sunlight breaks down the foam’s surface over years of exposure, making it brittle. Once it’s brittle, it splits along old seams, slides down the tube under its own weight, or simply falls away in chunks. Squirrels, birds, and insects treat exposed foam as nesting material or a chew toy, which speeds up the damage considerably.
Once a section of that cold suction line loses its cover, it starts sweating again, just like it would without any insulation at all. That moisture runs down the tubing, drips onto siding or a foundation wall, and can eventually stain brick or feed mildew in a shaded spot. Meanwhile, the line itself is picking up ambient heat it wasn’t designed to absorb, which means the gas reaching the compressor is warmer than it should be. The system isn’t broken, but it’s working against itself along every foot of exposed tubing.
A spring walk-around, step by step
This doesn’t require tools or technical knowledge, just a few minutes of looking closely once the weather warms up each year.
- Walk the entire visible run of the line set, from the outdoor unit to the wall, checking for foam that’s cracked, missing, or slumped to one side.
- Look specifically at the spot where the lines enter the house. This is where insulation tends to bunch up or get pulled loose during past repairs.
- Check the sealant around that wall penetration for cracking or gaps, since it’s doing double duty Protecting both the line and the wall itself.
- Confirm nothing is leaning against the lines, resting on top of them, or forcing them into a tight bend, since a load like that can crimp the tubing over time.
None of this is dramatic, but small losses add up the same way they do inside the ductwork. The U.S. ENERGY STAR program puts it plainly: “Airflow problems can reduce your system’s efficiency by up to 15 percent.” That figure is usually cited about duct leaks and dirty filters, but the principle applies just as well outside. A system fighting heat gain along a bare line set is losing capacity before the air even reaches your rooms.
The hole it goes through
The line set has to get from the outdoor unit into the house somehow, and that means it passes straight through your building envelope, usually through a hole drilled in siding, brick, or a foundation wall. That hole is a detail with consequences that have nothing to do with cooling capacity. An unsealed penetration is a direct air leak, a path for rainwater to track inward along the tubing, and an open invitation for ants, wasps, and mice looking for a way in.
A properly finished penetration looks tidy and deliberate. The hole should be sized just large enough for the lines and any wrapping around them, not left gaping. A weatherproof sealant, or in some cases a dedicated escutcheon plate, should close the gap around the tubing completely, with no visible daylight or airflow when you hold a hand near it on a windy day. Inside, if the penetration passes through conditioned space before reaching the coil, that same gap should be sealed on the interior side too.
If what you find instead is a rough hole with crumbling old caulk, a gap you can see light through, or foam that’s been chewed away by something with teeth, it’s worth addressing before it becomes a bigger problem. Fresh exterior-grade sealant applied around the tubing, after clearing away old cracked material, solves most of these situations without any specialized skill. For homeowners who want to understand how this single hole fits into the bigger picture of home air sealing and insulation, the broader guides elsewhere on this site cover envelope sealing and insulation performance in more depth.
What is not yours
Everything up to this point, the foam lagging, the clips holding the lines to the wall, the sealant at the penetration, is reasonable homeowner territory. What’s inside those copper lines is not. The line set and the components it connects to form a sealed, pressurized system, and it’s built that way on purpose.
The service valves at the outdoor unit are not something to loosen or adjust on a hunch. Flare nuts and fittings are not something to tighten “just to stop a leak” you think you’re hearing or seeing. And if a system seems to be running weaker than it used to, the honest explanation isn’t that it needs more refrigerant the way a car needs more oil. Refrigerant is not a consumable that gets used up in normal operation. A system that’s low on charge has a leak somewhere, and that leak needs to be found and fixed, not covered over by adding more.
It’s also worth remembering that components near the outdoor unit, including the run capacitor, can hold a charge even after the power is switched off. That’s a fact worth knowing and then leaving alone, not a project for a weekend.
None of that changes what you actually can do. Keeping the lagging intact and taped where seams show, keeping the mounting clips snug so the lines aren’t vibrating against the wall or ground, keeping the wall penetration sealed against weather and pests, and keeping the run clear of stored items, mulch, or overgrown shrubs that could bend the tubing: all of that is squarely in your hands. It’s ordinary upkeep, and it’s the difference between a line set that quietly does its job for years and one that starts causing small problems nobody traces back to a torn strip of foam.
Common questions
Is it normal for only one of the two copper lines to have insulation?
Yes. The larger line carries cold refrigerant gas and needs the foam covering to prevent sweating and heat gain. The smaller line carries warm liquid refrigerant and doesn’t need it, so it’s normally left bare.
What happens if the insulation on the cold line is missing for a while?
The exposed copper will sweat in humid weather, dripping condensation along the wall or foundation below it, and the line will pick up ambient heat that reduces how much cooling capacity reaches the indoor coil.
Can I just wrap the line set myself with foam from a hardware store?
Replacing damaged or missing lagging on the outside of the tubing is a reasonable task for a homeowner. Just make sure the replacement goes on the correct line, the larger suction line, and covers the full exposed run.
My system seems weaker than before. Should I add refrigerant myself?
No. Refrigerant isn’t consumed during normal operation, so a system running low has a leak somewhere in the sealed circuit. That needs to be located and repaired, not masked by topping off the charge.